|
--- |
|
sidebar_position: 2 |
|
slug: /general_purpose_chatbot |
|
--- |
|
|
|
# Create a general-purpose chatbot |
|
|
|
Chatbot is one of the most common AI scenarios. However, effectively understanding user queries and responding appropriately remains a challenge. RAGFlow's general-purpose chatbot agent is our attempt to tackle this longstanding issue. |
|
|
|
This chatbot closely resembles the chatbot introduced in [Start an AI chat](../start_chat.md), but with a key difference - it introduces a reflective mechanism that allows it to improve the retrieval from the target knowledge bases by rewriting the user's query. |
|
|
|
This document provides guides on creating such a chatbot using our chatbot template. |
|
|
|
## Prerequisites |
|
|
|
1. Ensure you have properly set the LLM to use. See the guides on [Configure your API key](../llm_api_key_setup.md) or [Deploy a local LLM](../deploy_local_llm.mdx) for more information. |
|
2. Ensure you have a knowledge base configured and the corresponding files properly parsed. See the guide on [Configure a knowledge base](../configure_knowledge_base.md) for more information. |
|
3. Make sure you have read the [Introduction to Agentic RAG](./agent_introduction.md). |
|
|
|
## Create a chatbot agent from template |
|
|
|
To create a general-purpose chatbot agent using our template: |
|
|
|
1. Click the **Agent** tab in the middle top of the page to show the **Agent** page. |
|
2. Click **+ Create agent** on the top right of the page to show the **agent template** page. |
|
3. On the **agent template** page, hover over the card on **General-purpose chatbot** and click **Use this template**. |
|
*You are now directed to the **no-code workflow editor** page.* |
|
|
|
 |
|
|
|
:::tip NOTE |
|
RAGFlow's no-code editor spares you the trouble of coding, making agent development effortless. |
|
::: |
|
|
|
## Understand each component in the template |
|
|
|
Here’s a breakdown of each component and its role and requirements in the chatbot template: |
|
|
|
- **Begin** |
|
- Function: Sets the opening greeting for the user. |
|
- Purpose: Establishes a welcoming atmosphere and prepares the user for interaction. |
|
|
|
- **Interact** |
|
- Function: Serves as the interface between human and the bot. |
|
- Role: Acts as the downstream component of **Begin**. |
|
|
|
- **Retrieval** |
|
- Function: Retrieves information from specified knowledge base(s). |
|
- Requirement: Must have `knowledgebases` set up to function. |
|
|
|
- **Relevant** |
|
- Function: Assesses the relevance of the retrieved information from the **Retrieval** component to the user query. |
|
- Process: |
|
- If relevant, it directs the data to the **Generate** component for final response generation. |
|
- Otherwise, it triggers the **Rewrite** component to refine the user query and redo the retrival process. |
|
|
|
- **Generate** |
|
- Function: Prompts the LLM to generate responses based on the retrieved information. |
|
- Note: The prompt settings allow you to control the way in which the LLM generates responses. Be sure to review the prompts and make necessary changes. |
|
|
|
- **Rewrite**: |
|
- Function: Refines a user query when no relevant information from the knowledge base is retrieved. |
|
- Usage: Often used in conjunction with **Relevant** and **Retrieval** to create a reflective/feedback loop. |
|
|
|
## Configure your chatbot agent |
|
|
|
1. Click **Begin** to set an opening greeting: |
|
 |
|
|
|
2. Click **Retrieval** to select the right knowledge base(s) and make any necessary adjustments: |
|
 |
|
|
|
3. Click **Generate** to configure the LLM's summarization behavior: |
|
3.1. Confirm the model. |
|
3.2. Review the prompt settings. If there are variables, ensure they match the correct component IDs: |
|
 |
|
|
|
4. Click **Relevant** to review or change its settings: |
|
*You may retain the current settings, but feel free to experiment with changes to understand how the agent operates.* |
|
 |
|
|
|
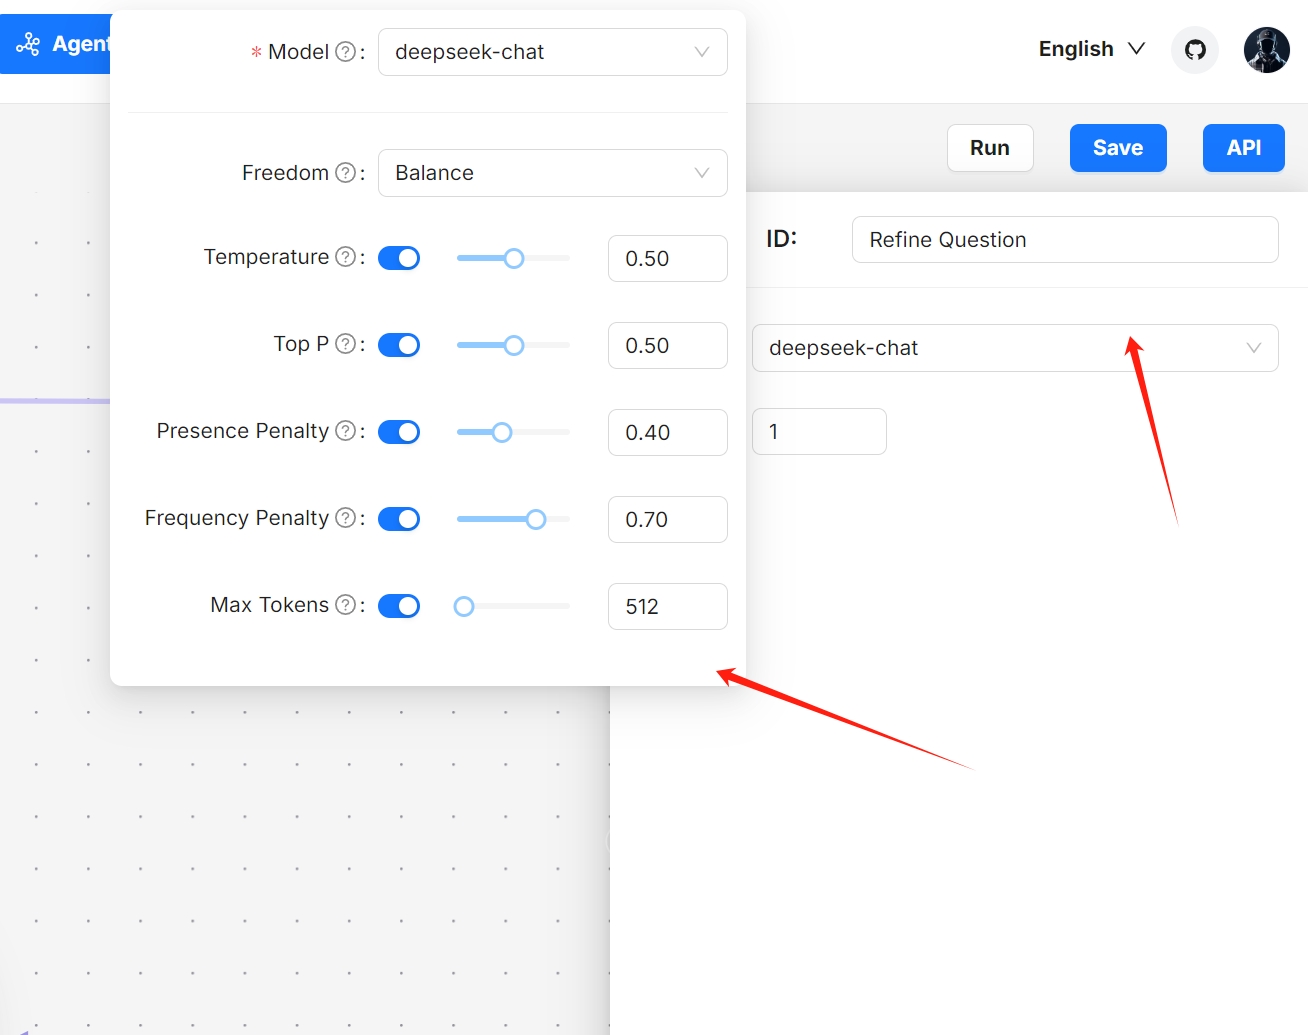
5. Click **Rewrite** to select a different model for query rewriting or update the maximum loop times for query rewriting: |
|
 |
|
 |
|
|
|
:::danger NOTE |
|
Increasing the maximum loop times may significantly extend the time required to receive the final response. |
|
::: |
|
|
|
1. Update your workflow where you see necessary. |
|
|
|
2. Click to **Save** to apply your changes. |
|
*Your agent appears as one of the agent cards on the **Agent** page.* |
|
|
|
## Test your chatbot agent |
|
|
|
1. Find your chatbot agent on the **Agent** page: |
|
 |
|
|
|
2. Experiment with your questions to verify if this chatbot functions as intended: |
|
 |
