
File size: 10,977 Bytes
ab854b9 |
1 2 3 4 5 6 7 8 9 10 11 12 13 14 15 16 17 18 19 20 21 22 23 24 25 26 27 28 29 30 31 32 33 34 35 36 37 38 39 40 41 42 43 44 45 46 47 48 49 50 51 52 53 54 55 56 57 58 59 60 61 62 63 64 65 66 67 68 69 70 71 72 73 74 75 76 77 78 79 80 81 82 83 84 85 86 87 88 89 90 91 92 93 94 95 96 97 98 99 100 101 102 103 104 105 106 107 108 109 110 111 112 113 114 115 116 117 118 119 120 121 122 123 124 125 126 127 128 129 130 131 132 133 134 135 136 137 138 139 140 141 142 143 144 145 146 147 148 149 150 151 152 153 154 155 156 157 158 159 160 161 162 163 164 165 166 167 168 169 170 |
---
comments: true
description: Learn how to manage Ultralytics HUB projects. Understand effective strategies to create, share, edit, delete, and compare models in an organized workspace.
keywords: Ultralytics, HUB projects, Create project, Edit project, Share project, Delete project, Compare Models, Model Management
---
# Ultralytics HUB Projects
Ultralytics HUB projects provide an effective solution for consolidating and managing your models. If you are working with several models that perform similar tasks or have related purposes, Ultralytics HUB projects allow you to group these models together.
This creates a unified and organized workspace that facilitates easier model management, comparison and development. Having similar models or various iterations together can facilitate rapid benchmarking, as you can compare their effectiveness. This can lead to faster, more insightful iterative development and refinement of your models.
## Create Project
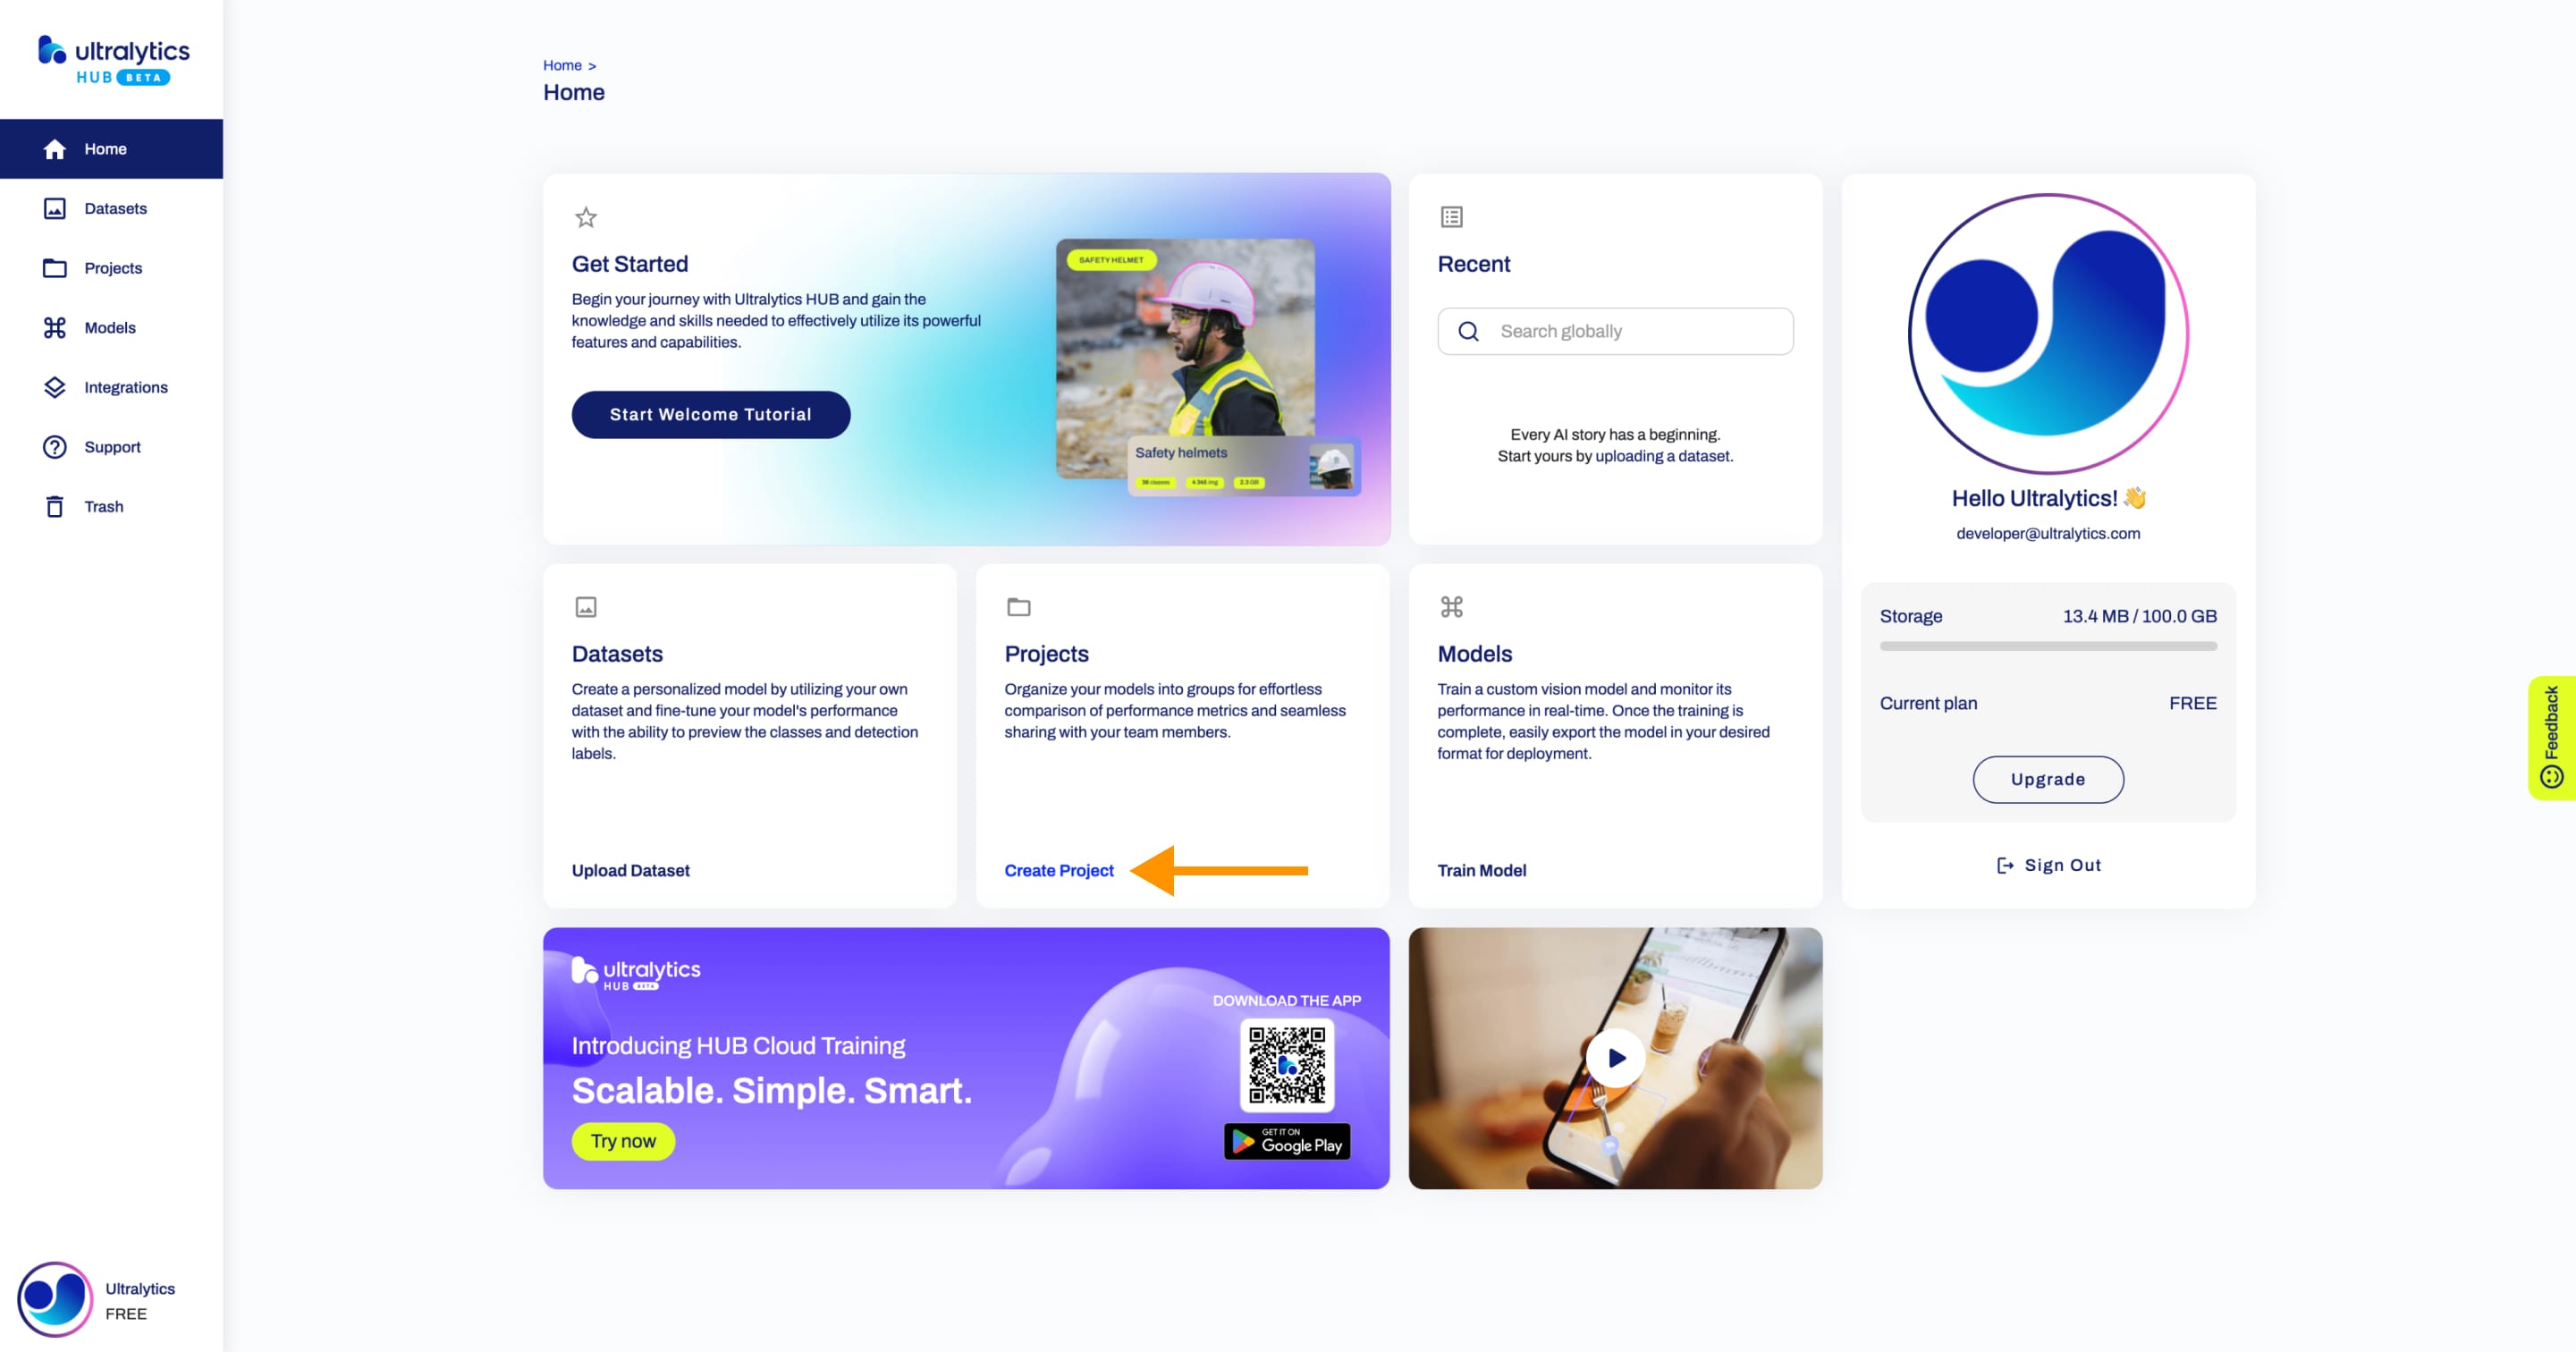
Navigate to the [Projects](https://hub.ultralytics.com/projects) page by clicking on the **Projects** button in the sidebar.
??? tip "Tip"
You can also create a project directly from the [Home](https://hub.ultralytics.com/home) page.
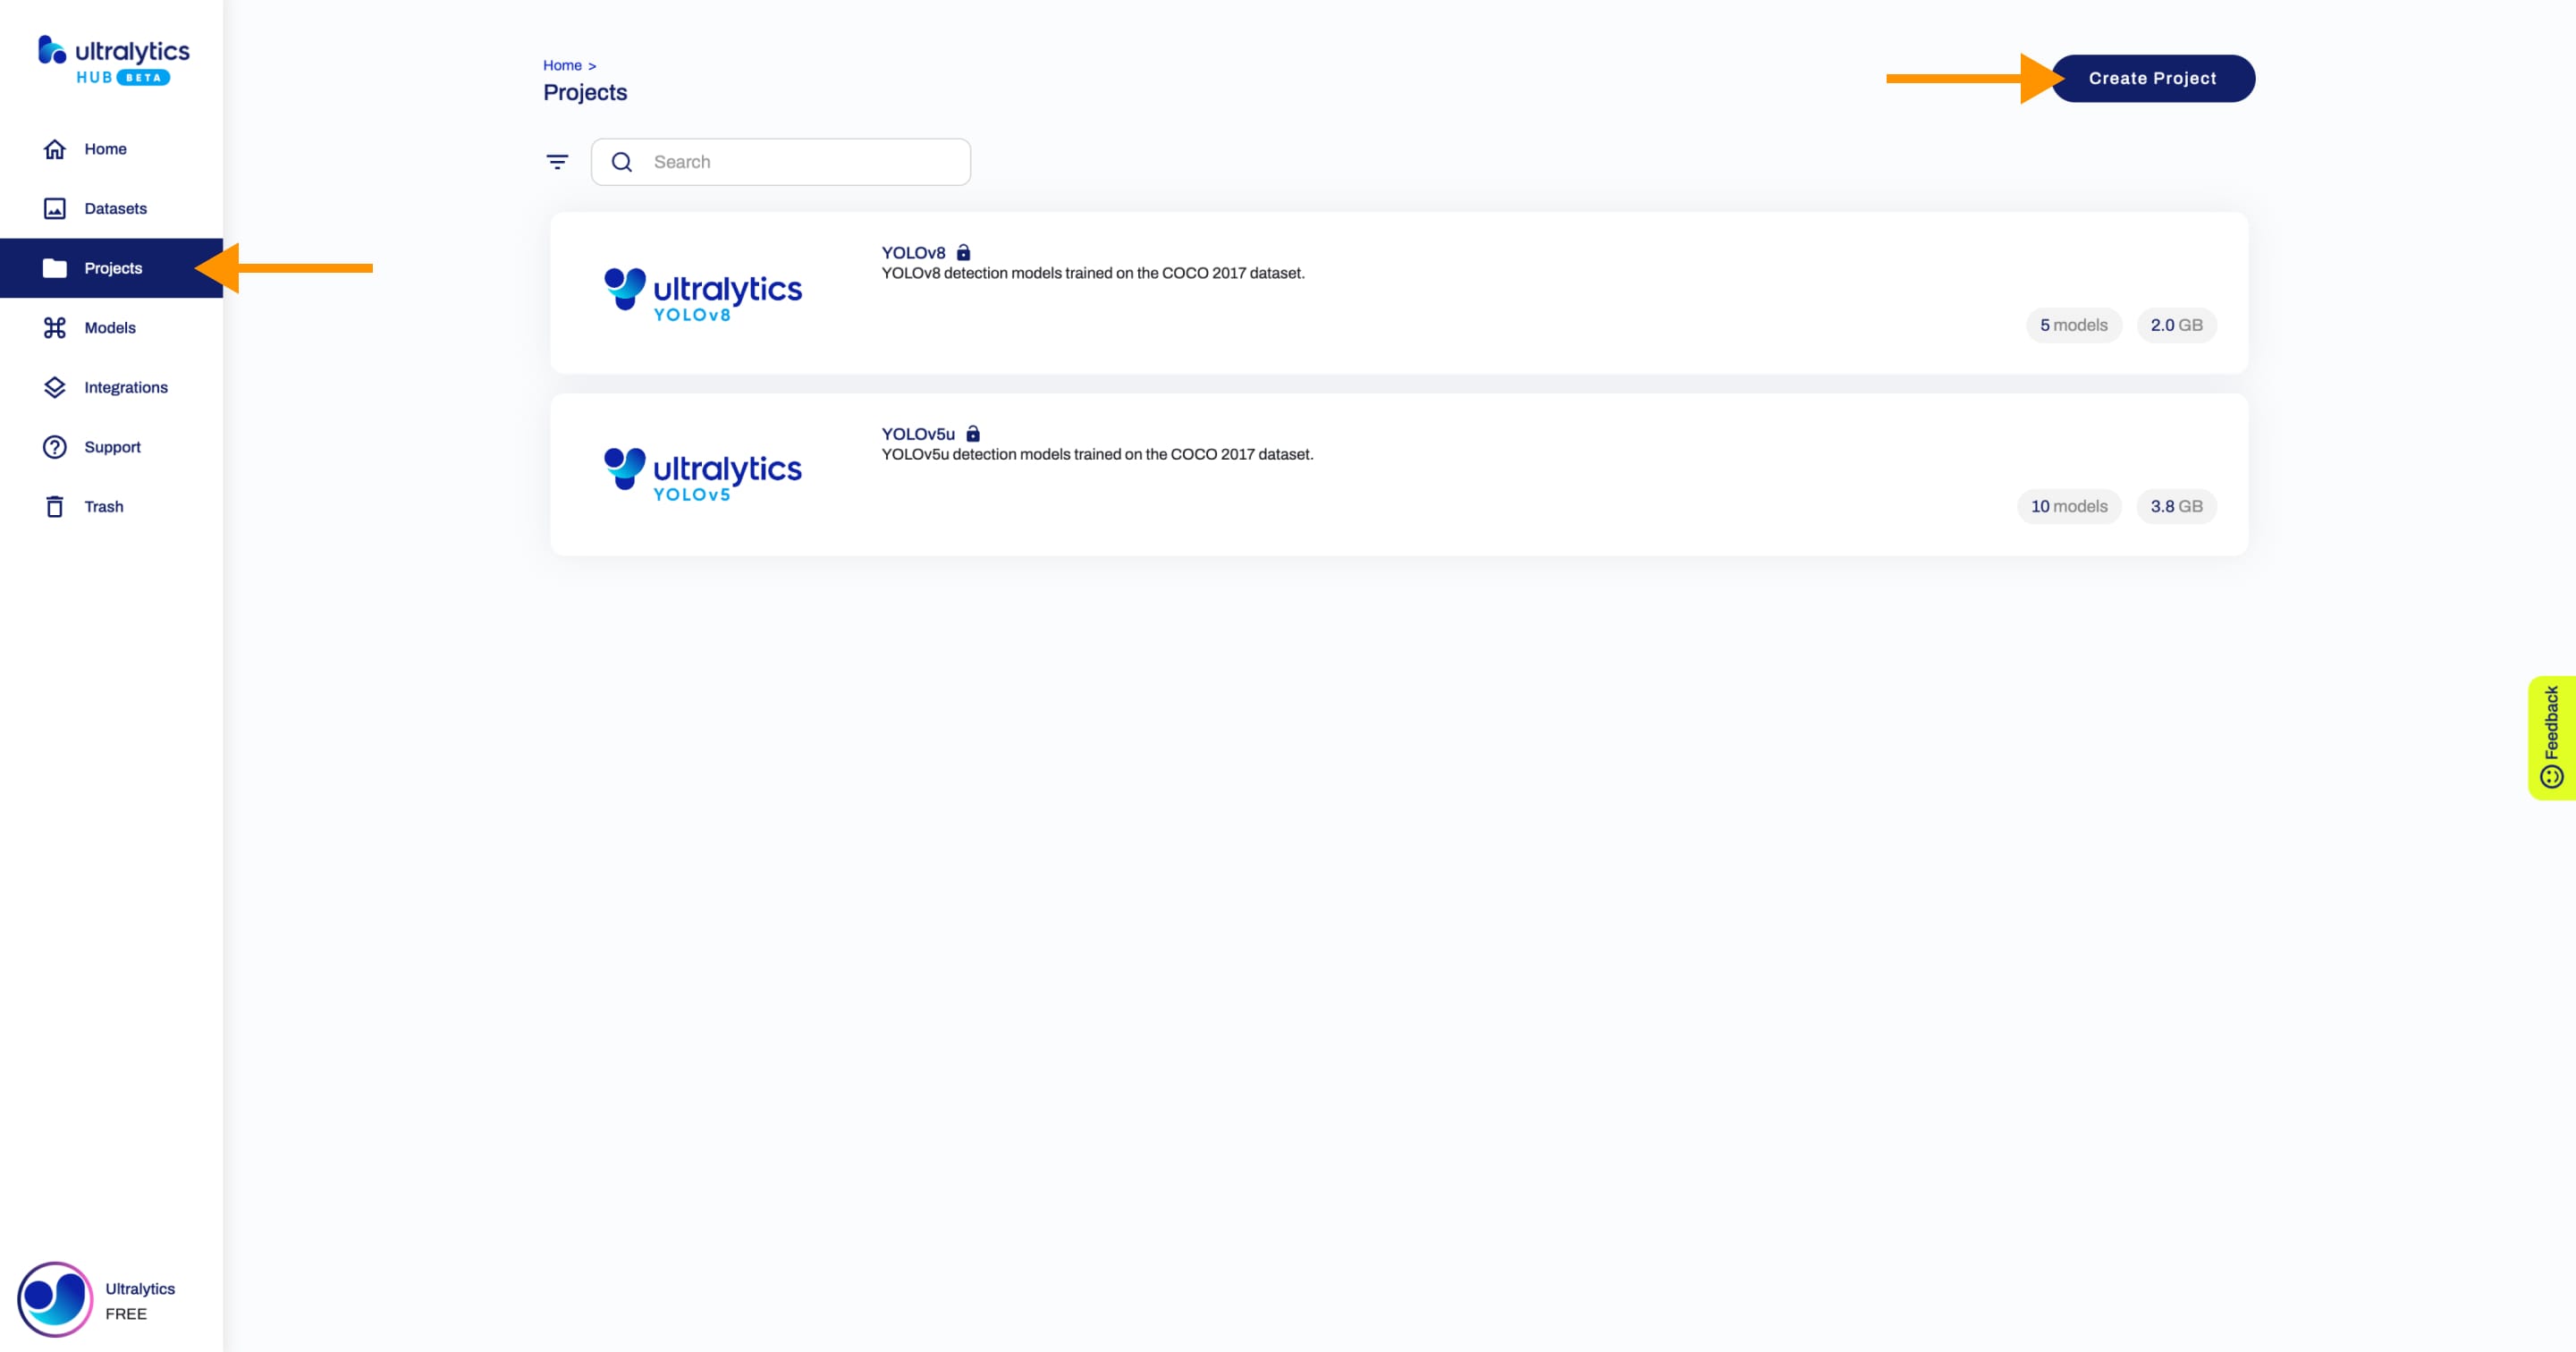
Click on the **Create Project** button on the top right of the page. This action will trigger the **Create Project** dialog, opening up a suite of options for tailoring your project to your needs.
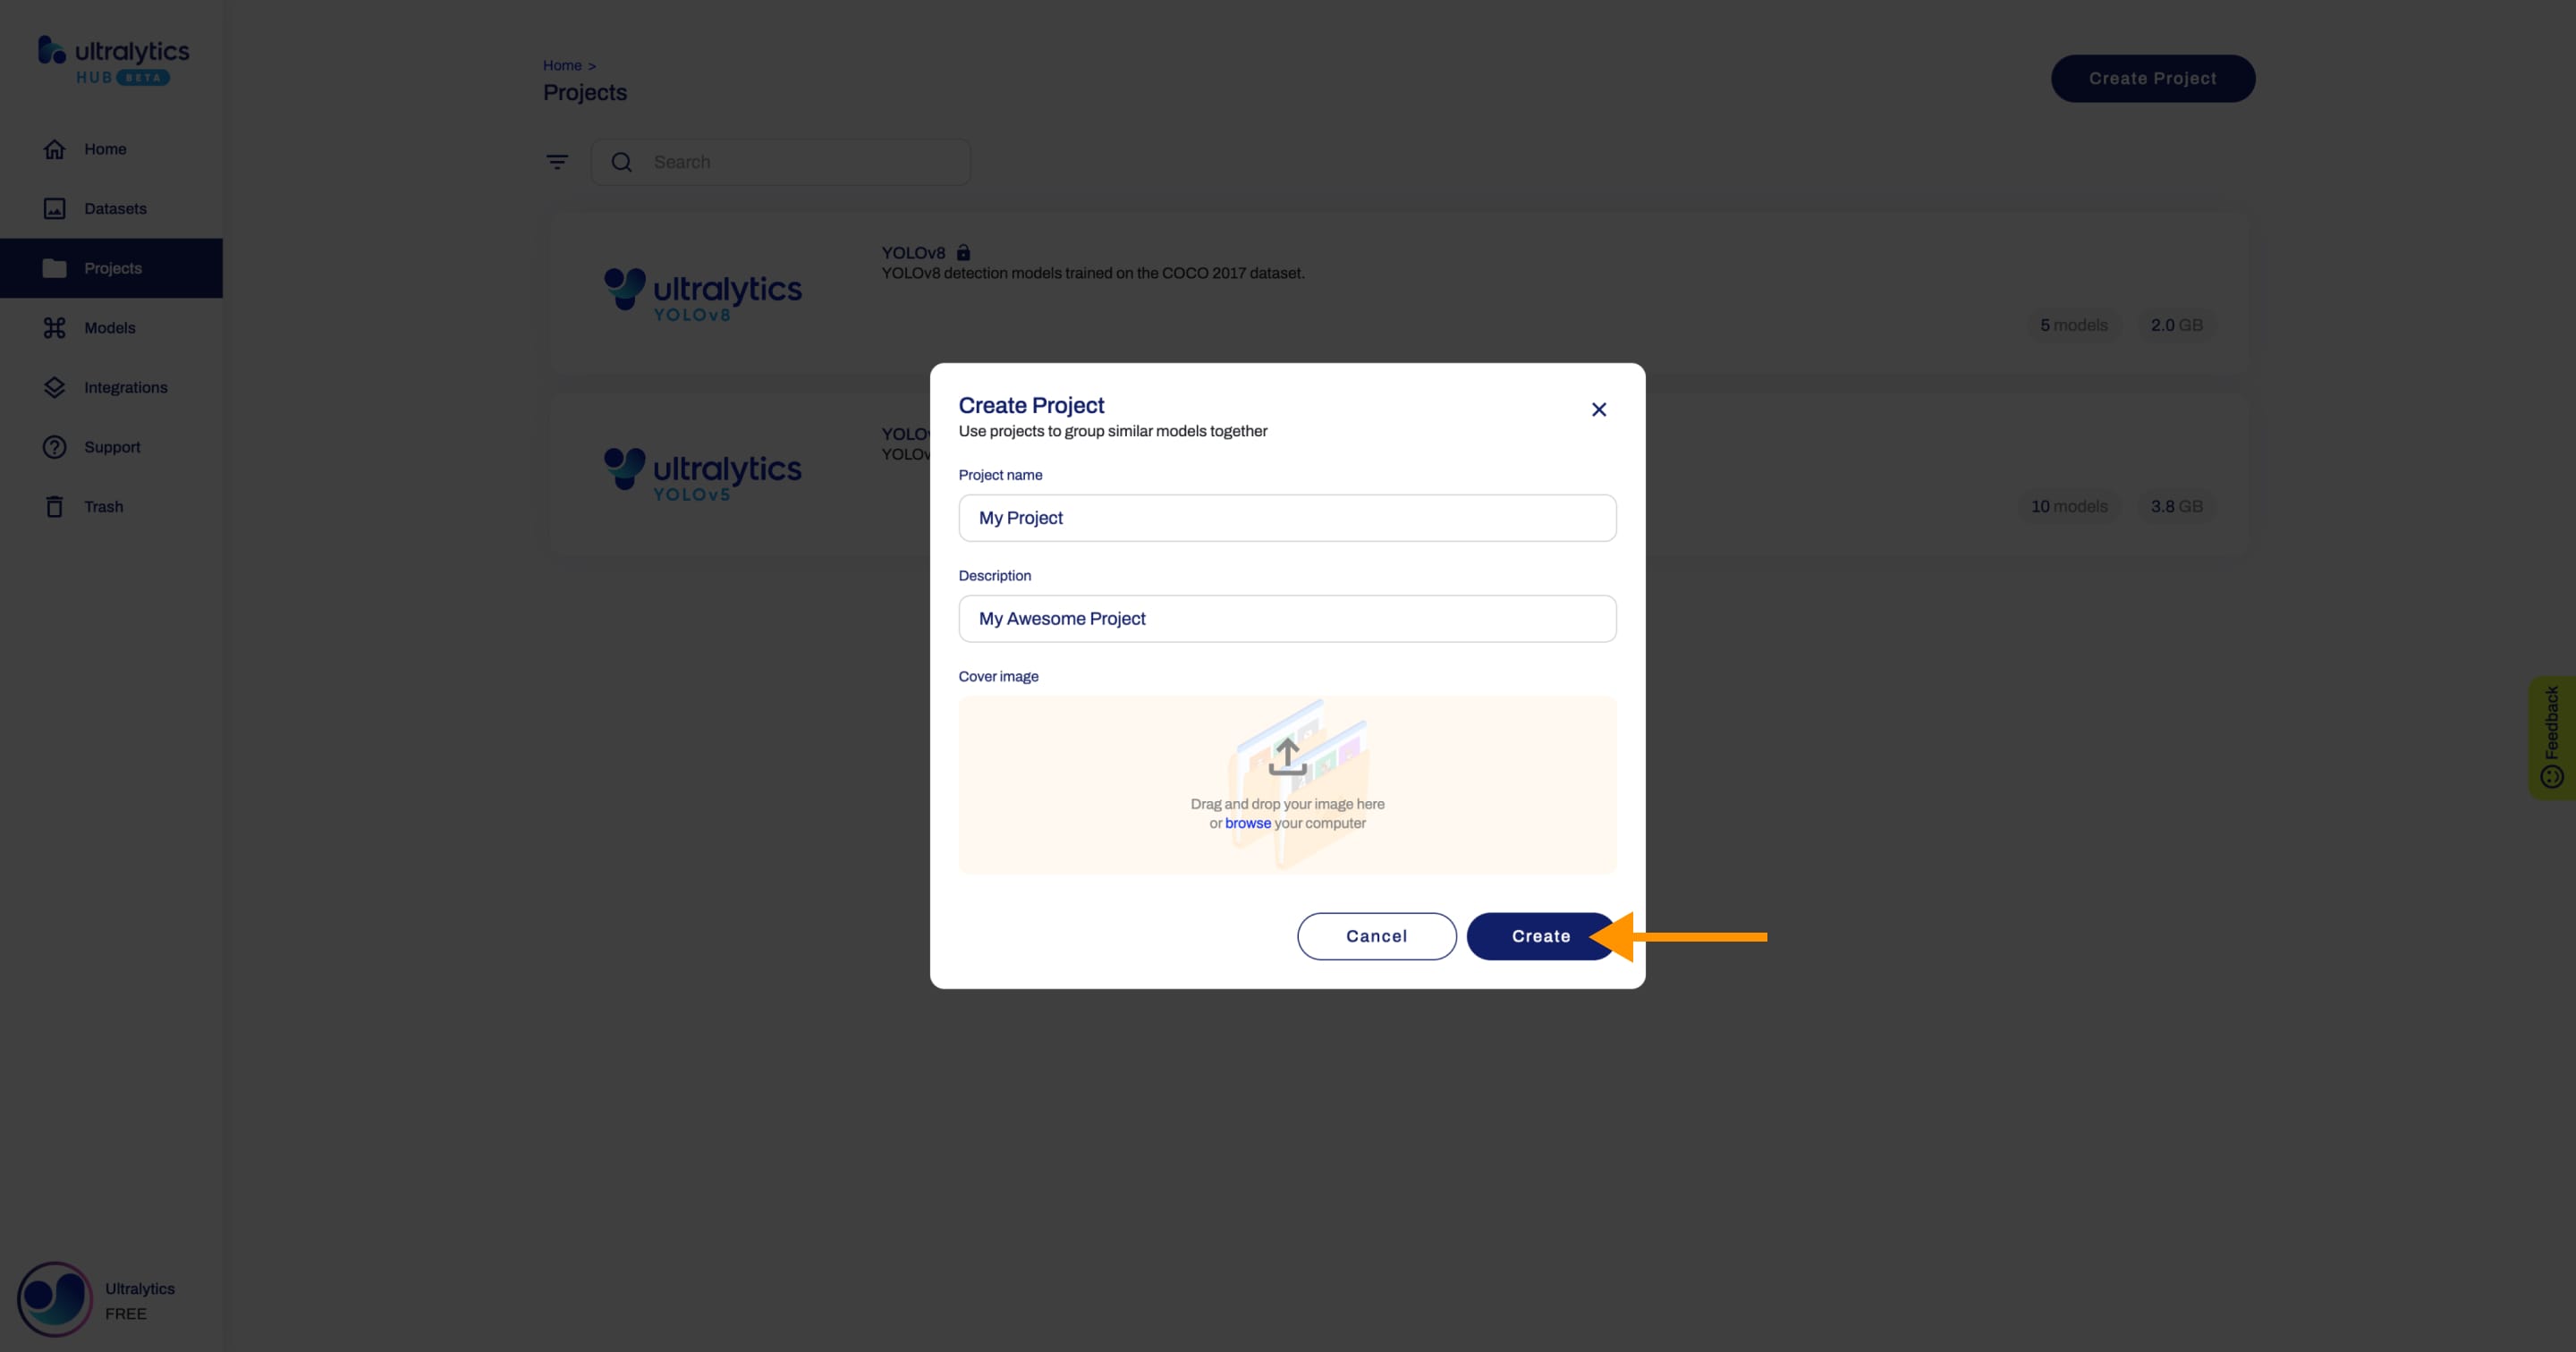
Type the name of your project in the _Project name_ field or keep the default name and finalize the project creation with a single click.
You have the additional option to enrich your project with a description and a unique image, enhancing its recognizability on the Projects page.
When you're happy with your project configuration, click **Create**.
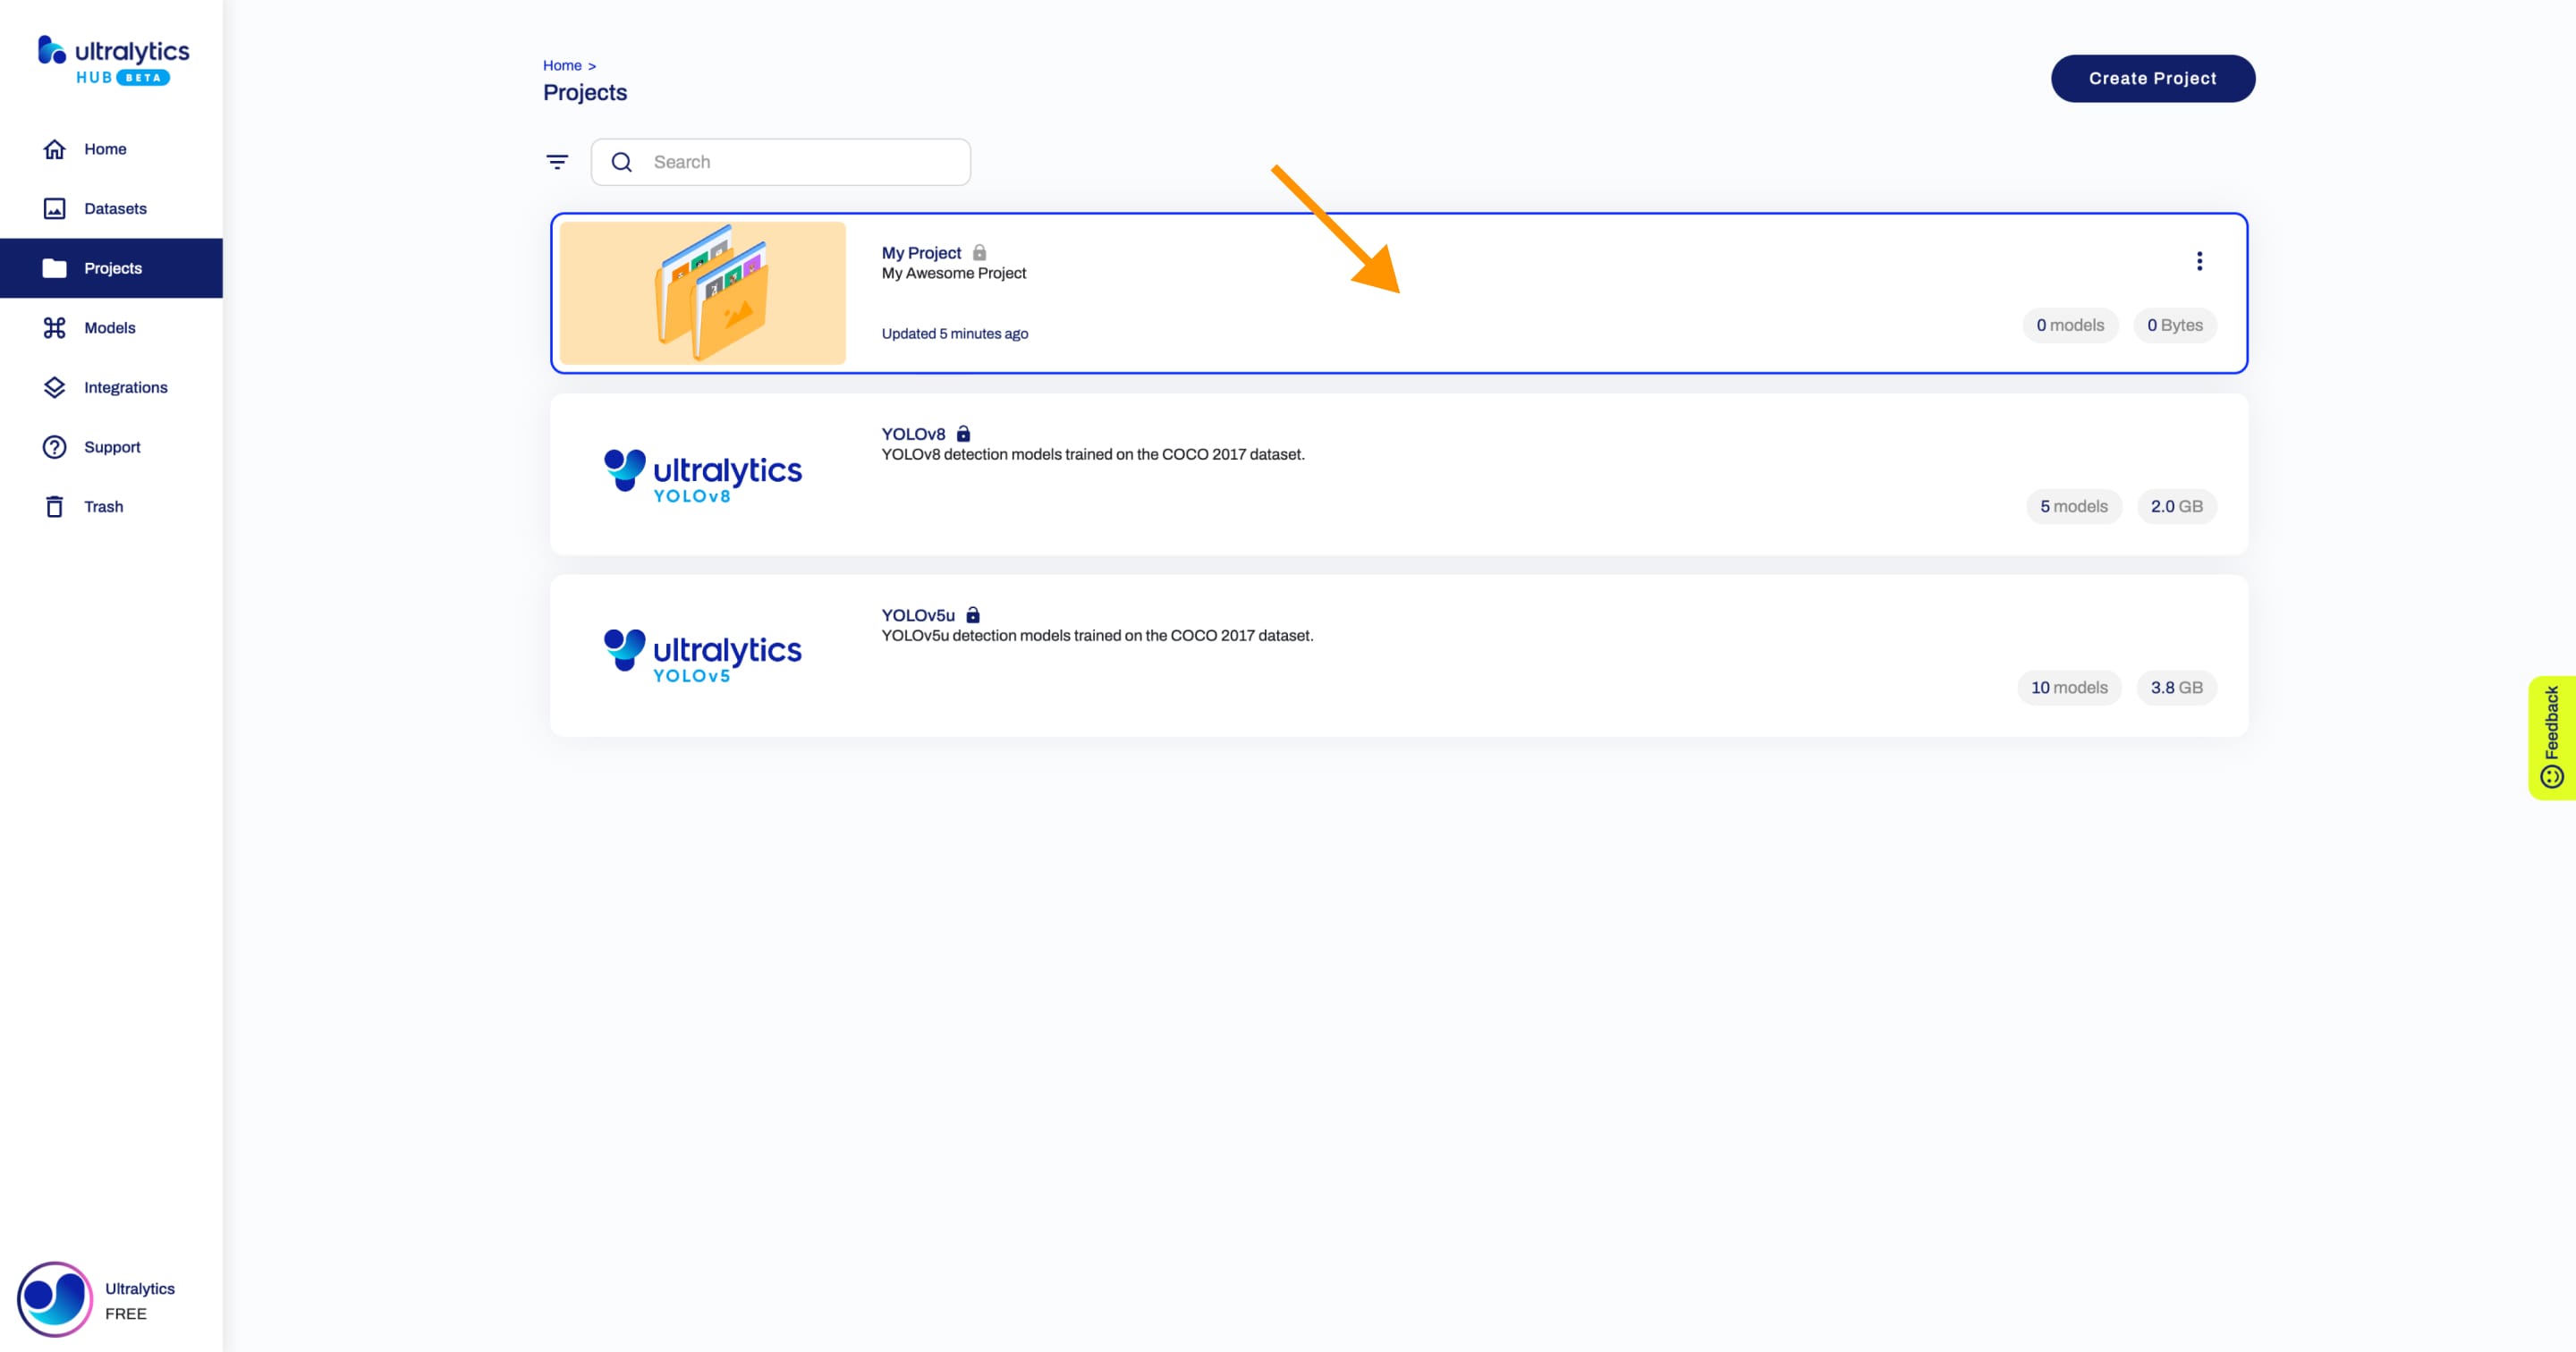
After your project is created, you will be able to access it from the Projects page.
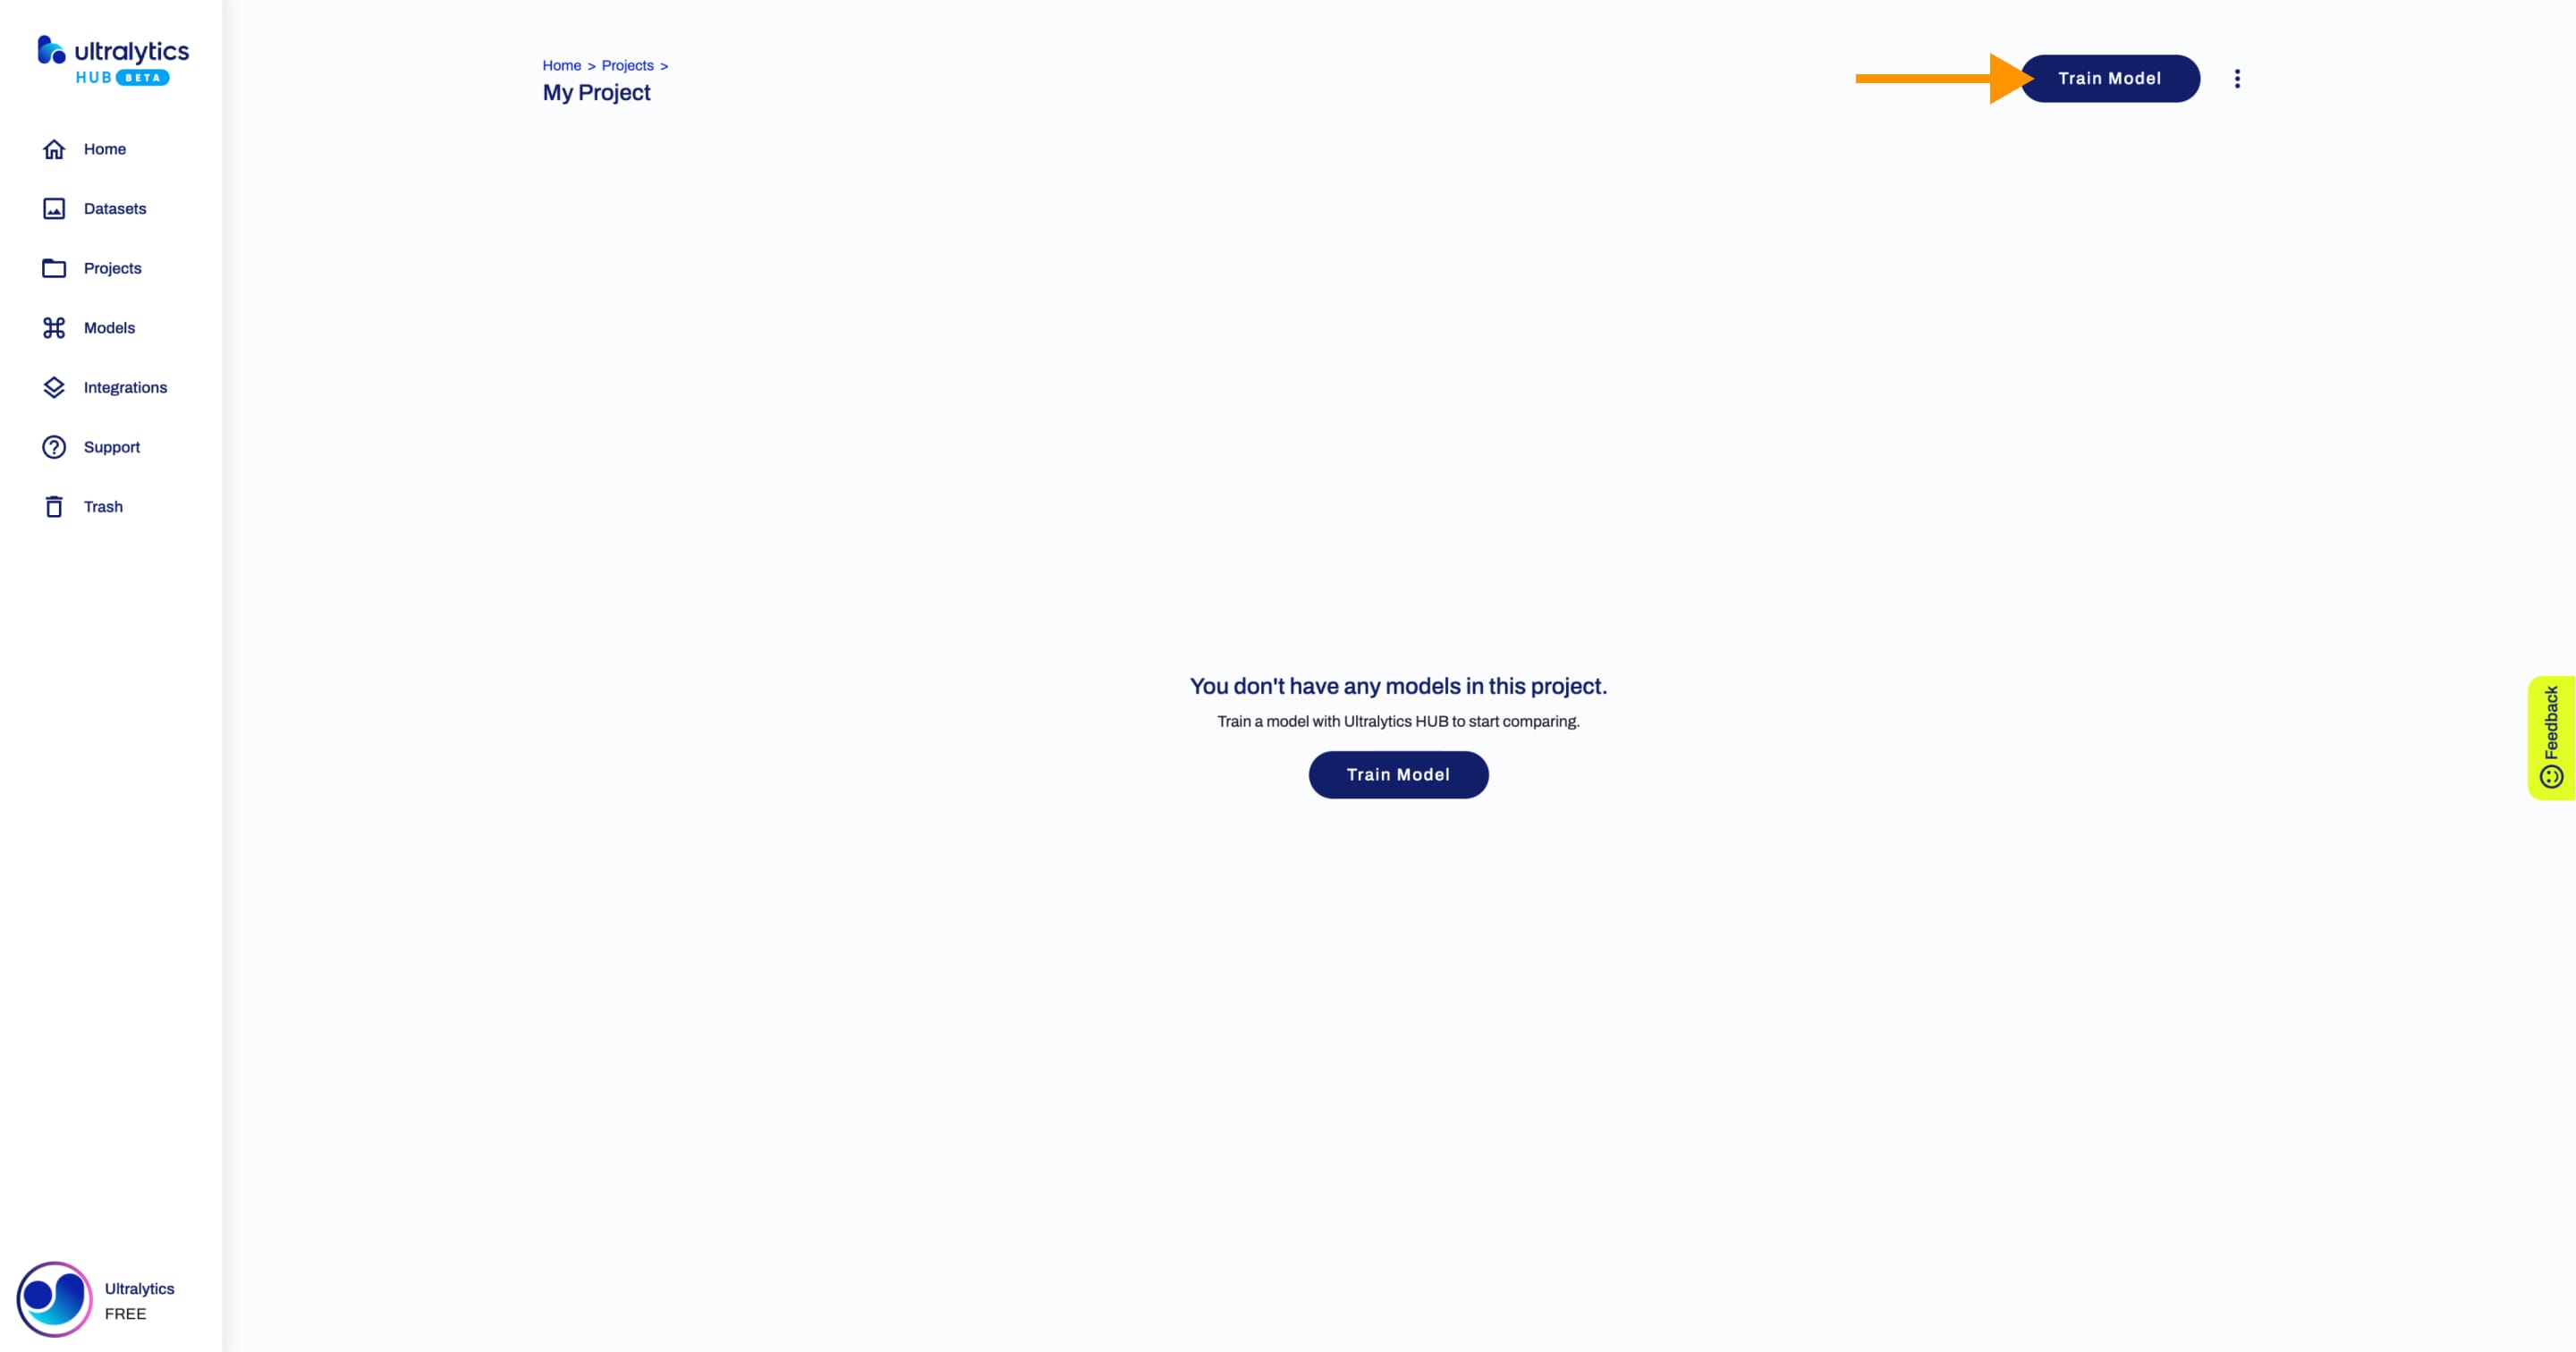
Next, [train a model](https://docs.ultralytics.com/hub/models/#train-model) inside your project.
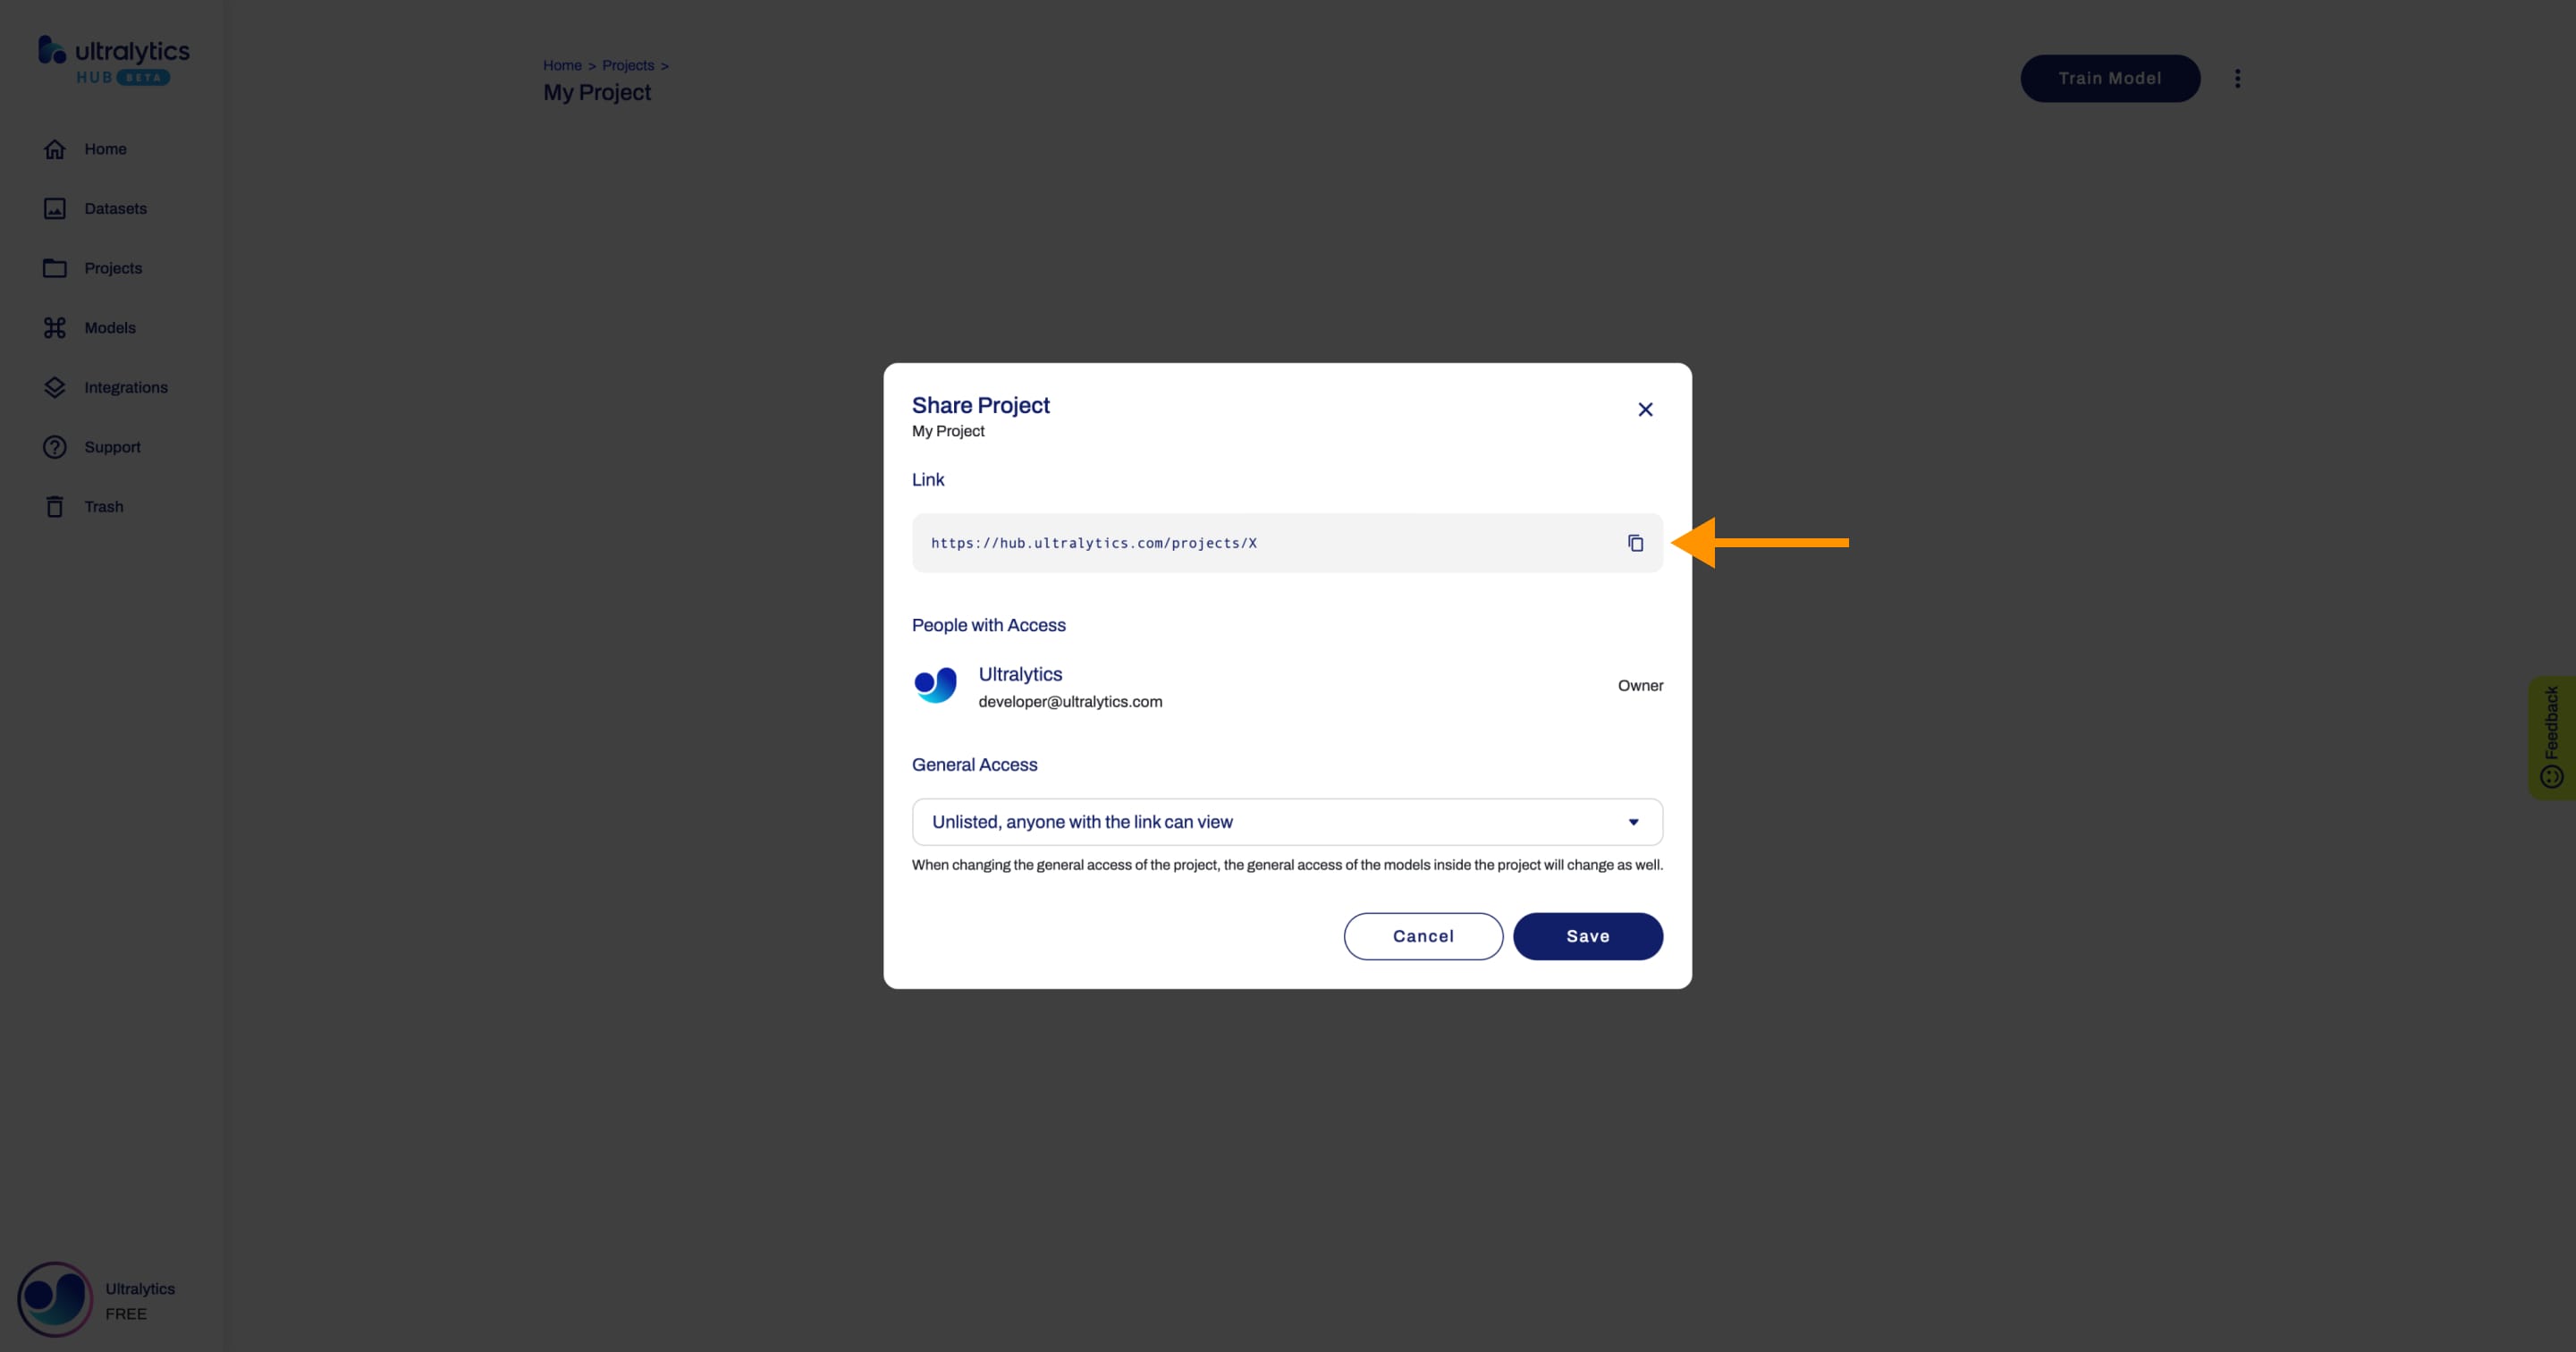
## Share Project
!!! info "Info"
Ultralytics HUB's sharing functionality provides a convenient way to share projects with others. This feature is designed to accommodate both existing Ultralytics HUB users and those who have yet to create an account.
??? note "Note"
You have control over the general access of your projects.
You can choose to set the general access to "Private", in which case, only you will have access to it. Alternatively, you can set the general access to "Unlisted" which grants viewing access to anyone who has the direct link to the project, regardless of whether they have an Ultralytics HUB account or not.
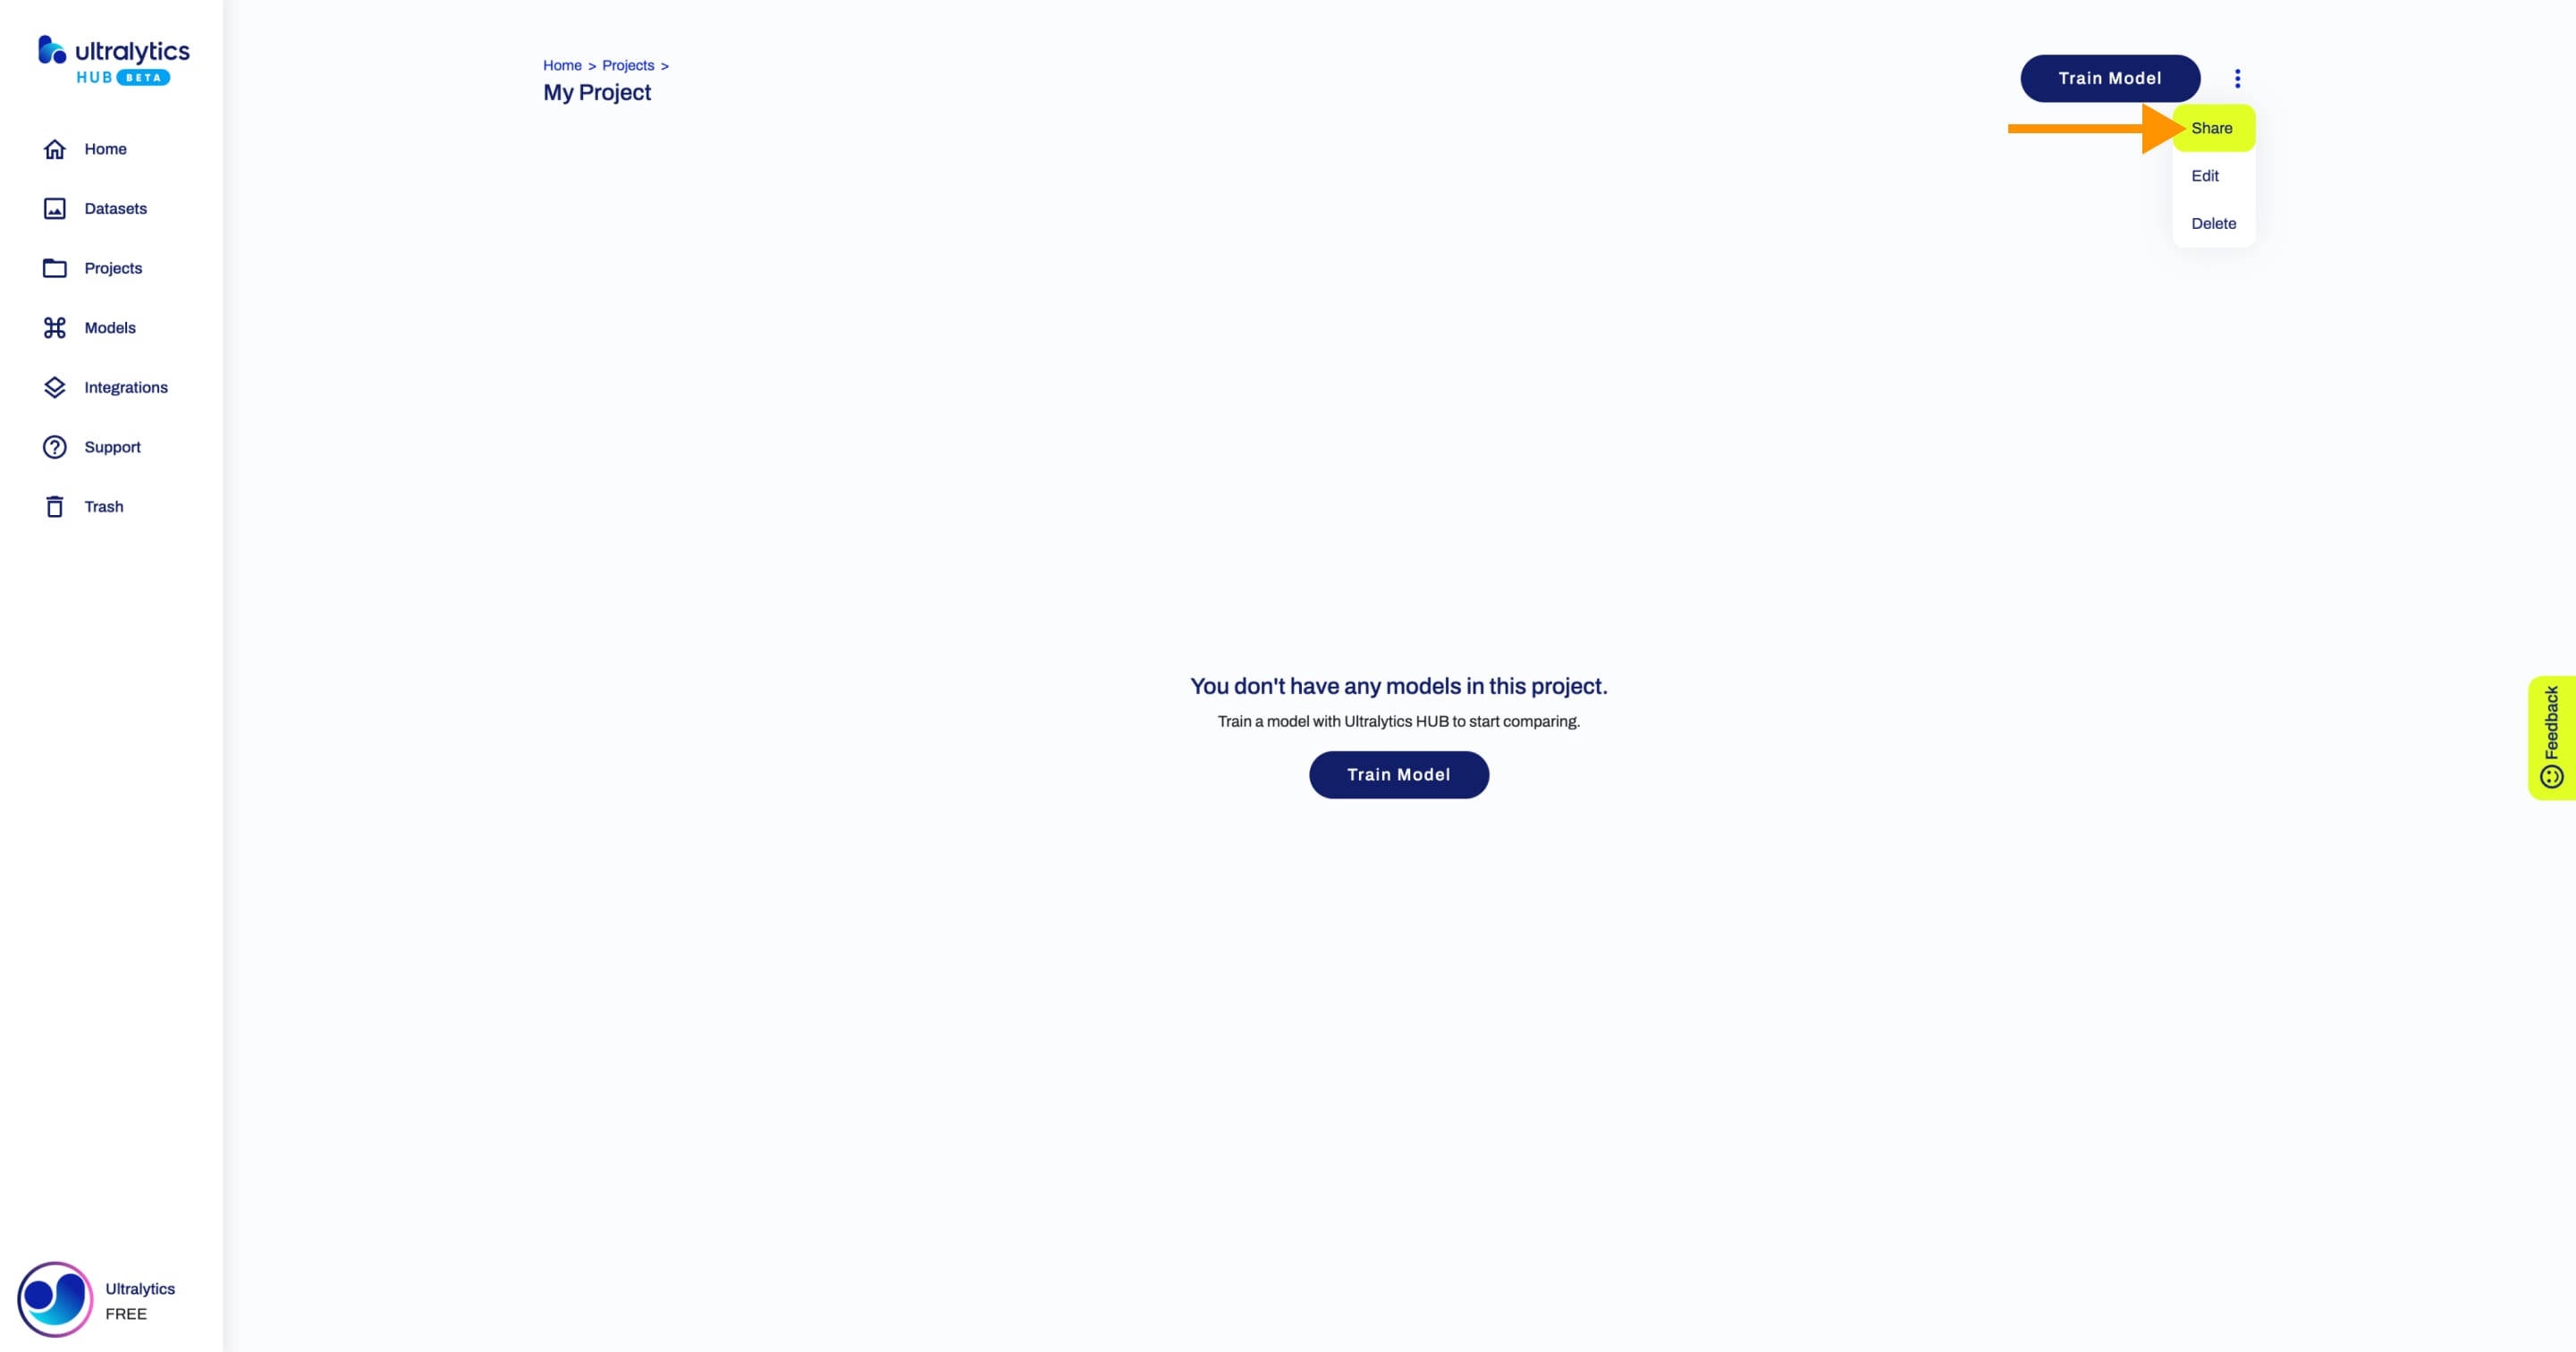
Navigate to the Project page of the project you want to share, open the project actions dropdown and click on the **Share** option. This action will trigger the **Share Project** dialog.
??? tip "Tip"
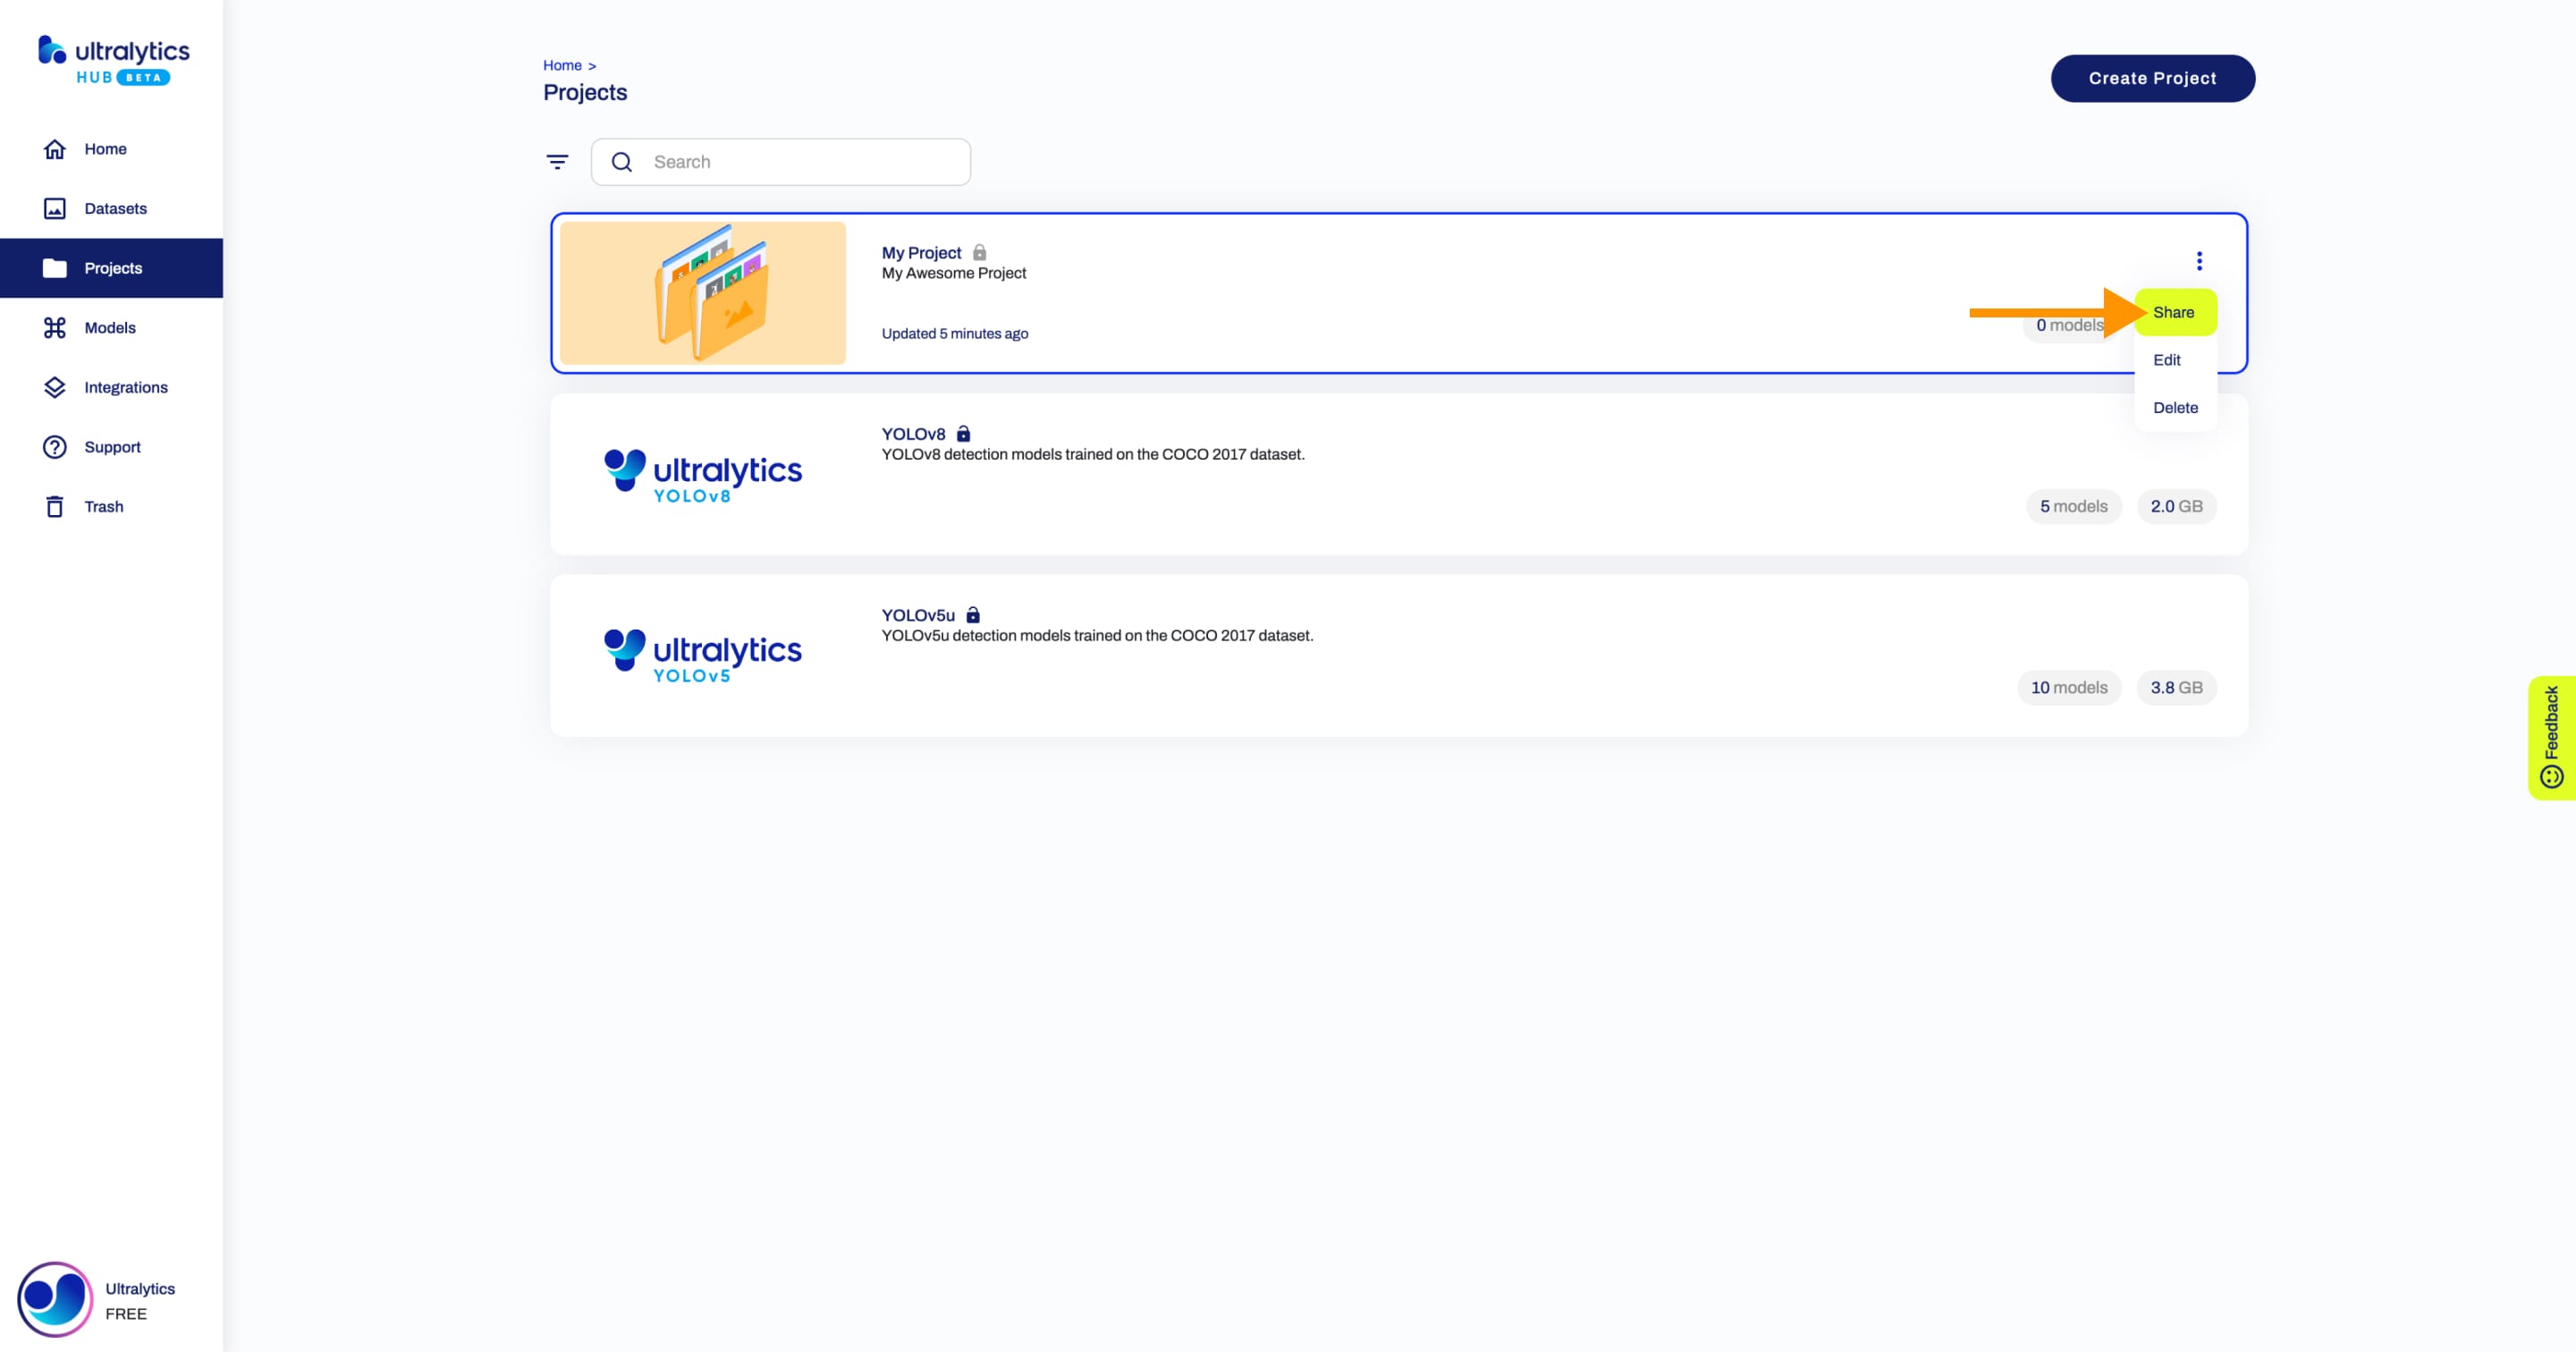
You can also share a project directly from the [Projects](https://hub.ultralytics.com/projects) page.
Set the general access to "Unlisted" and click **Save**.
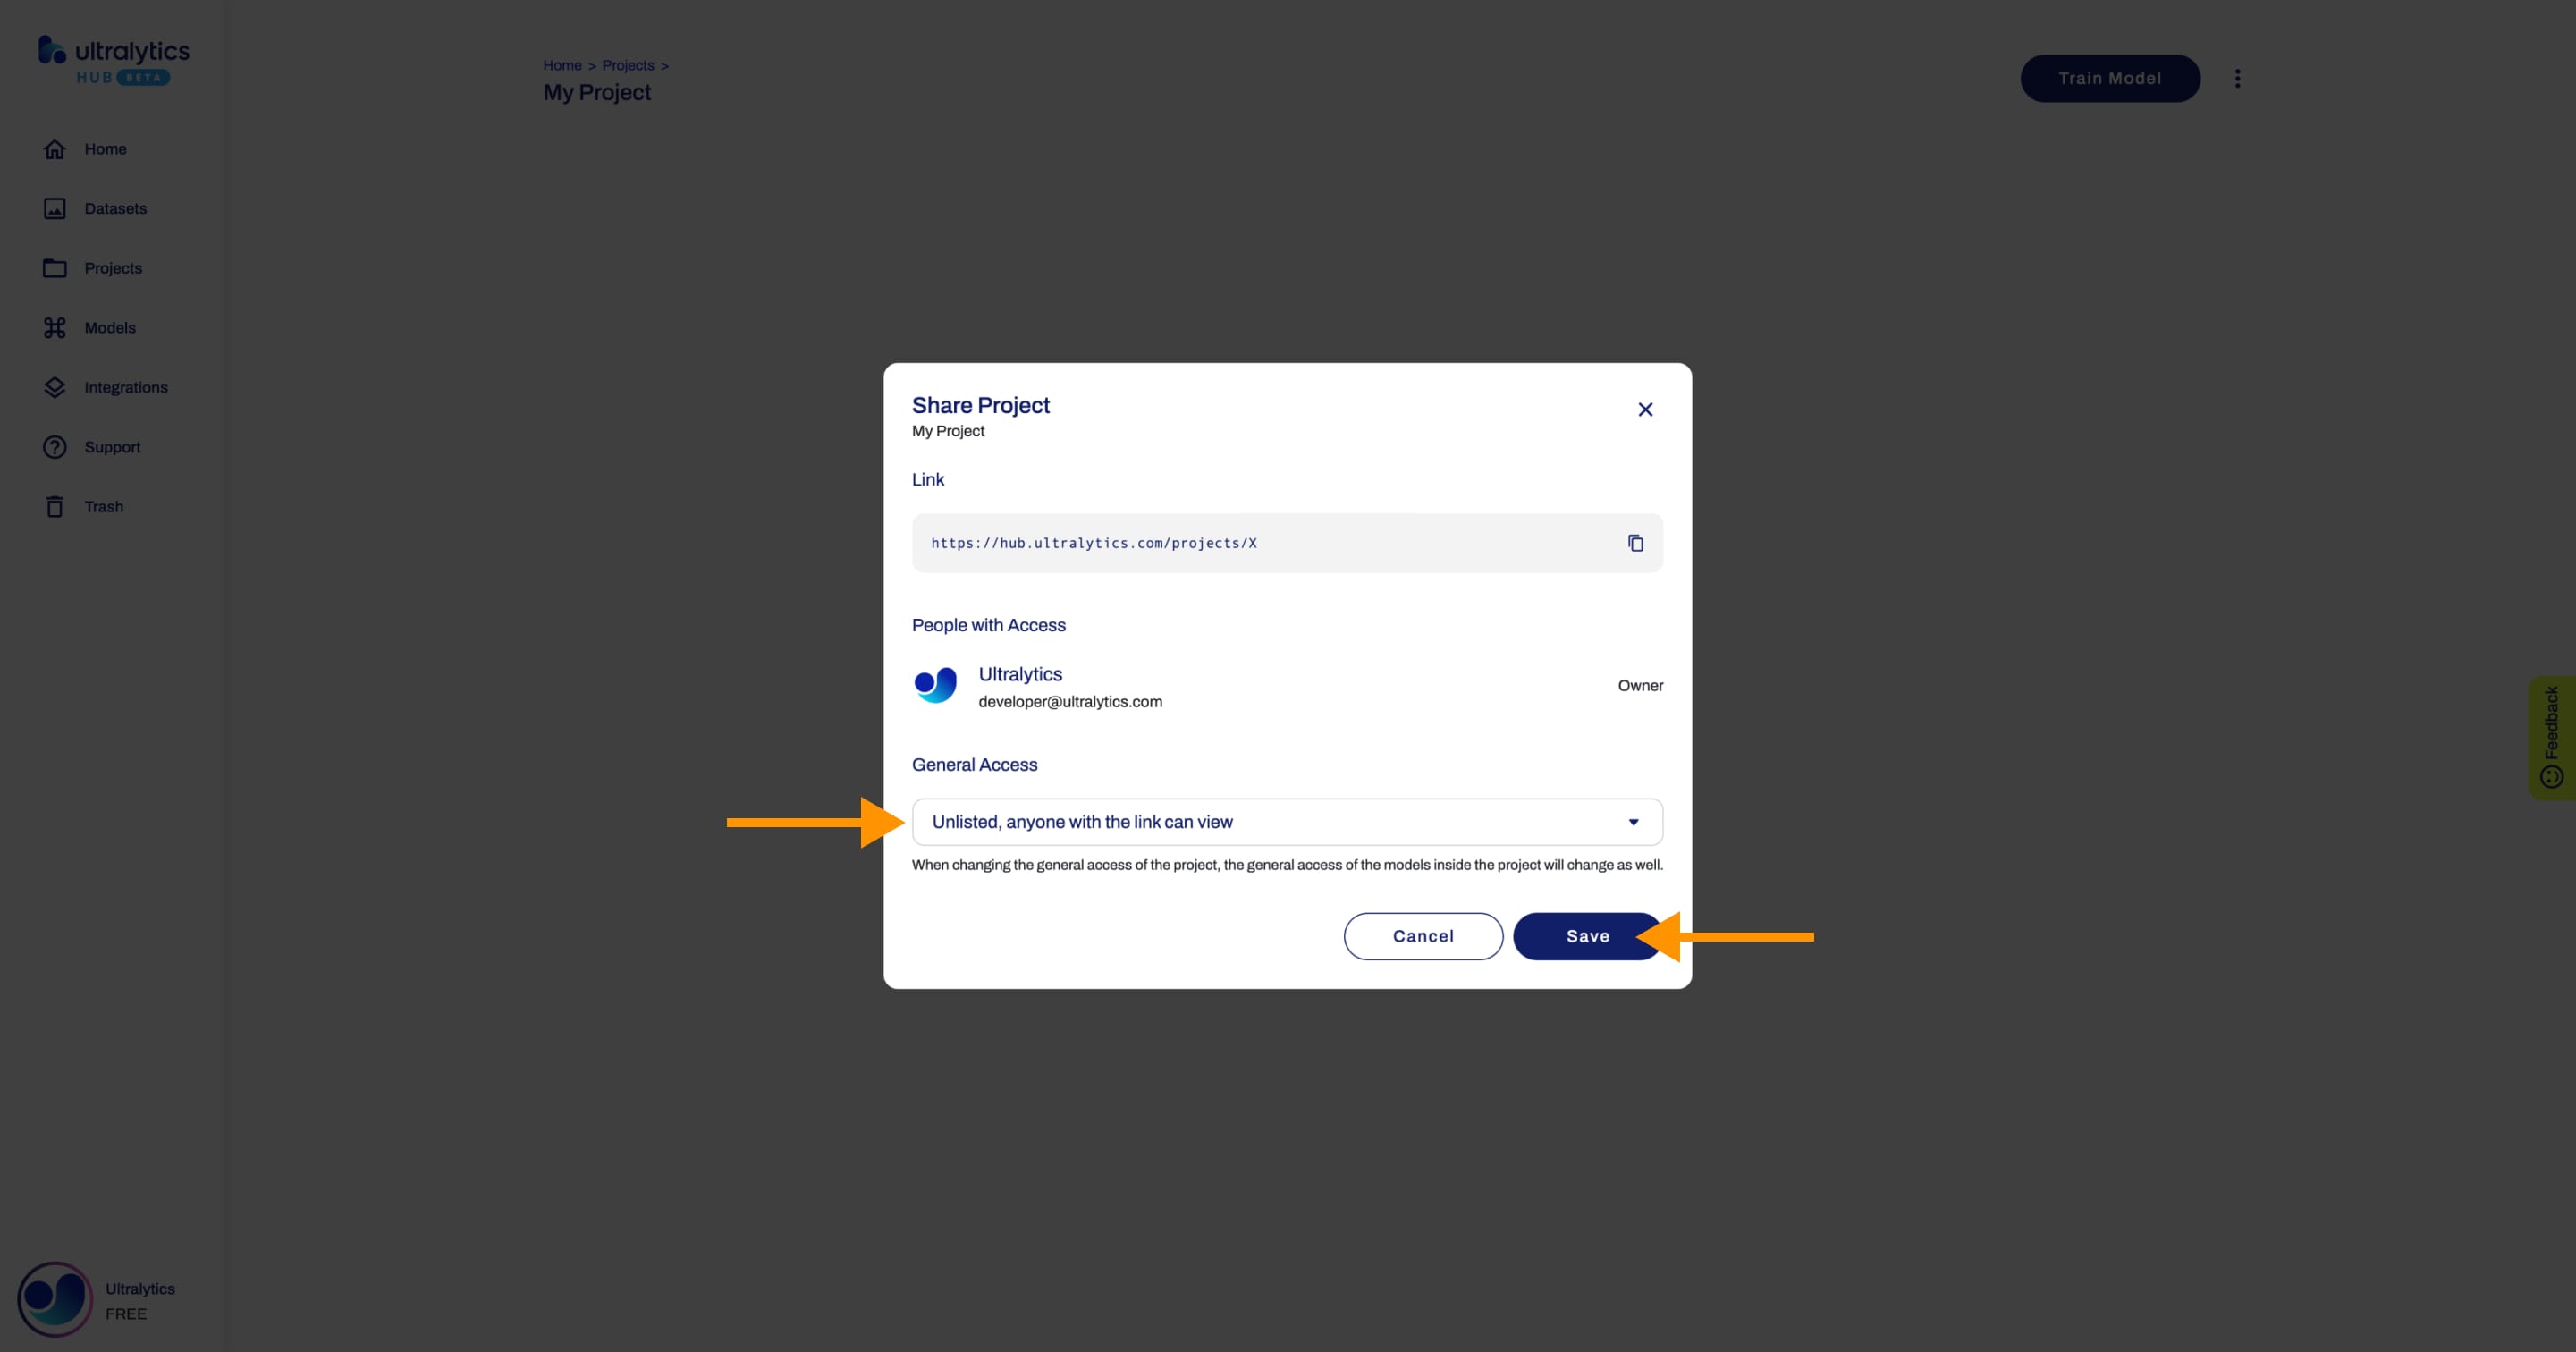
!!! warning "Warning"
When changing the general access of a project, the general access of the models inside the project will be changed as well.
Now, anyone who has the direct link to your project can view it.
??? tip "Tip"
You can easily click on the project's link shown in the **Share Project** dialog to copy it.
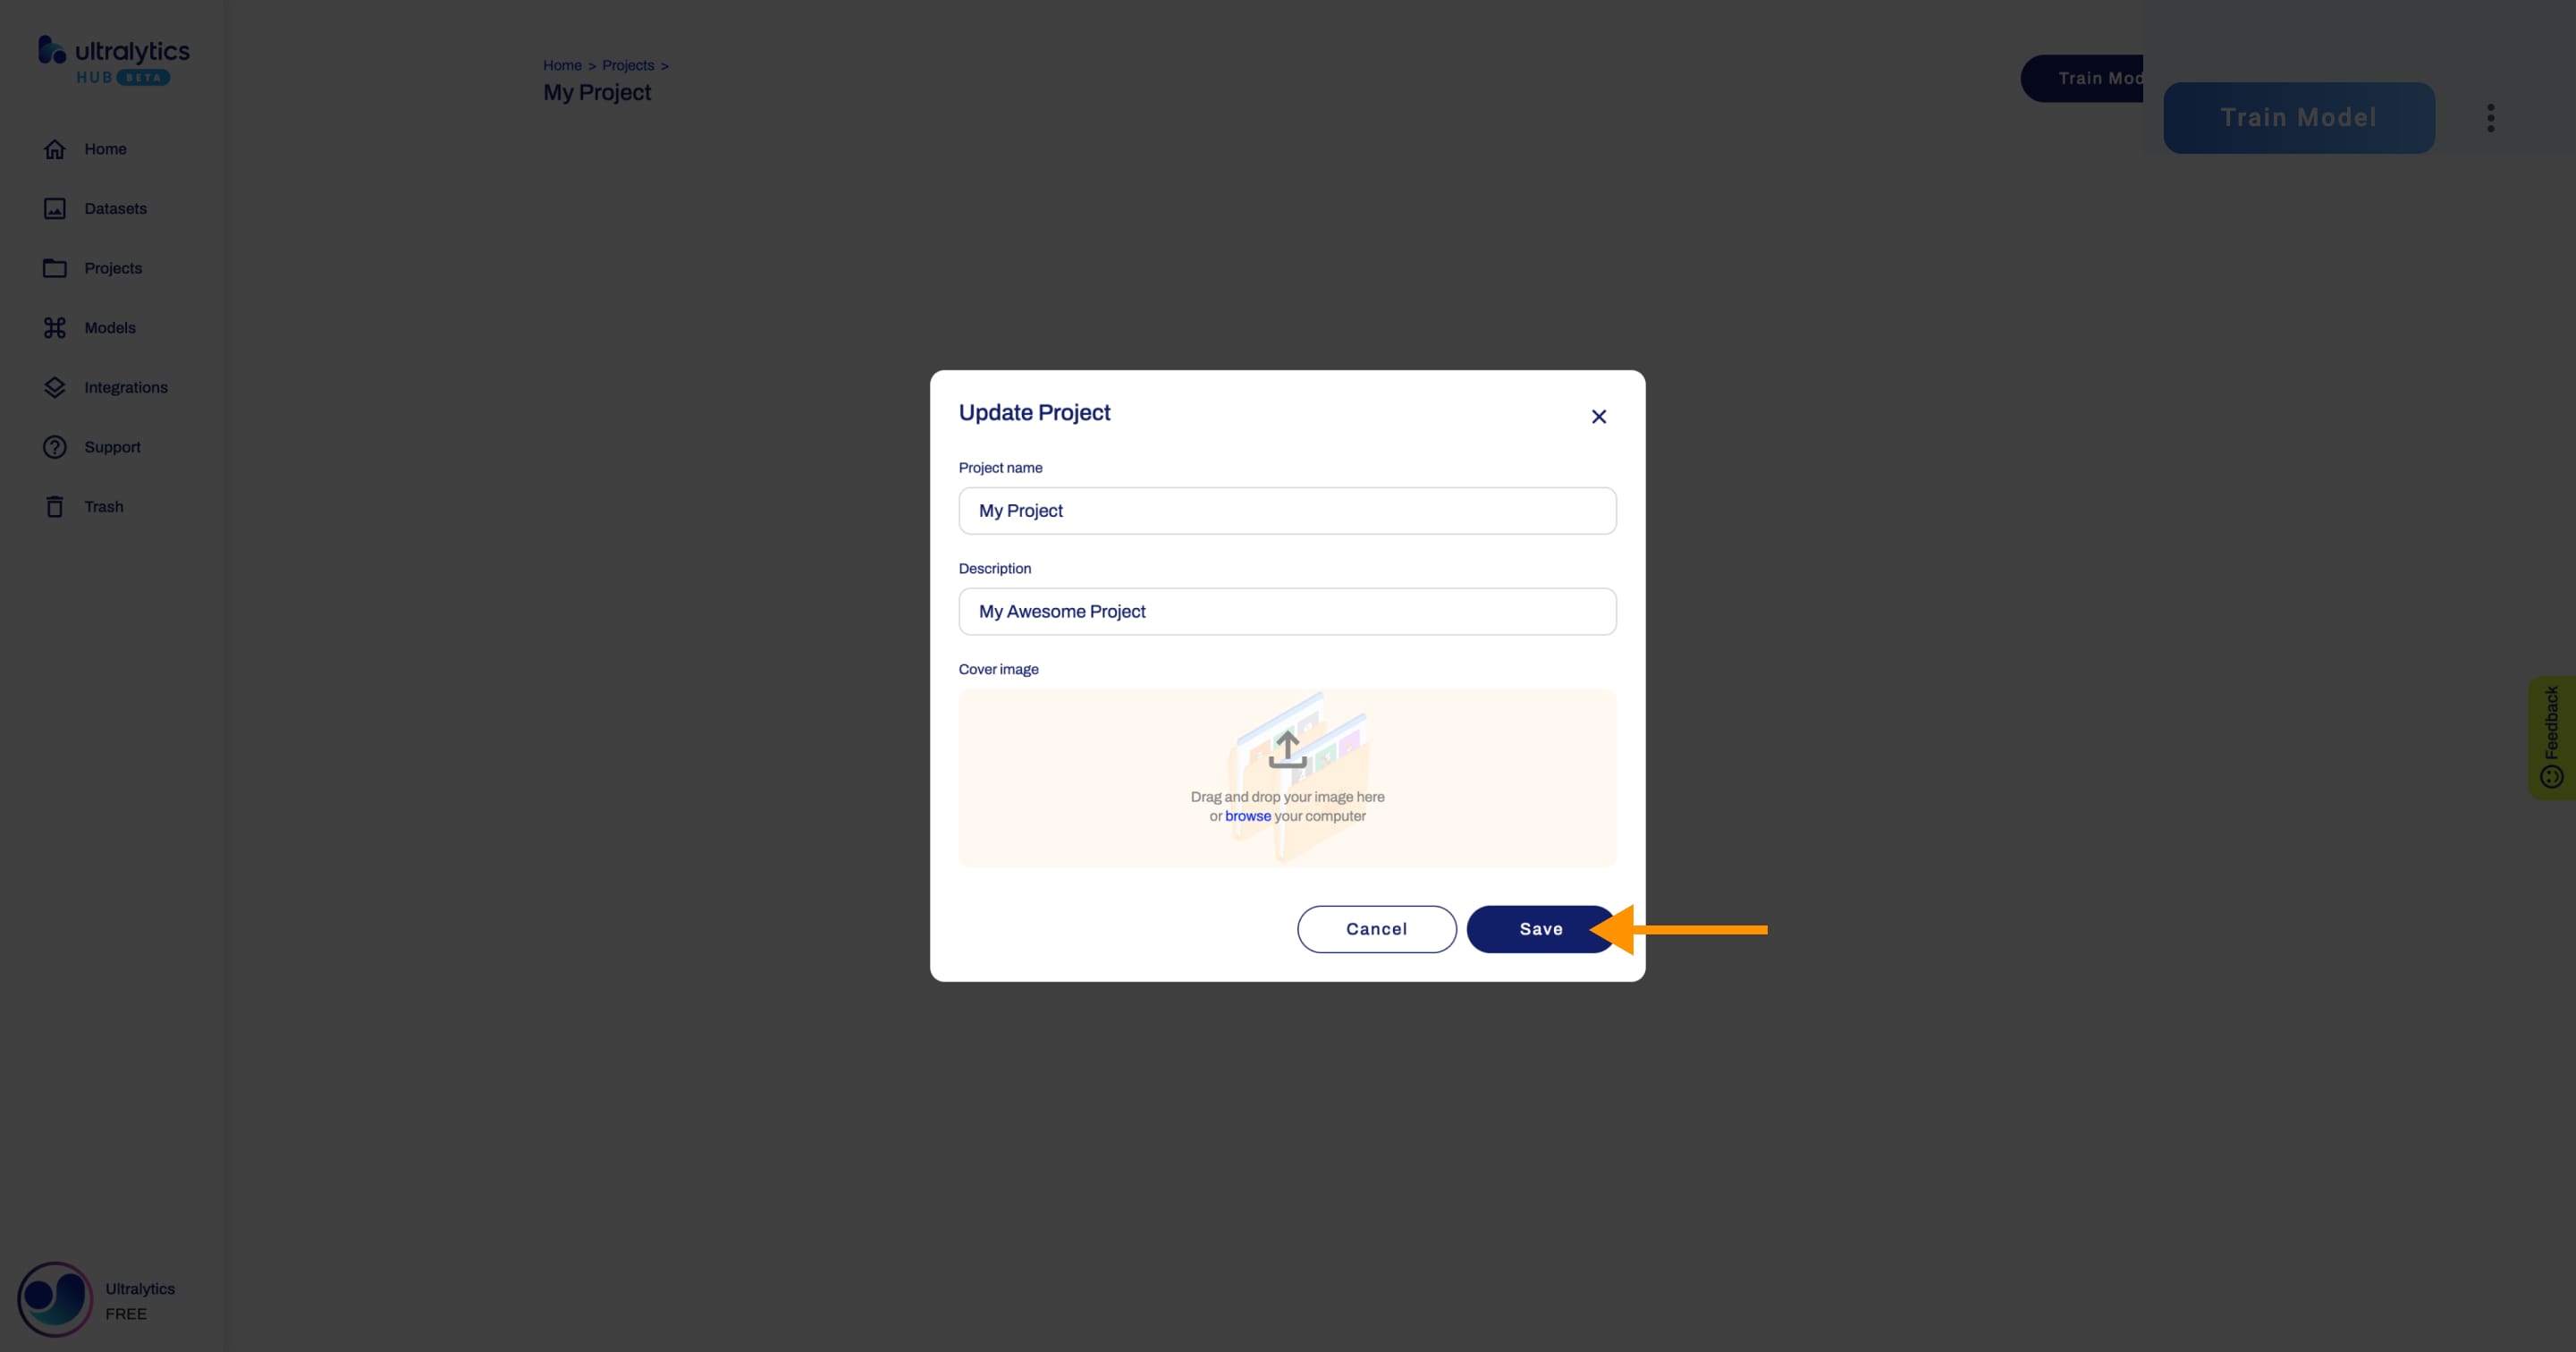
## Edit Project
Navigate to the Project page of the project you want to edit, open the project actions dropdown and click on the **Edit** option. This action will trigger the **Update Project** dialog.
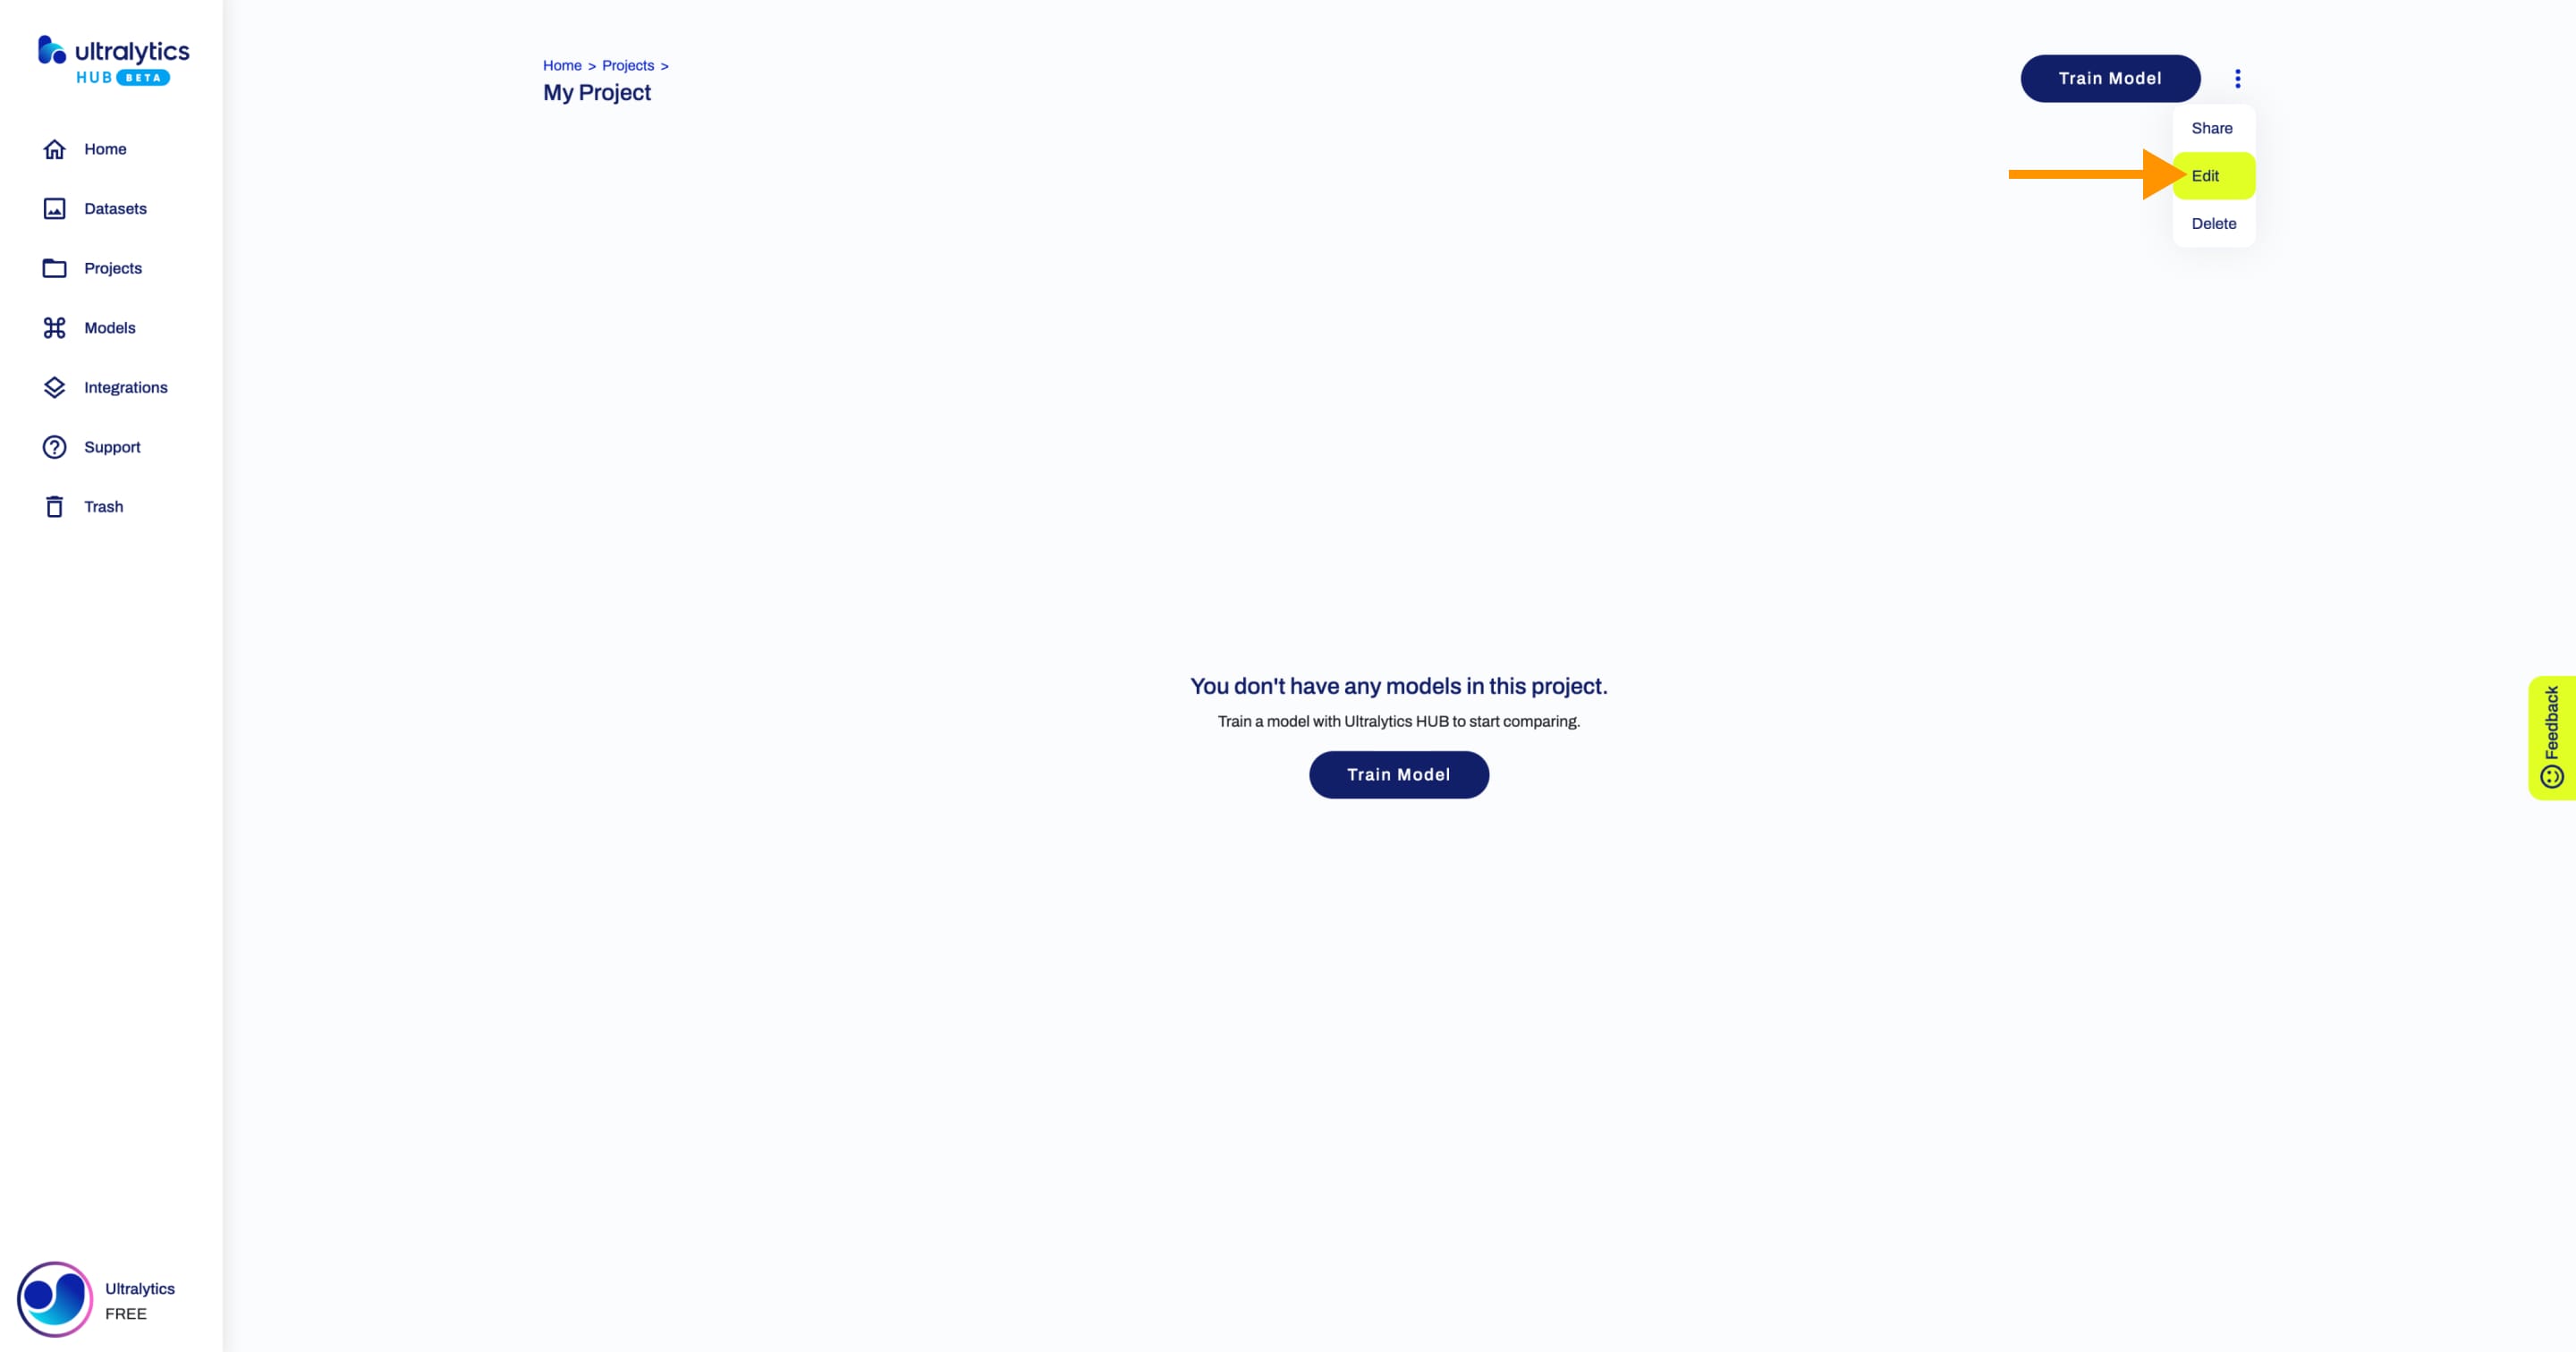
??? tip "Tip"
You can also edit a project directly from the [Projects](https://hub.ultralytics.com/projects) page.
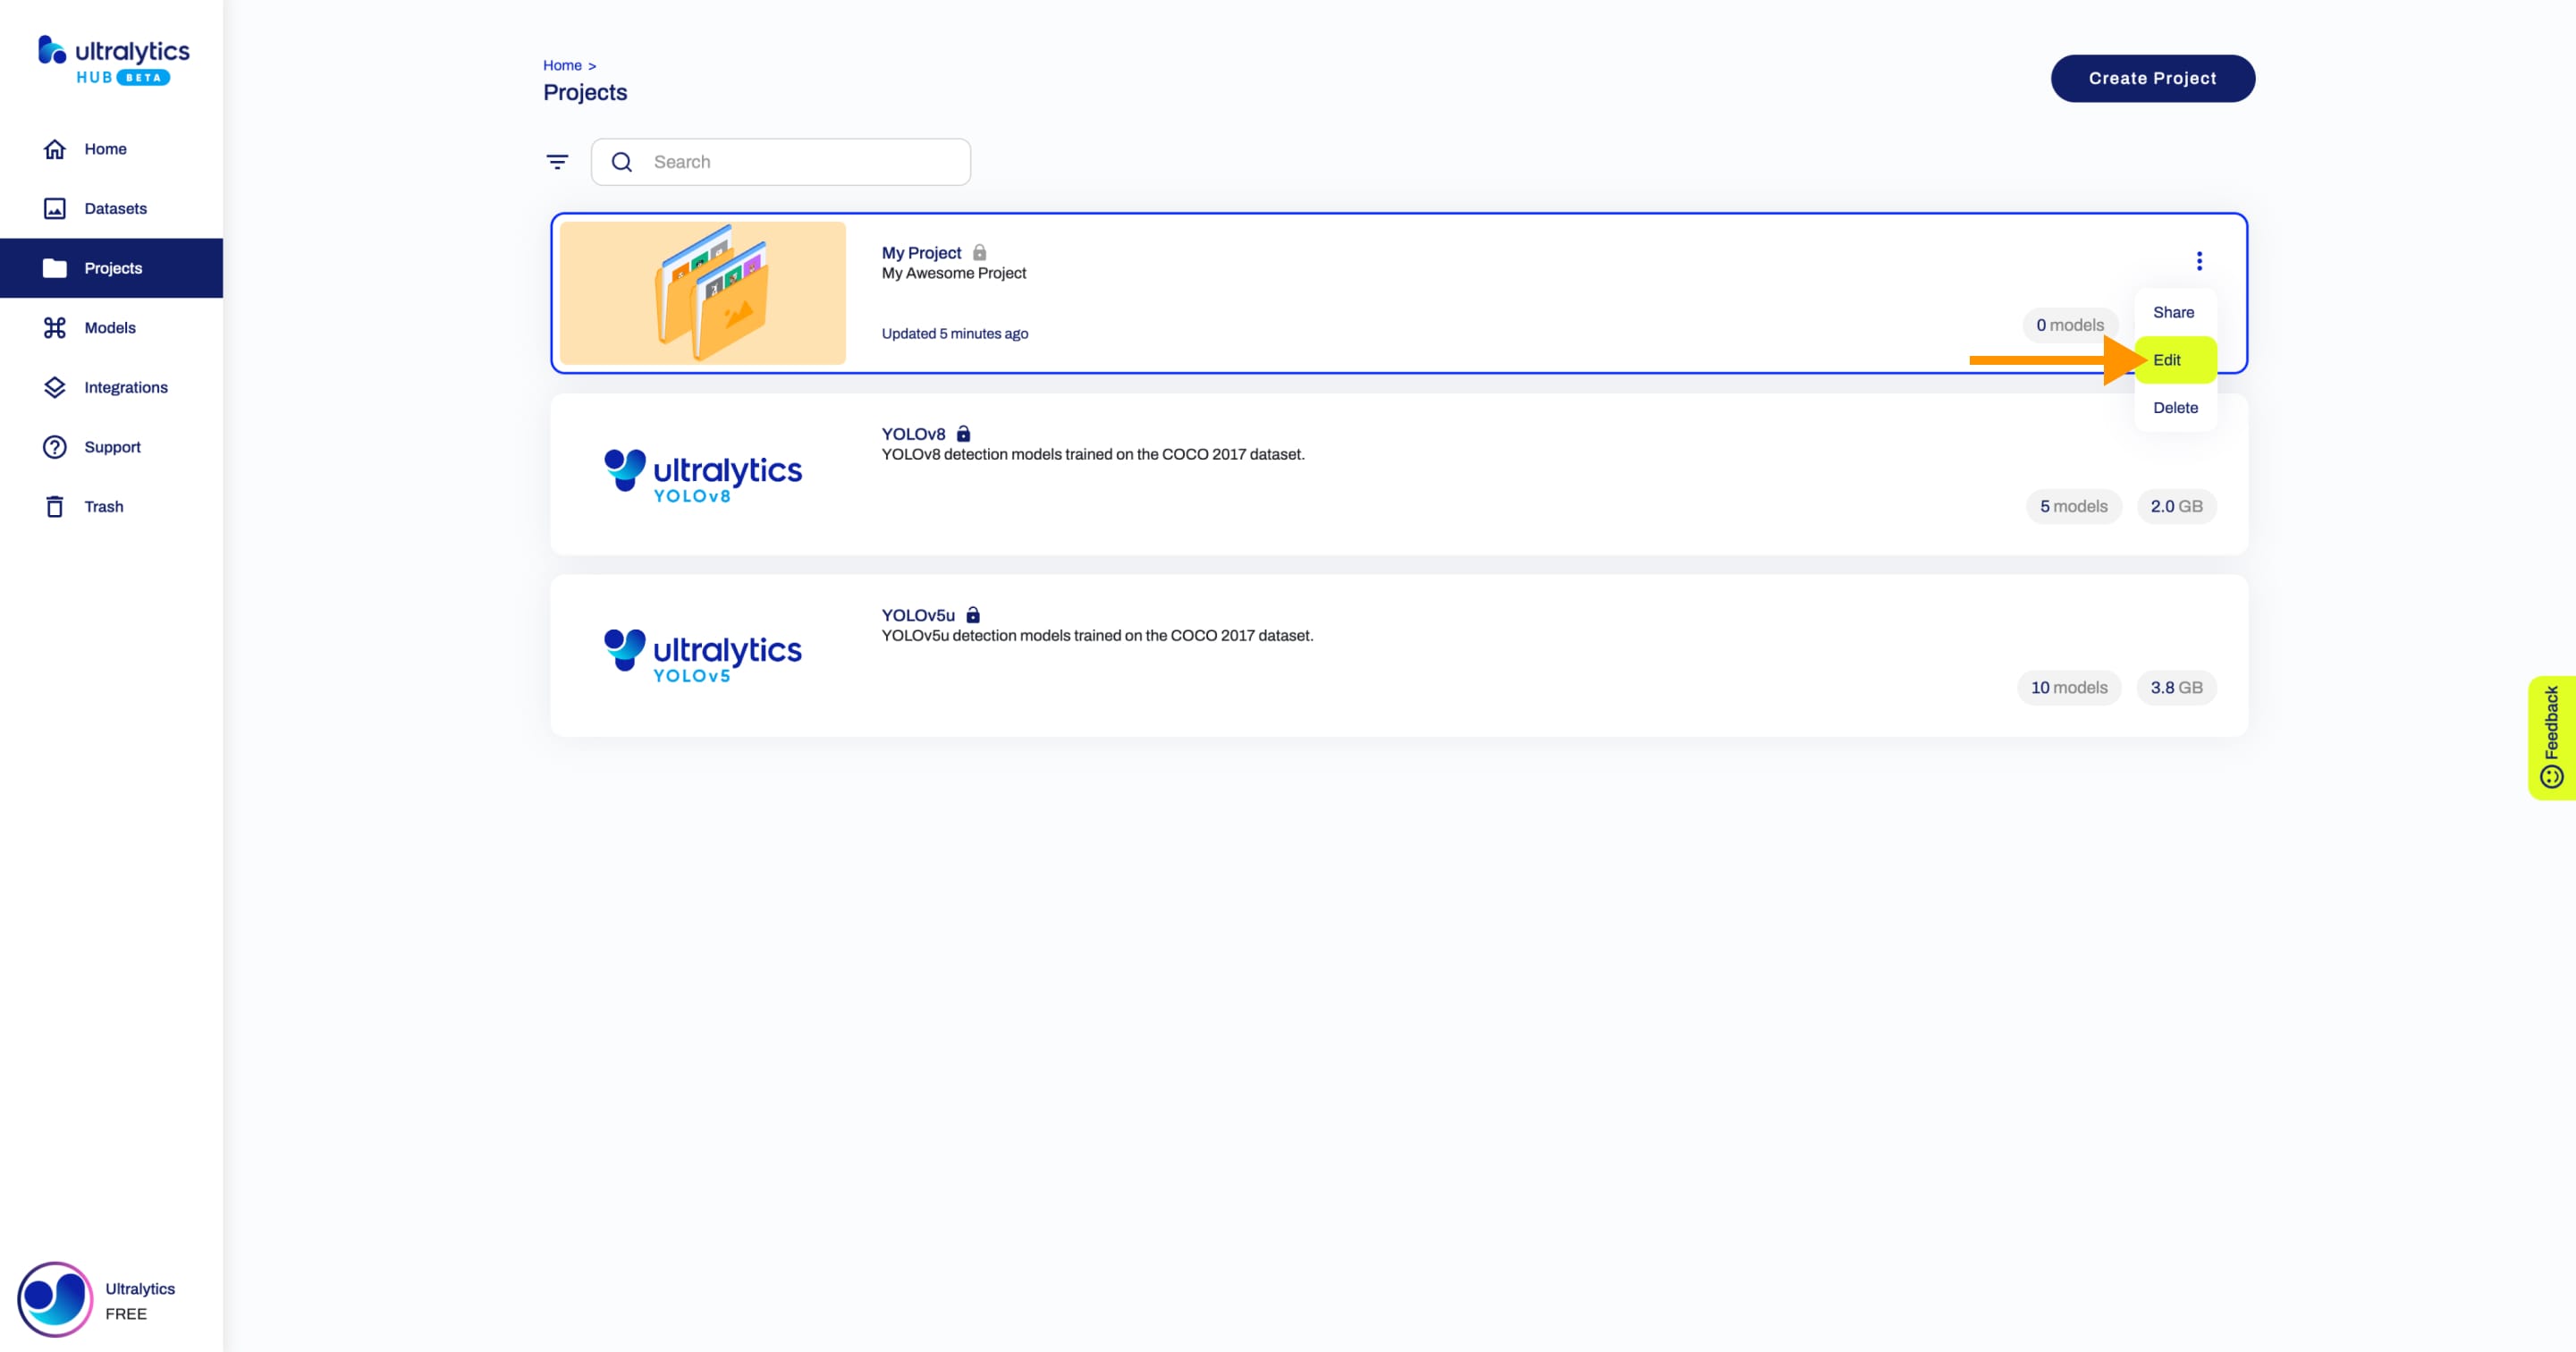
Apply the desired modifications to your project and then confirm the changes by clicking **Save**.
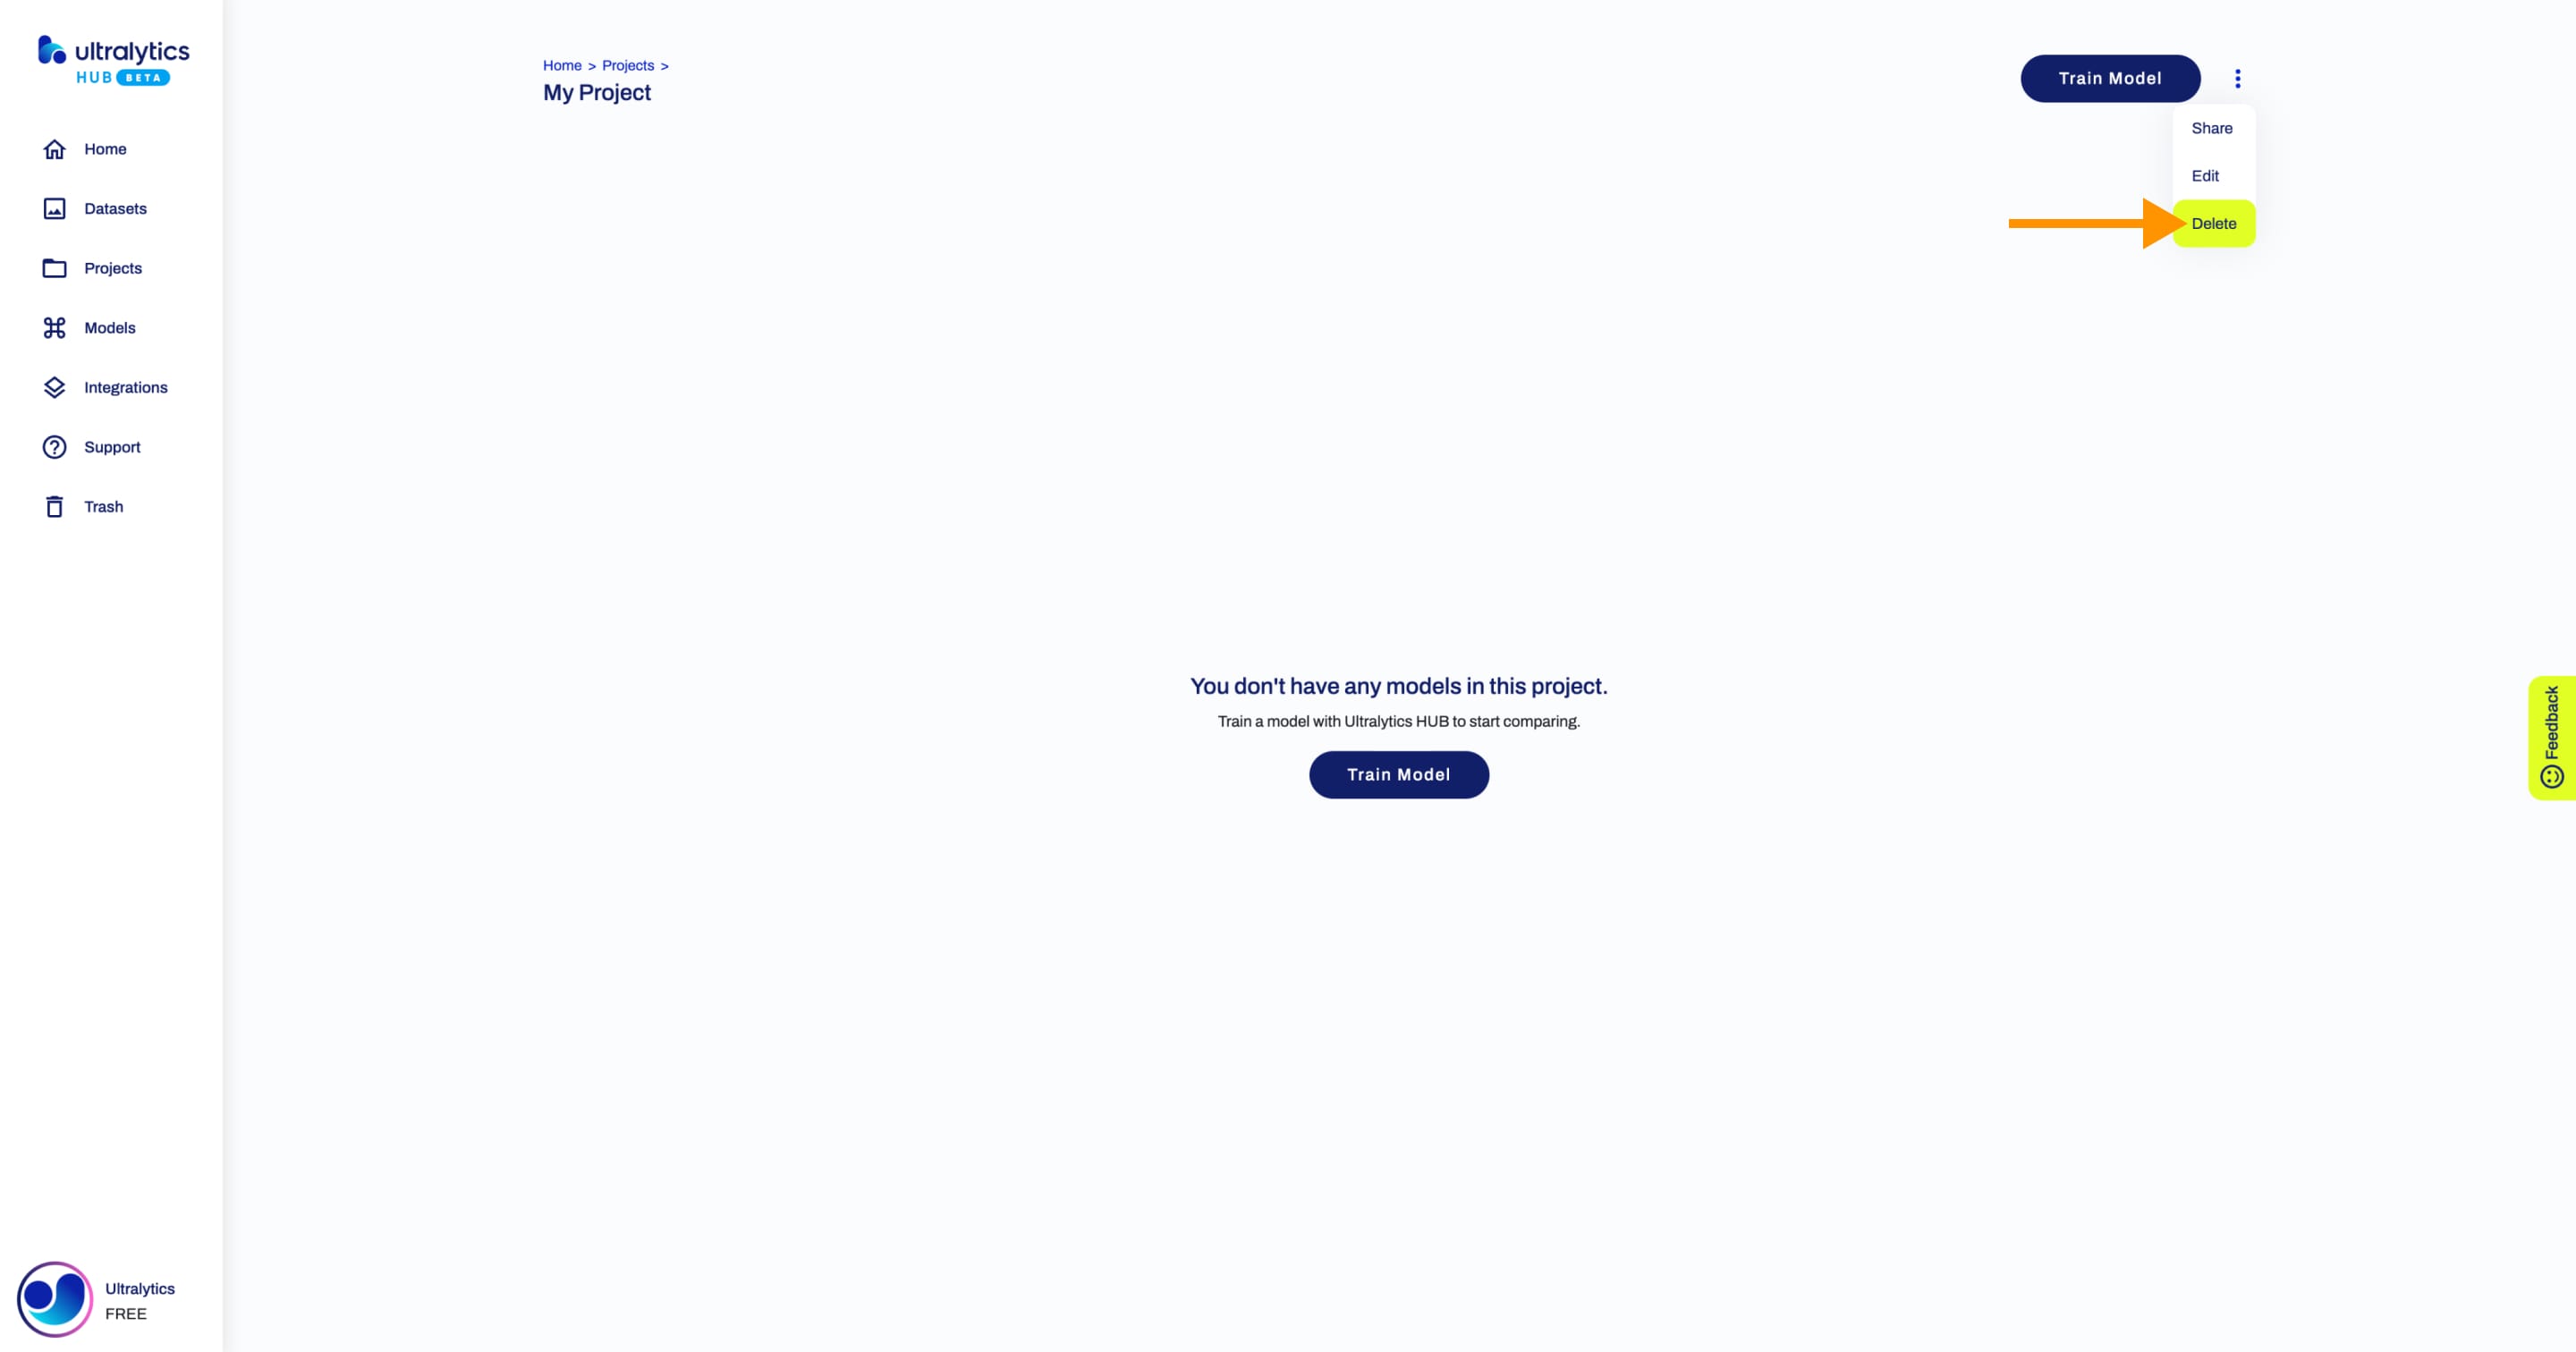
## Delete Project
Navigate to the Project page of the project you want to delete, open the project actions dropdown and click on the **Delete** option. This action will delete the project.
??? tip "Tip"
You can also delete a project directly from the [Projects](https://hub.ultralytics.com/projects) page.

!!! warning "Warning"
When deleting a project, the the models inside the project will be deleted as well.
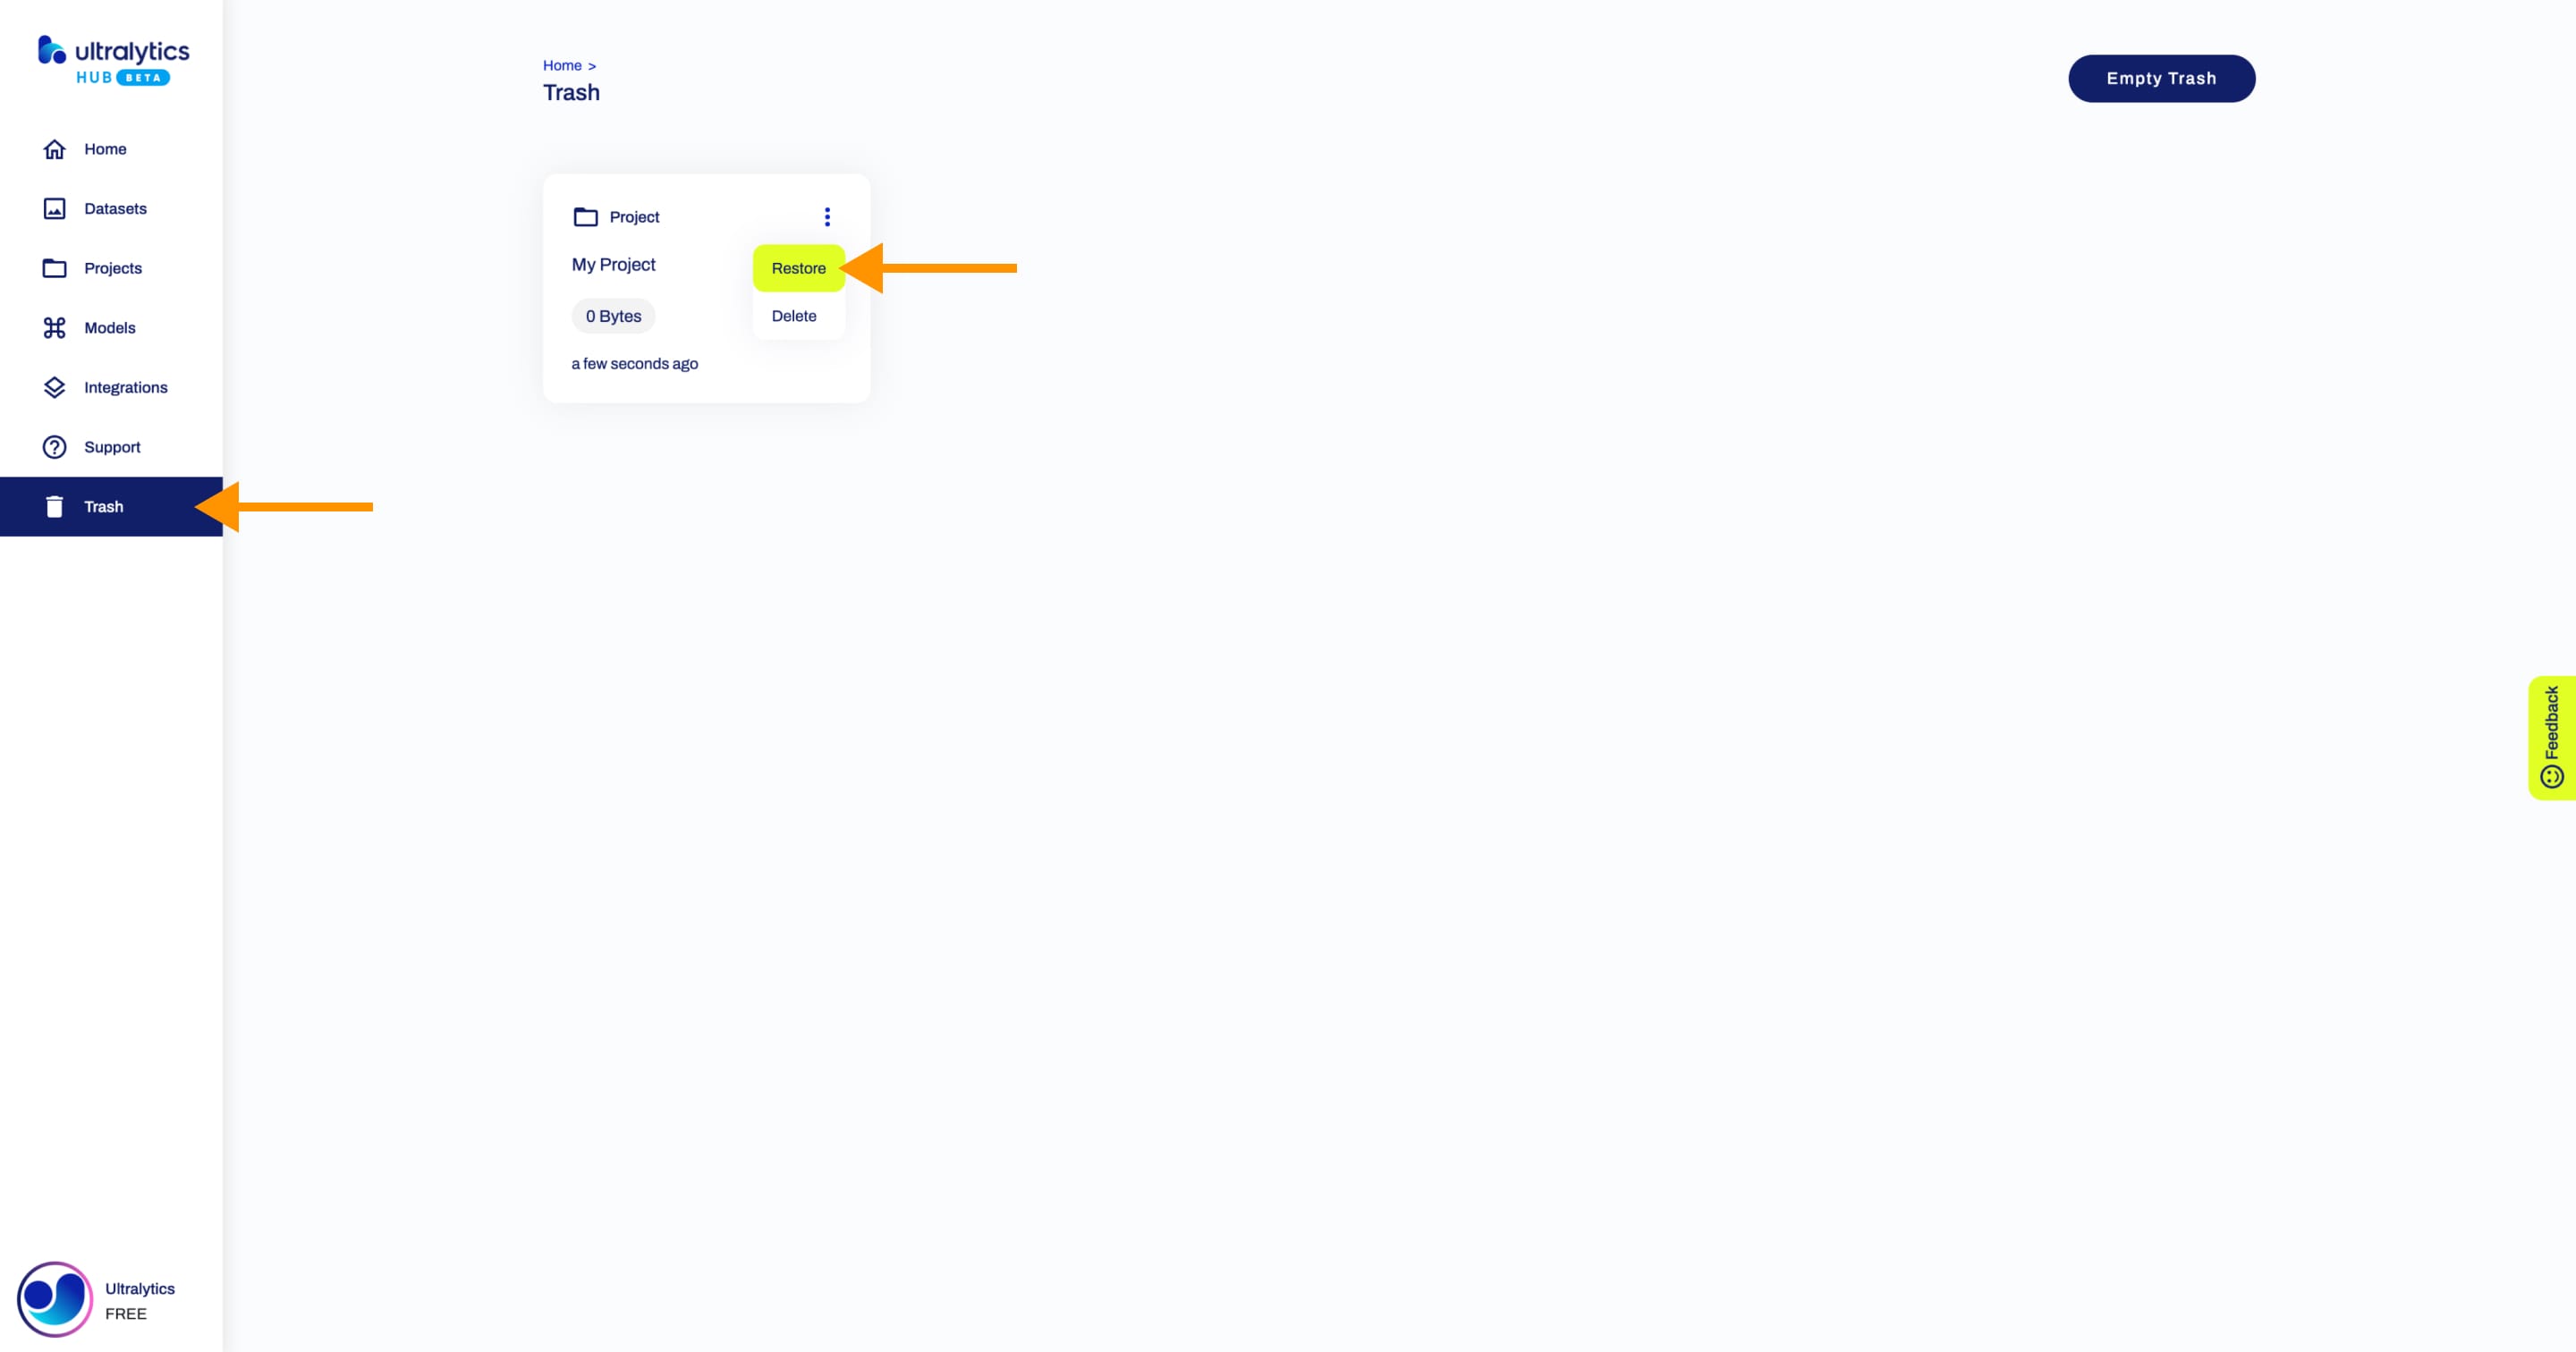
??? note "Note"
If you change your mind, you can restore the project from the [Trash](https://hub.ultralytics.com/trash) page.
## Compare Models
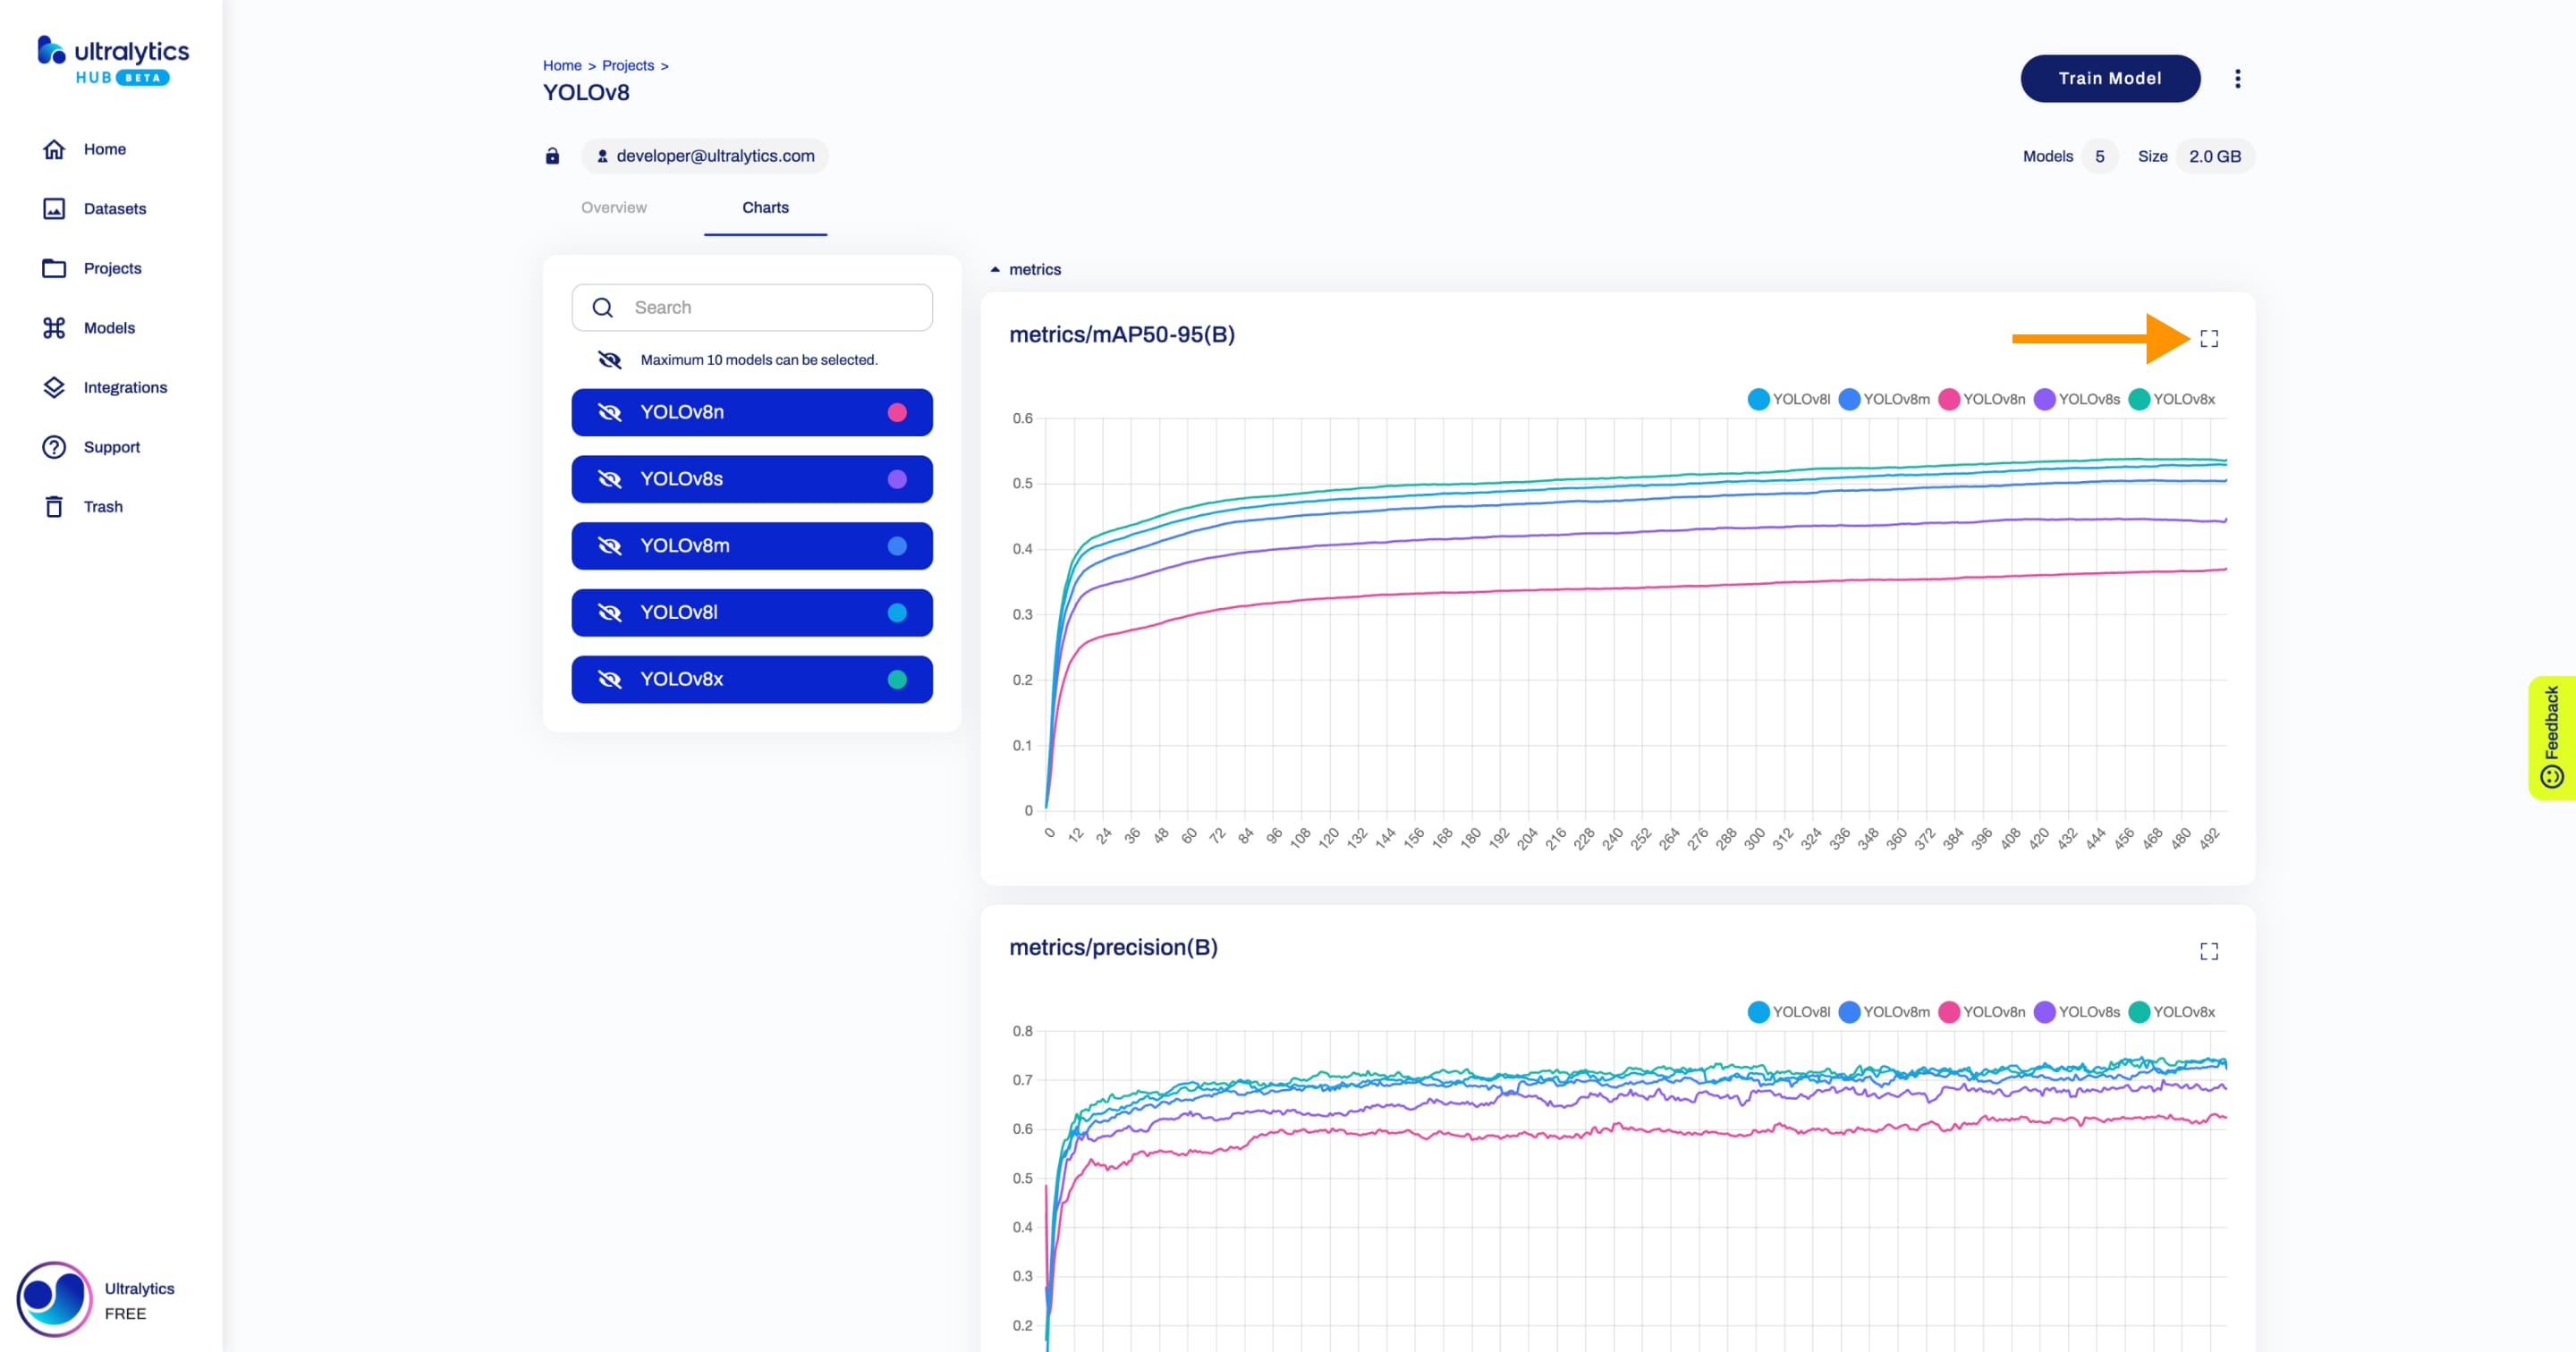
Navigate to the Project page of the project where the models you want to compare are located. To use the model comparison feature, click on the **Charts** tab.
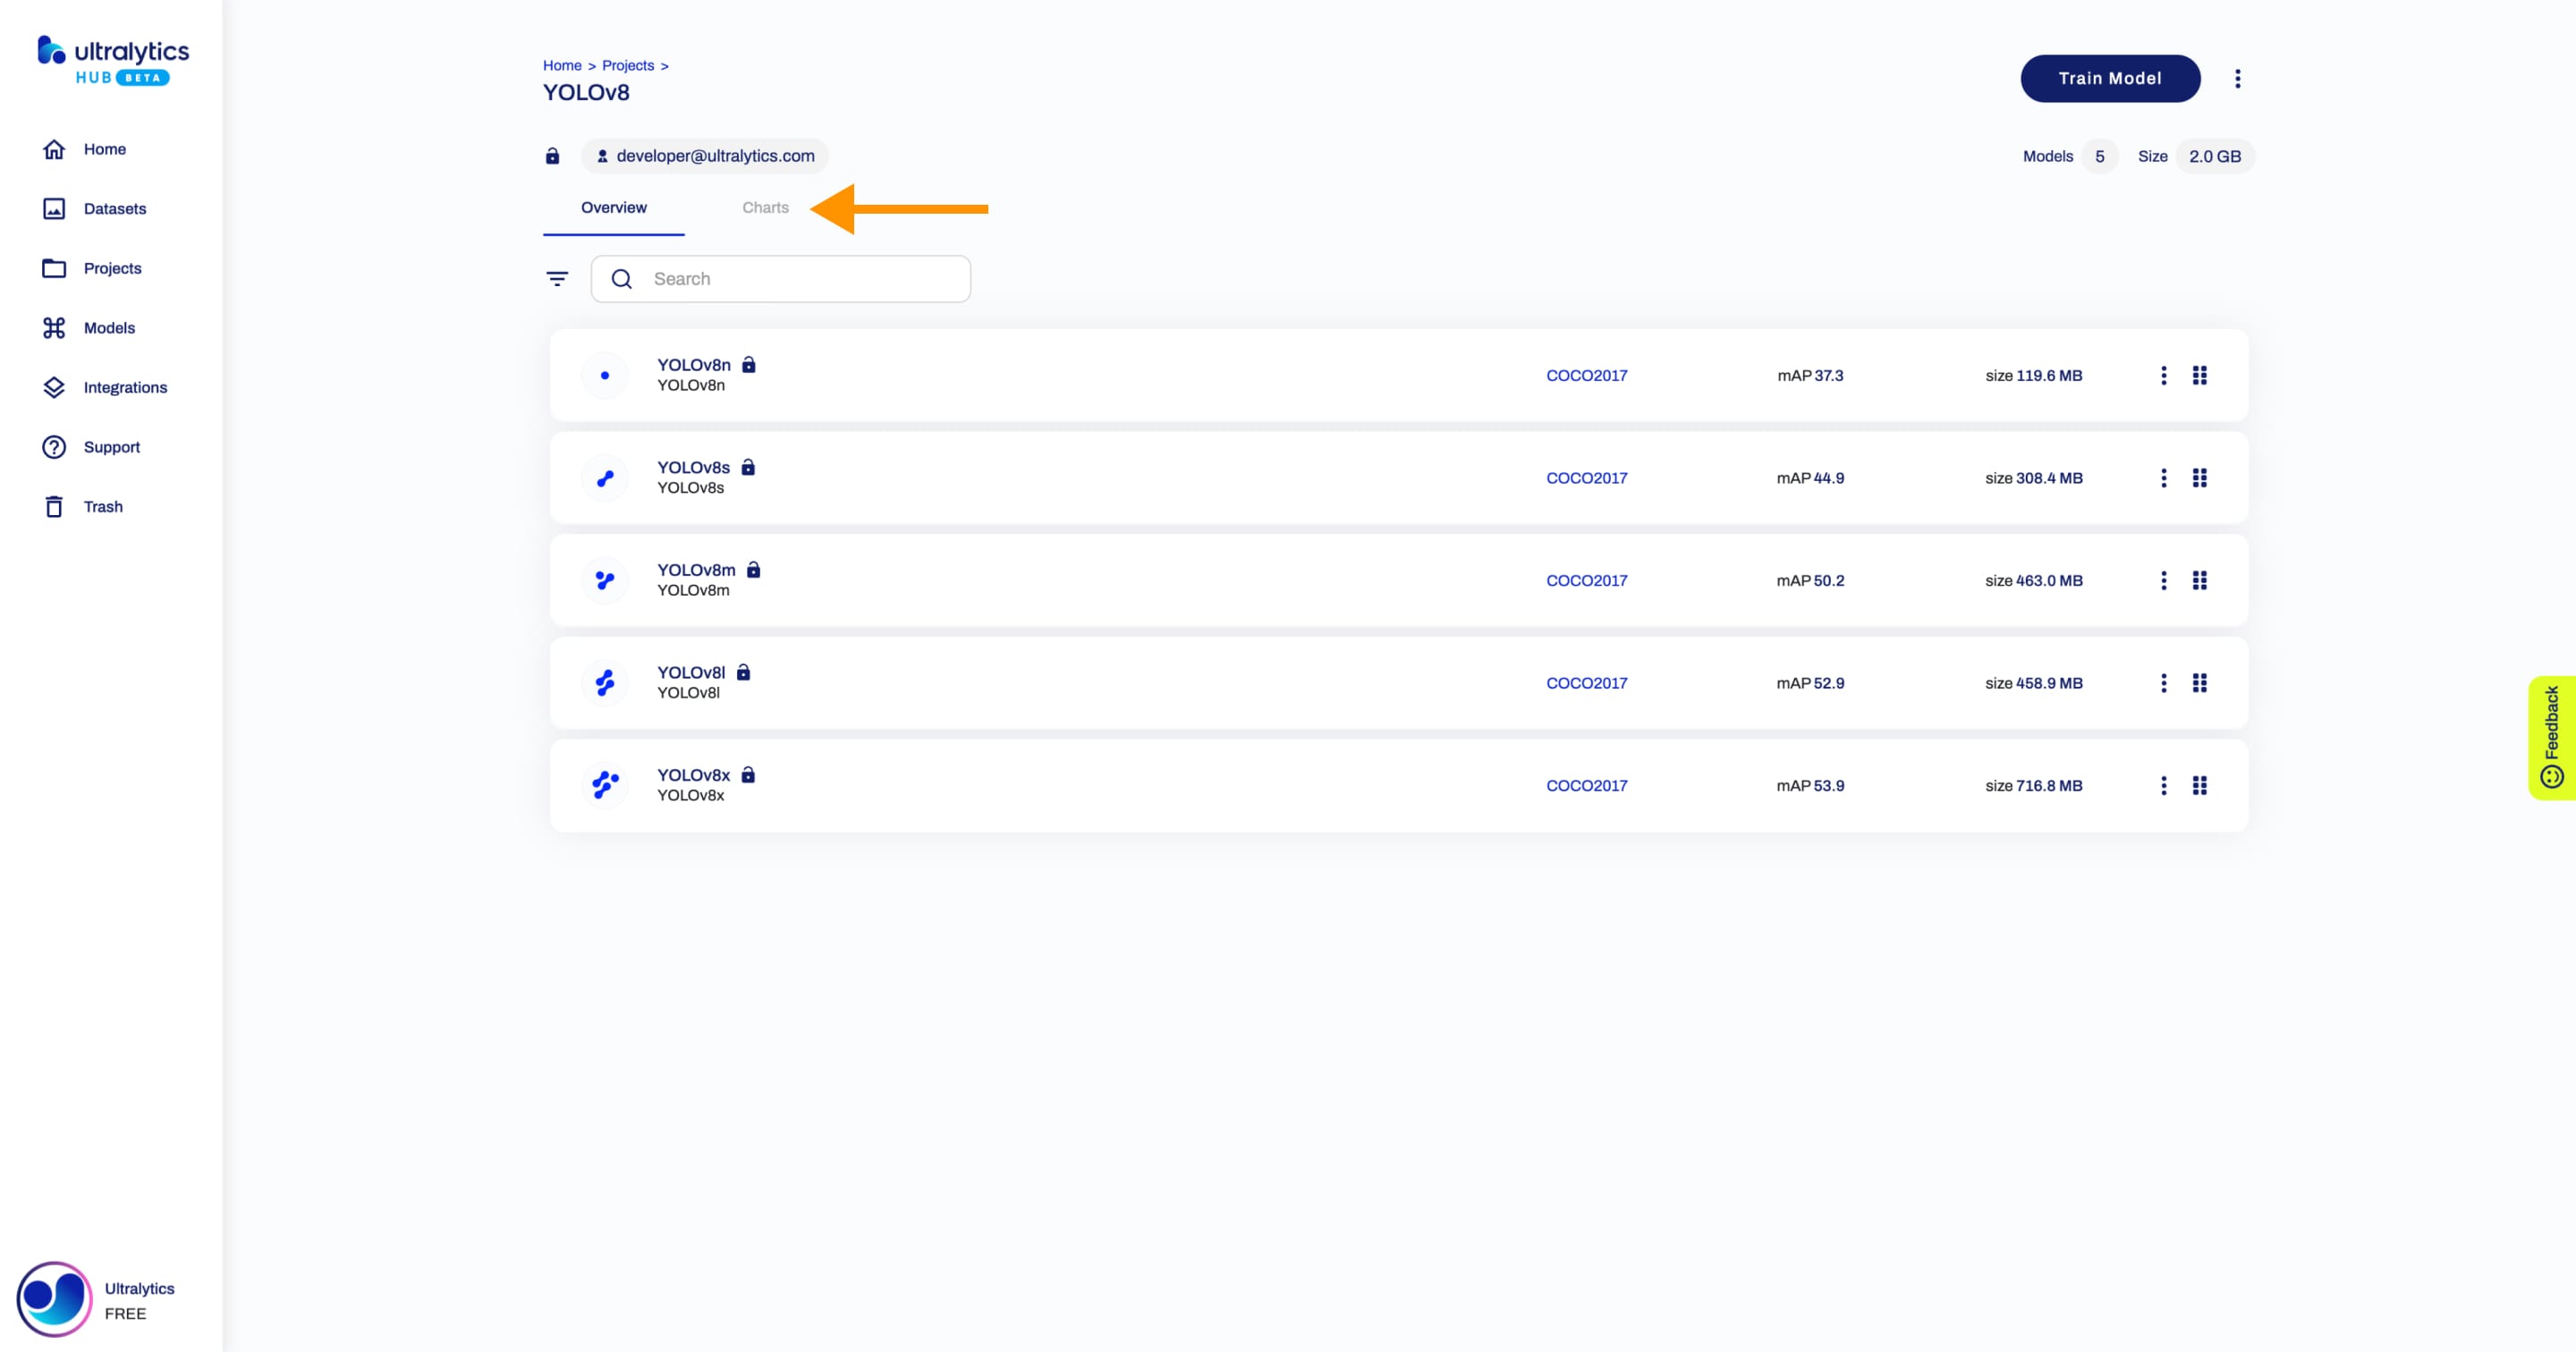
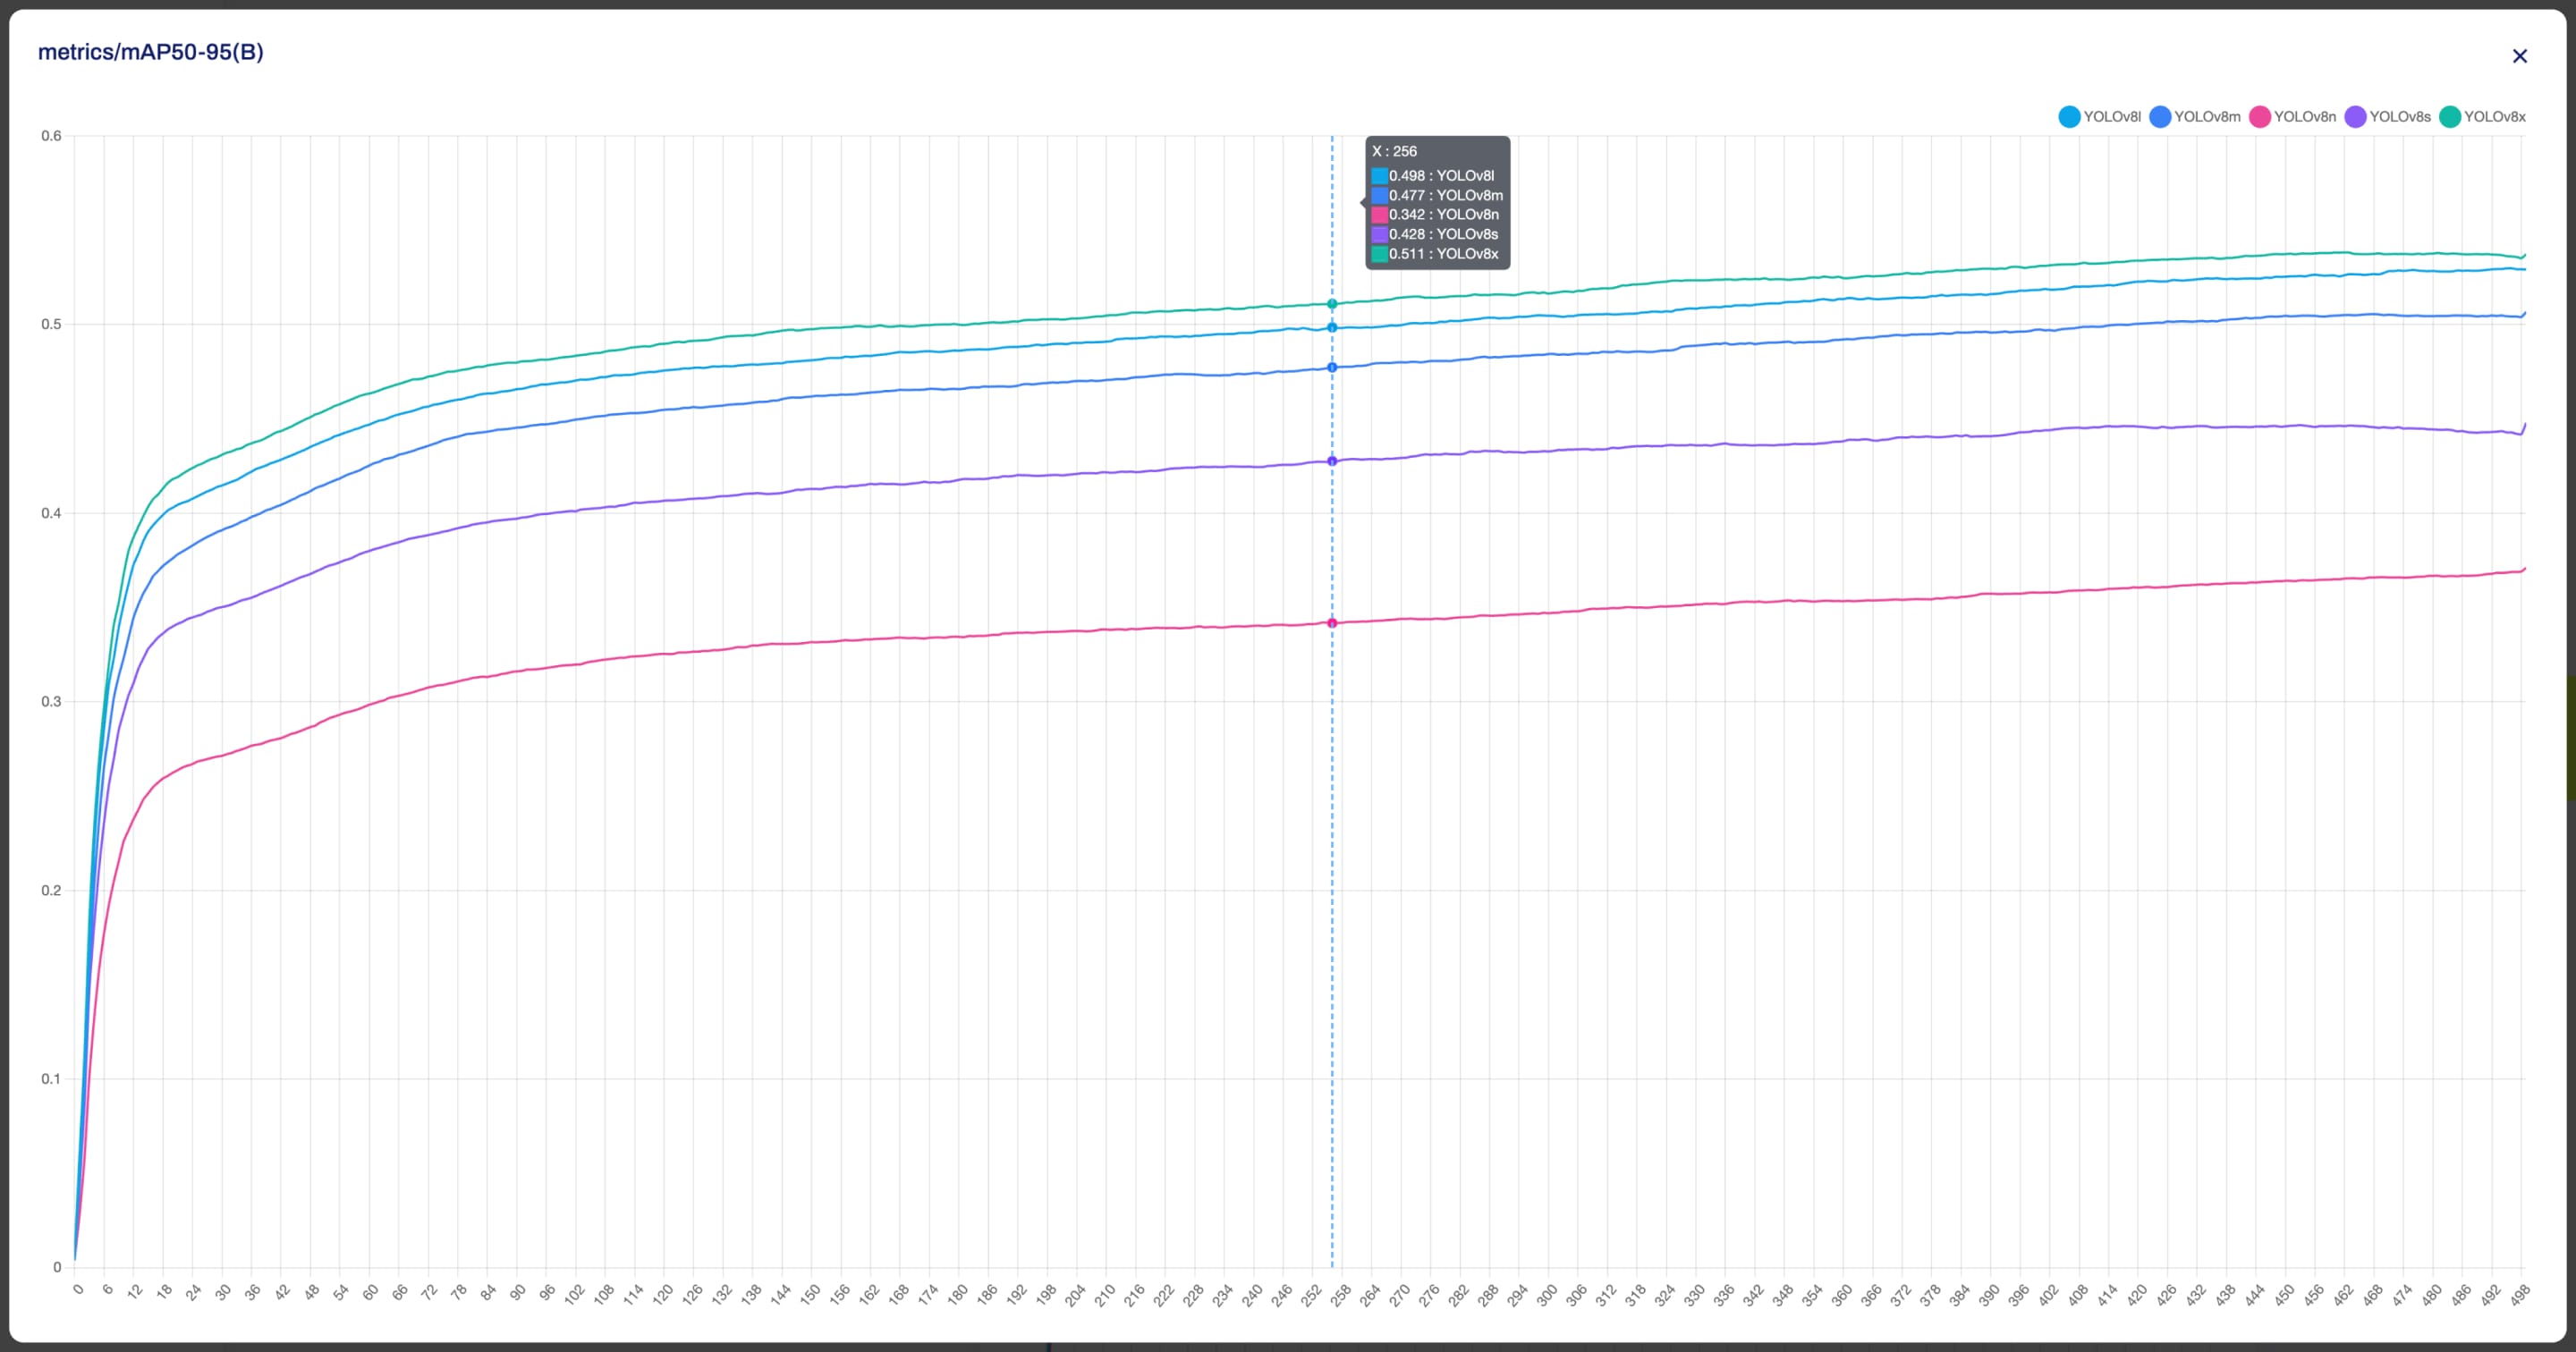
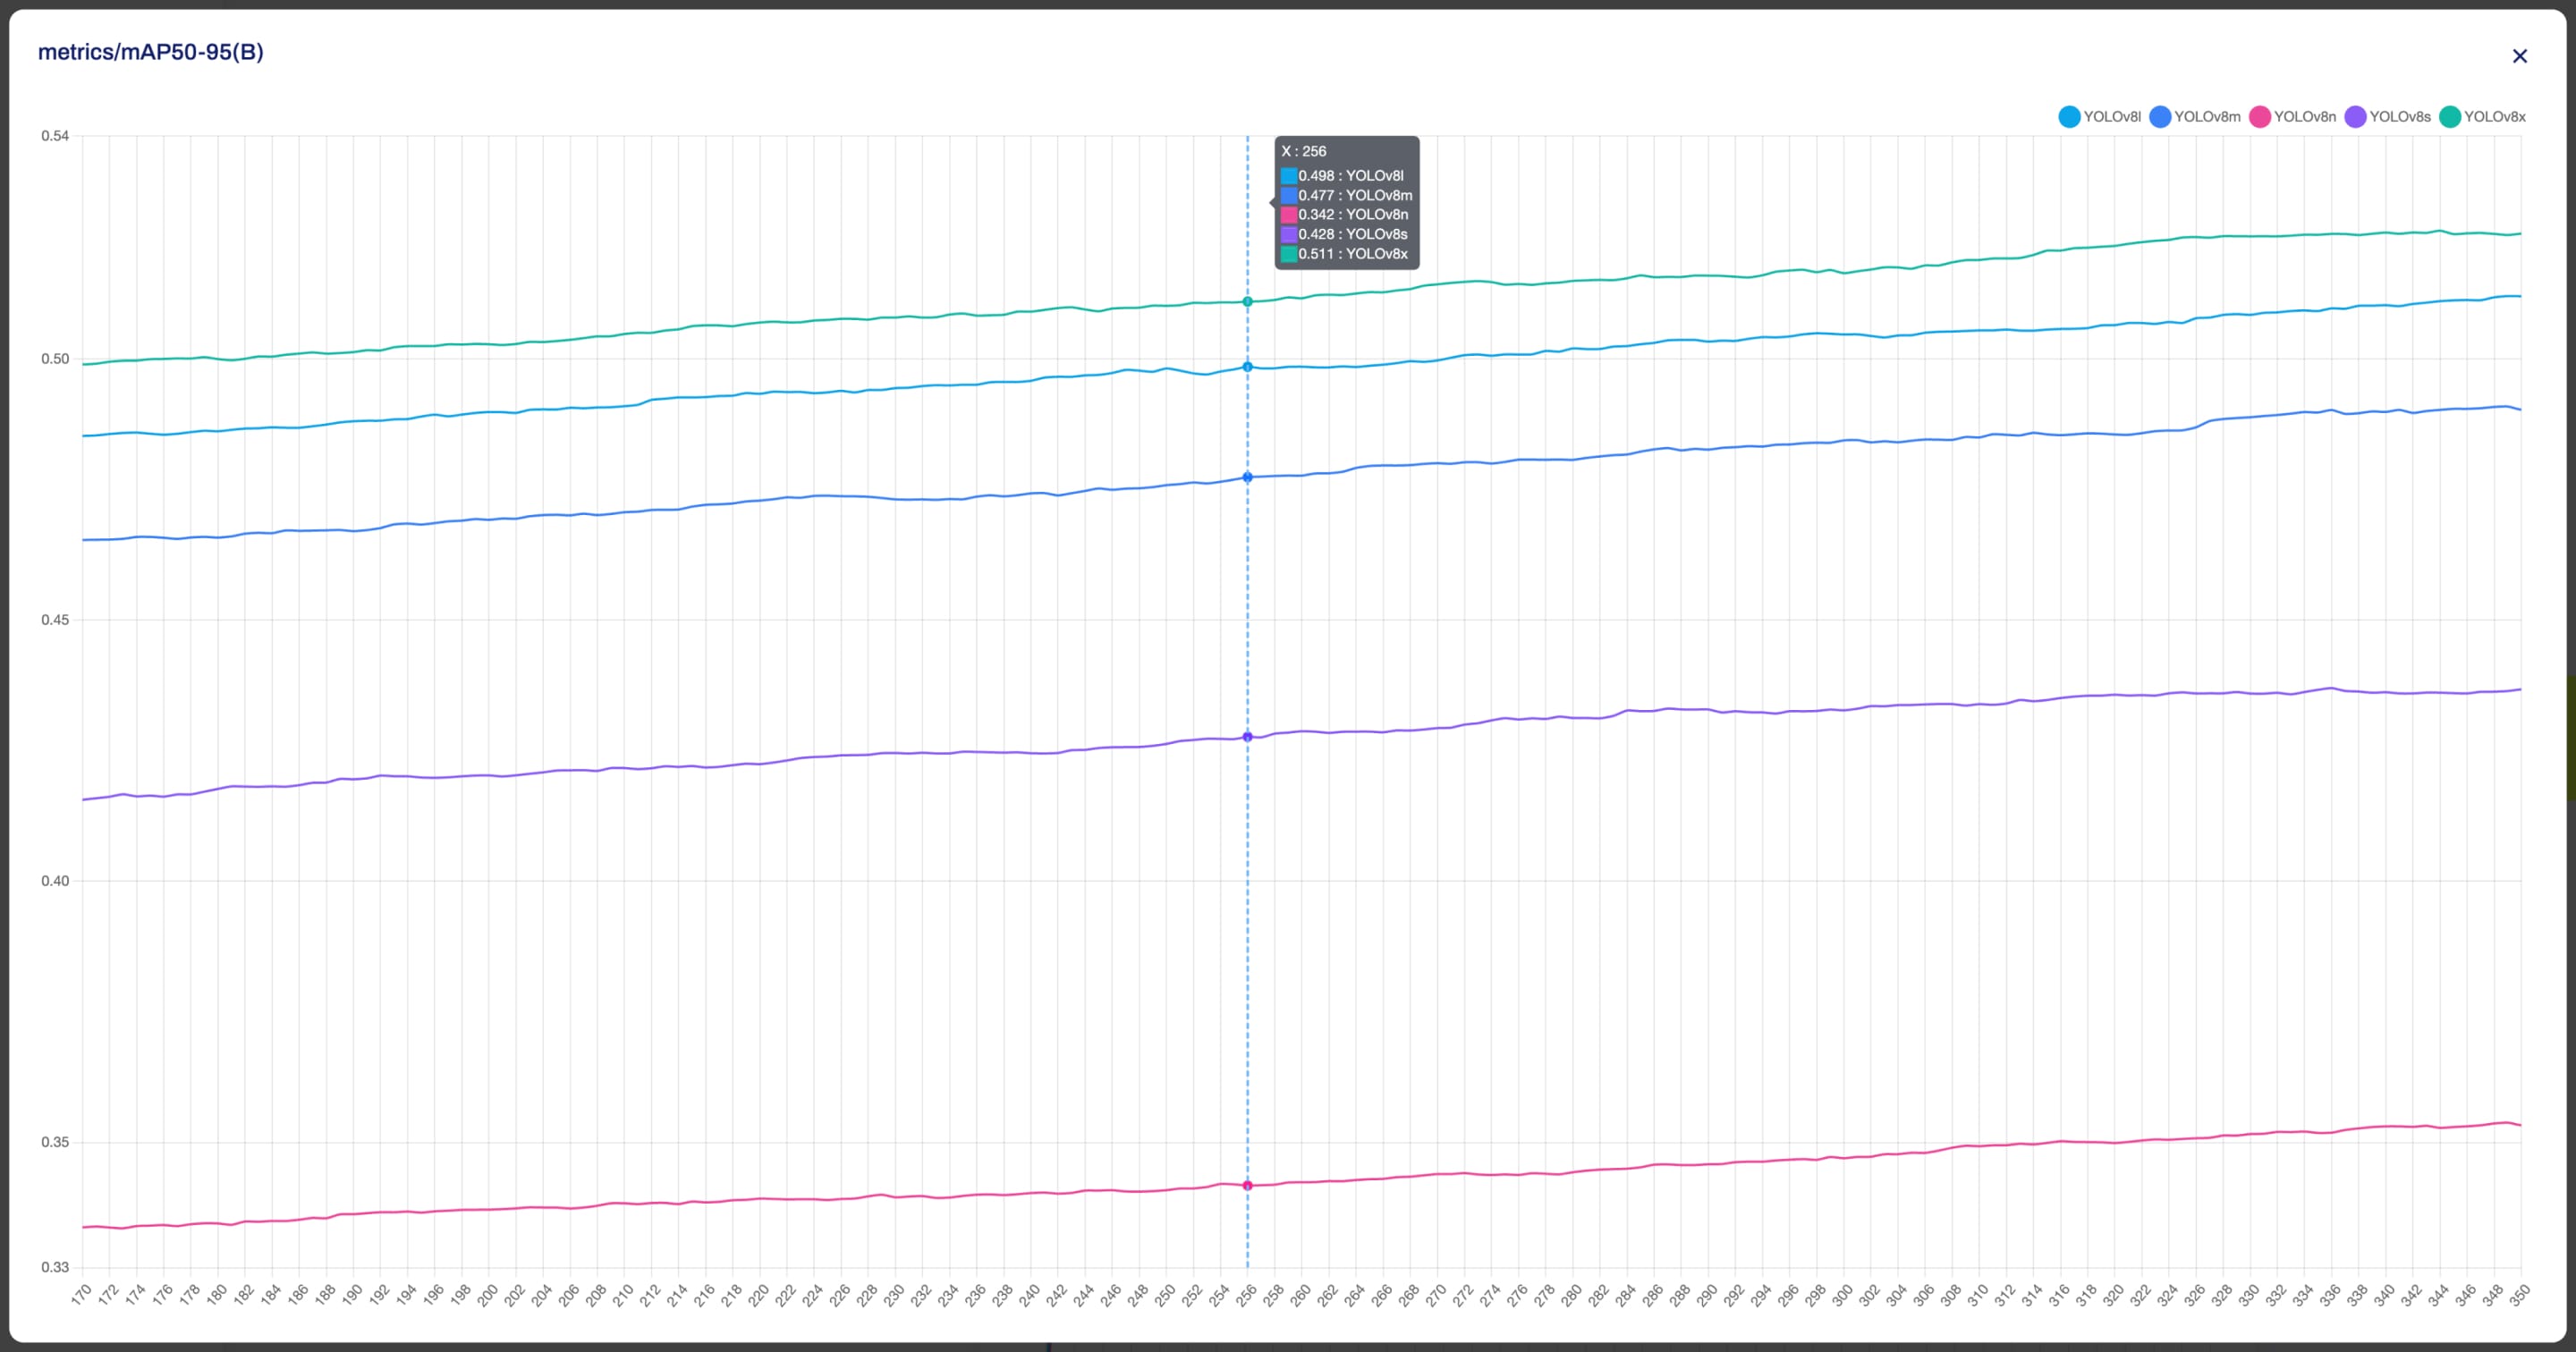
This will display all the relevant charts. Each chart corresponds to a different metric and contains the performance of each model for that metric. The models are represented by different colors and you can hover over each data point to get more information.

??? tip "Tip"
Each chart can be enlarged for better visualization.
??? tip "Tip"
You have the flexibility to customize your view by selectively hiding certain models. This feature allows you to concentrate on the models of interest.
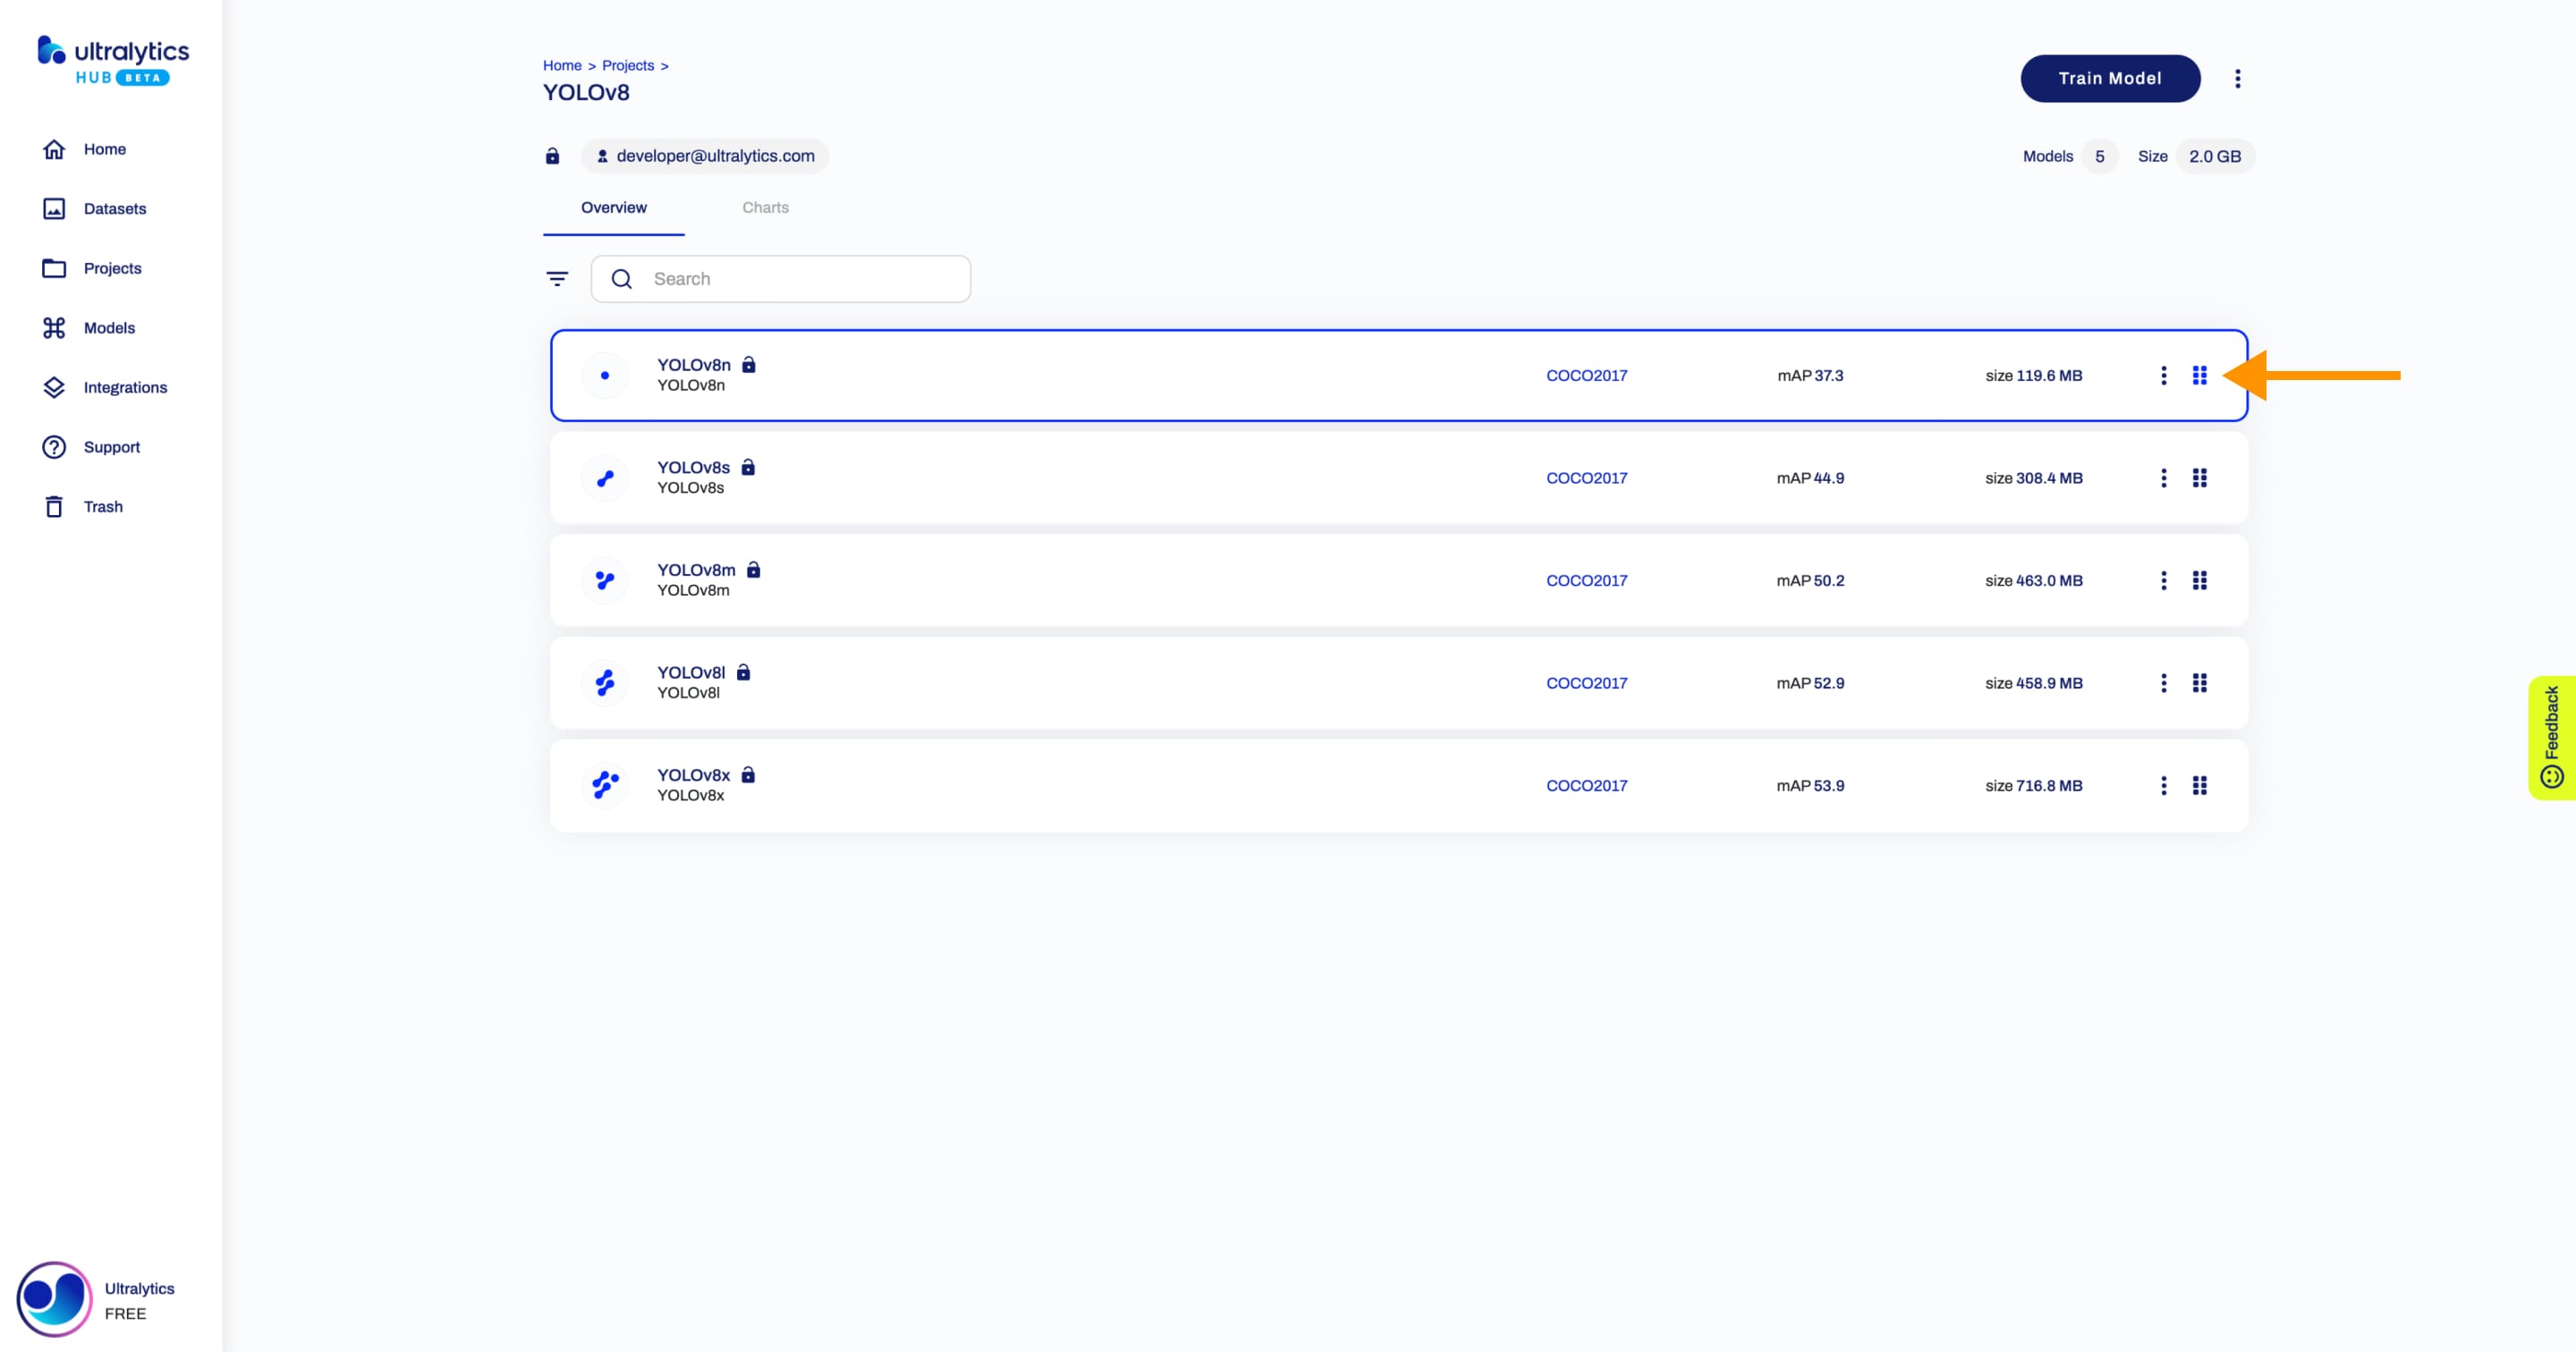
## Reorder Models
??? note "Note"
Ultralytics HUB's reordering functionality works only inside projects you own.
Navigate to the Project page of the project where the models you want to reorder are located. Click on the designated reorder icon of the model you want to move and drag it to the desired location.
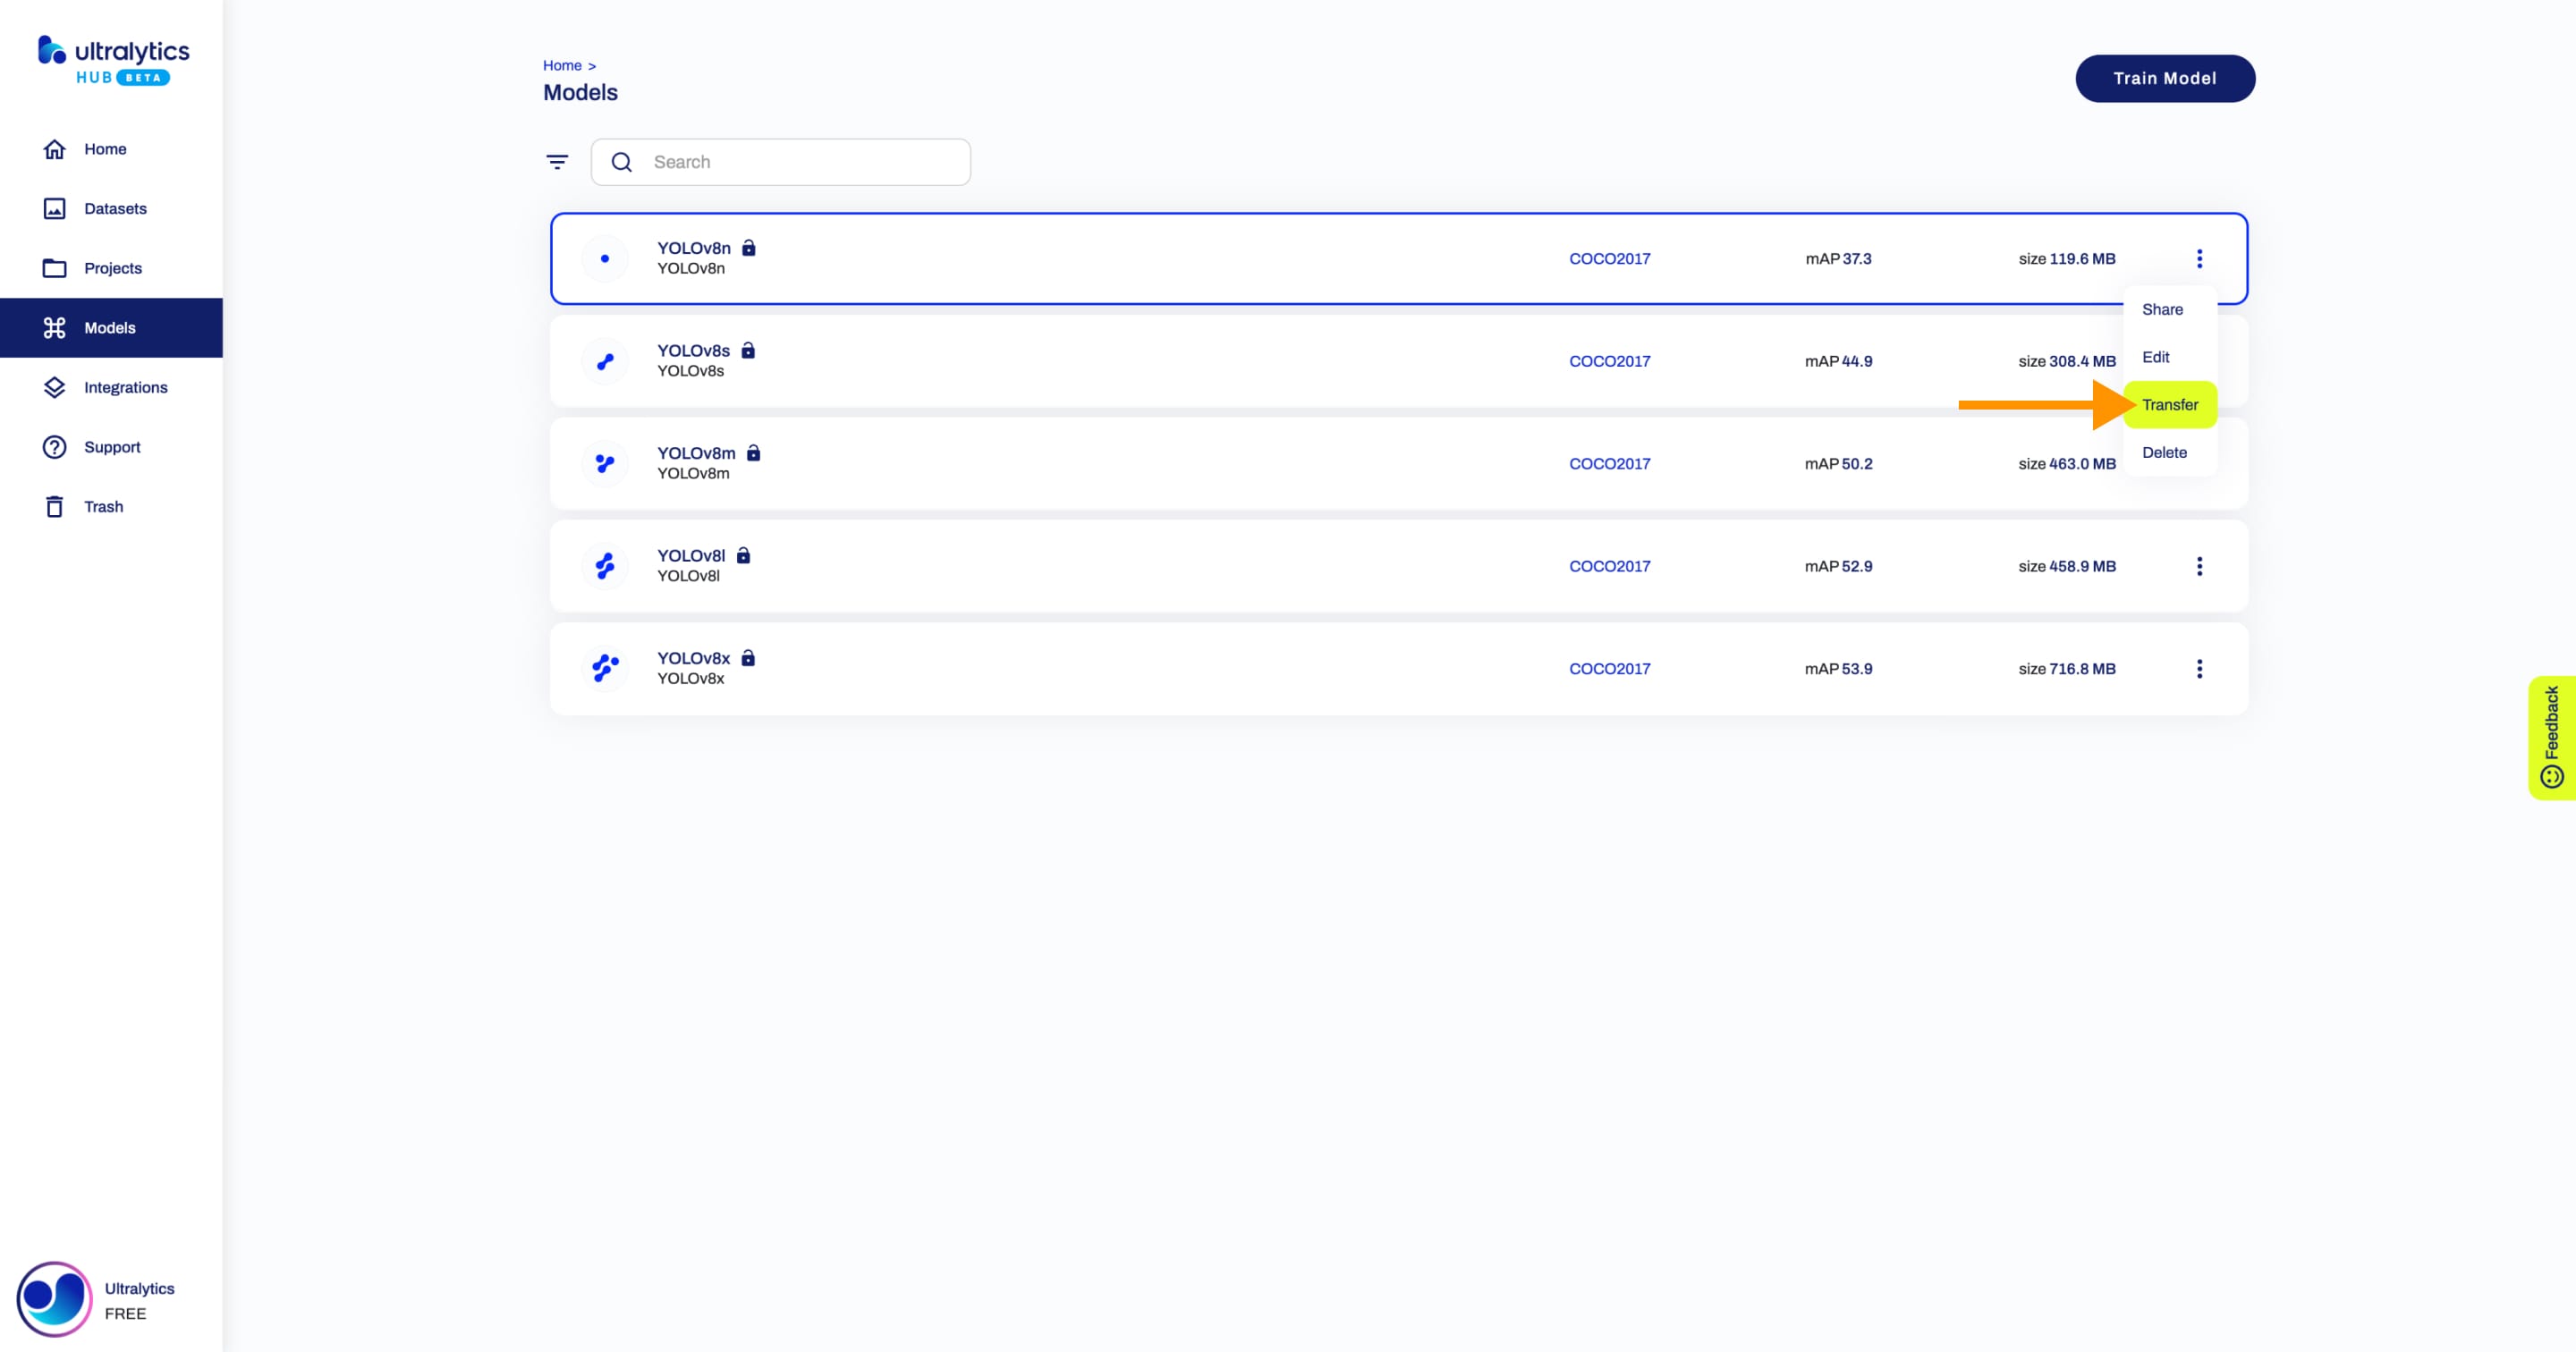
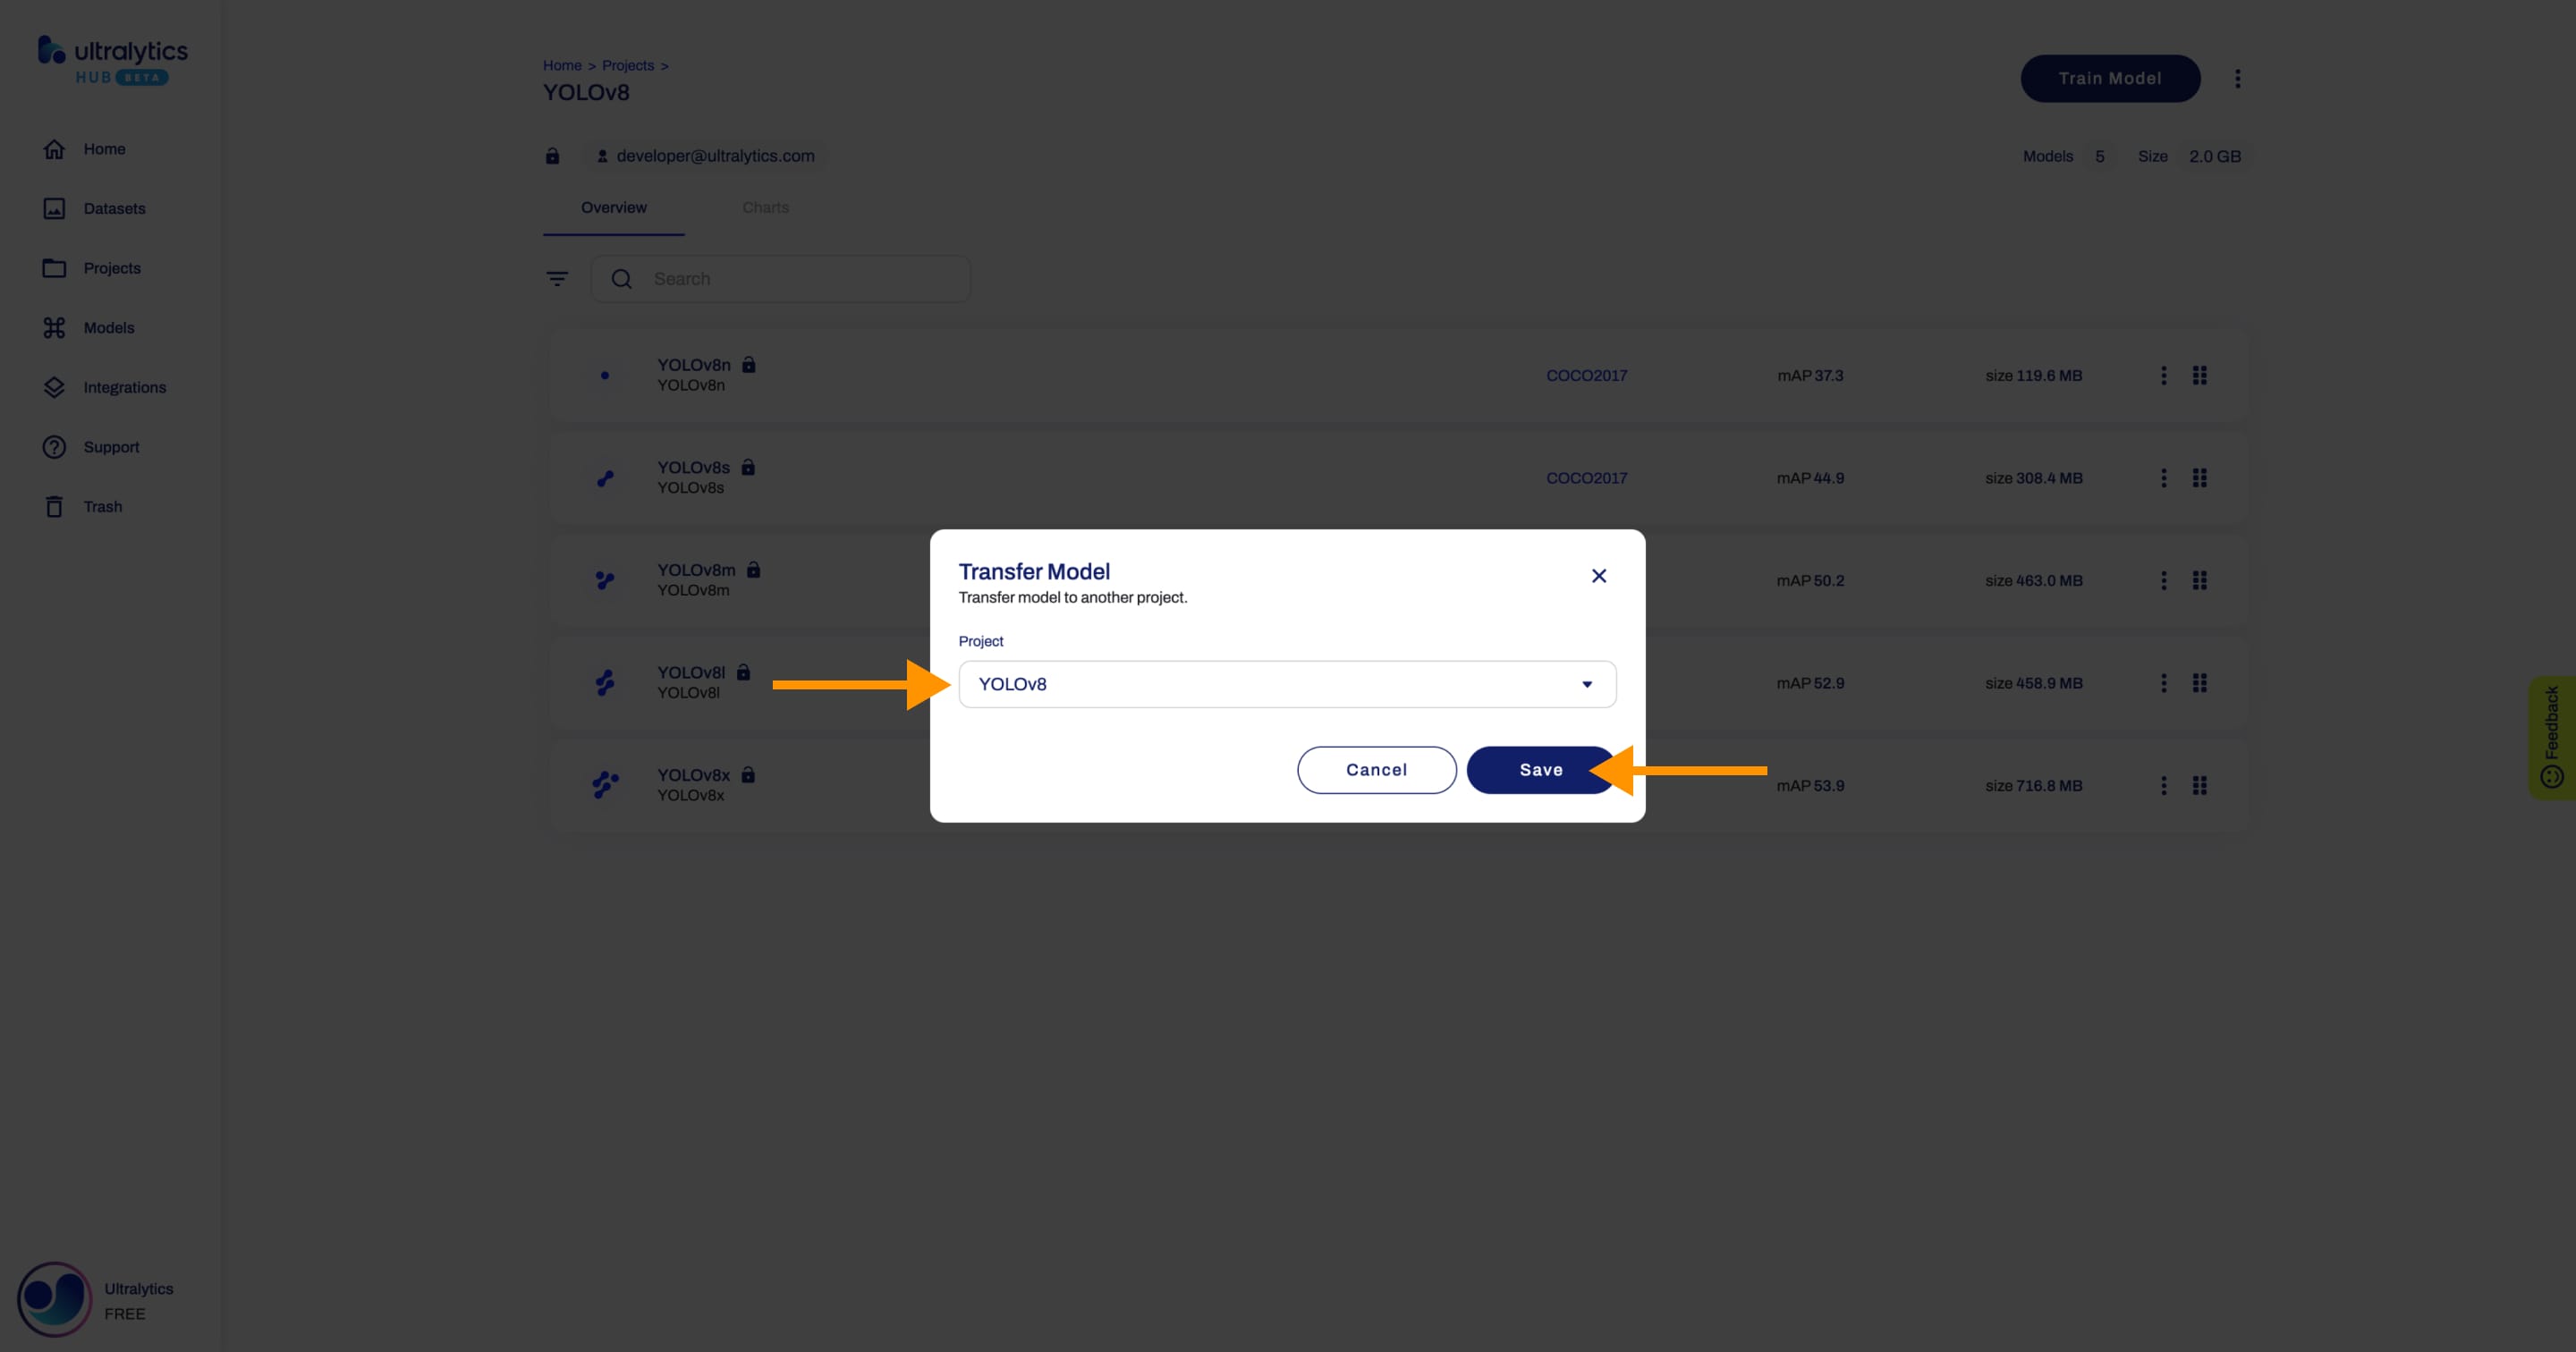
## Transfer Models
Navigate to the Project page of the project where the model you want to mode is located, open the project actions dropdown and click on the **Transfer** option. This action will trigger the **Transfer Model** dialog.
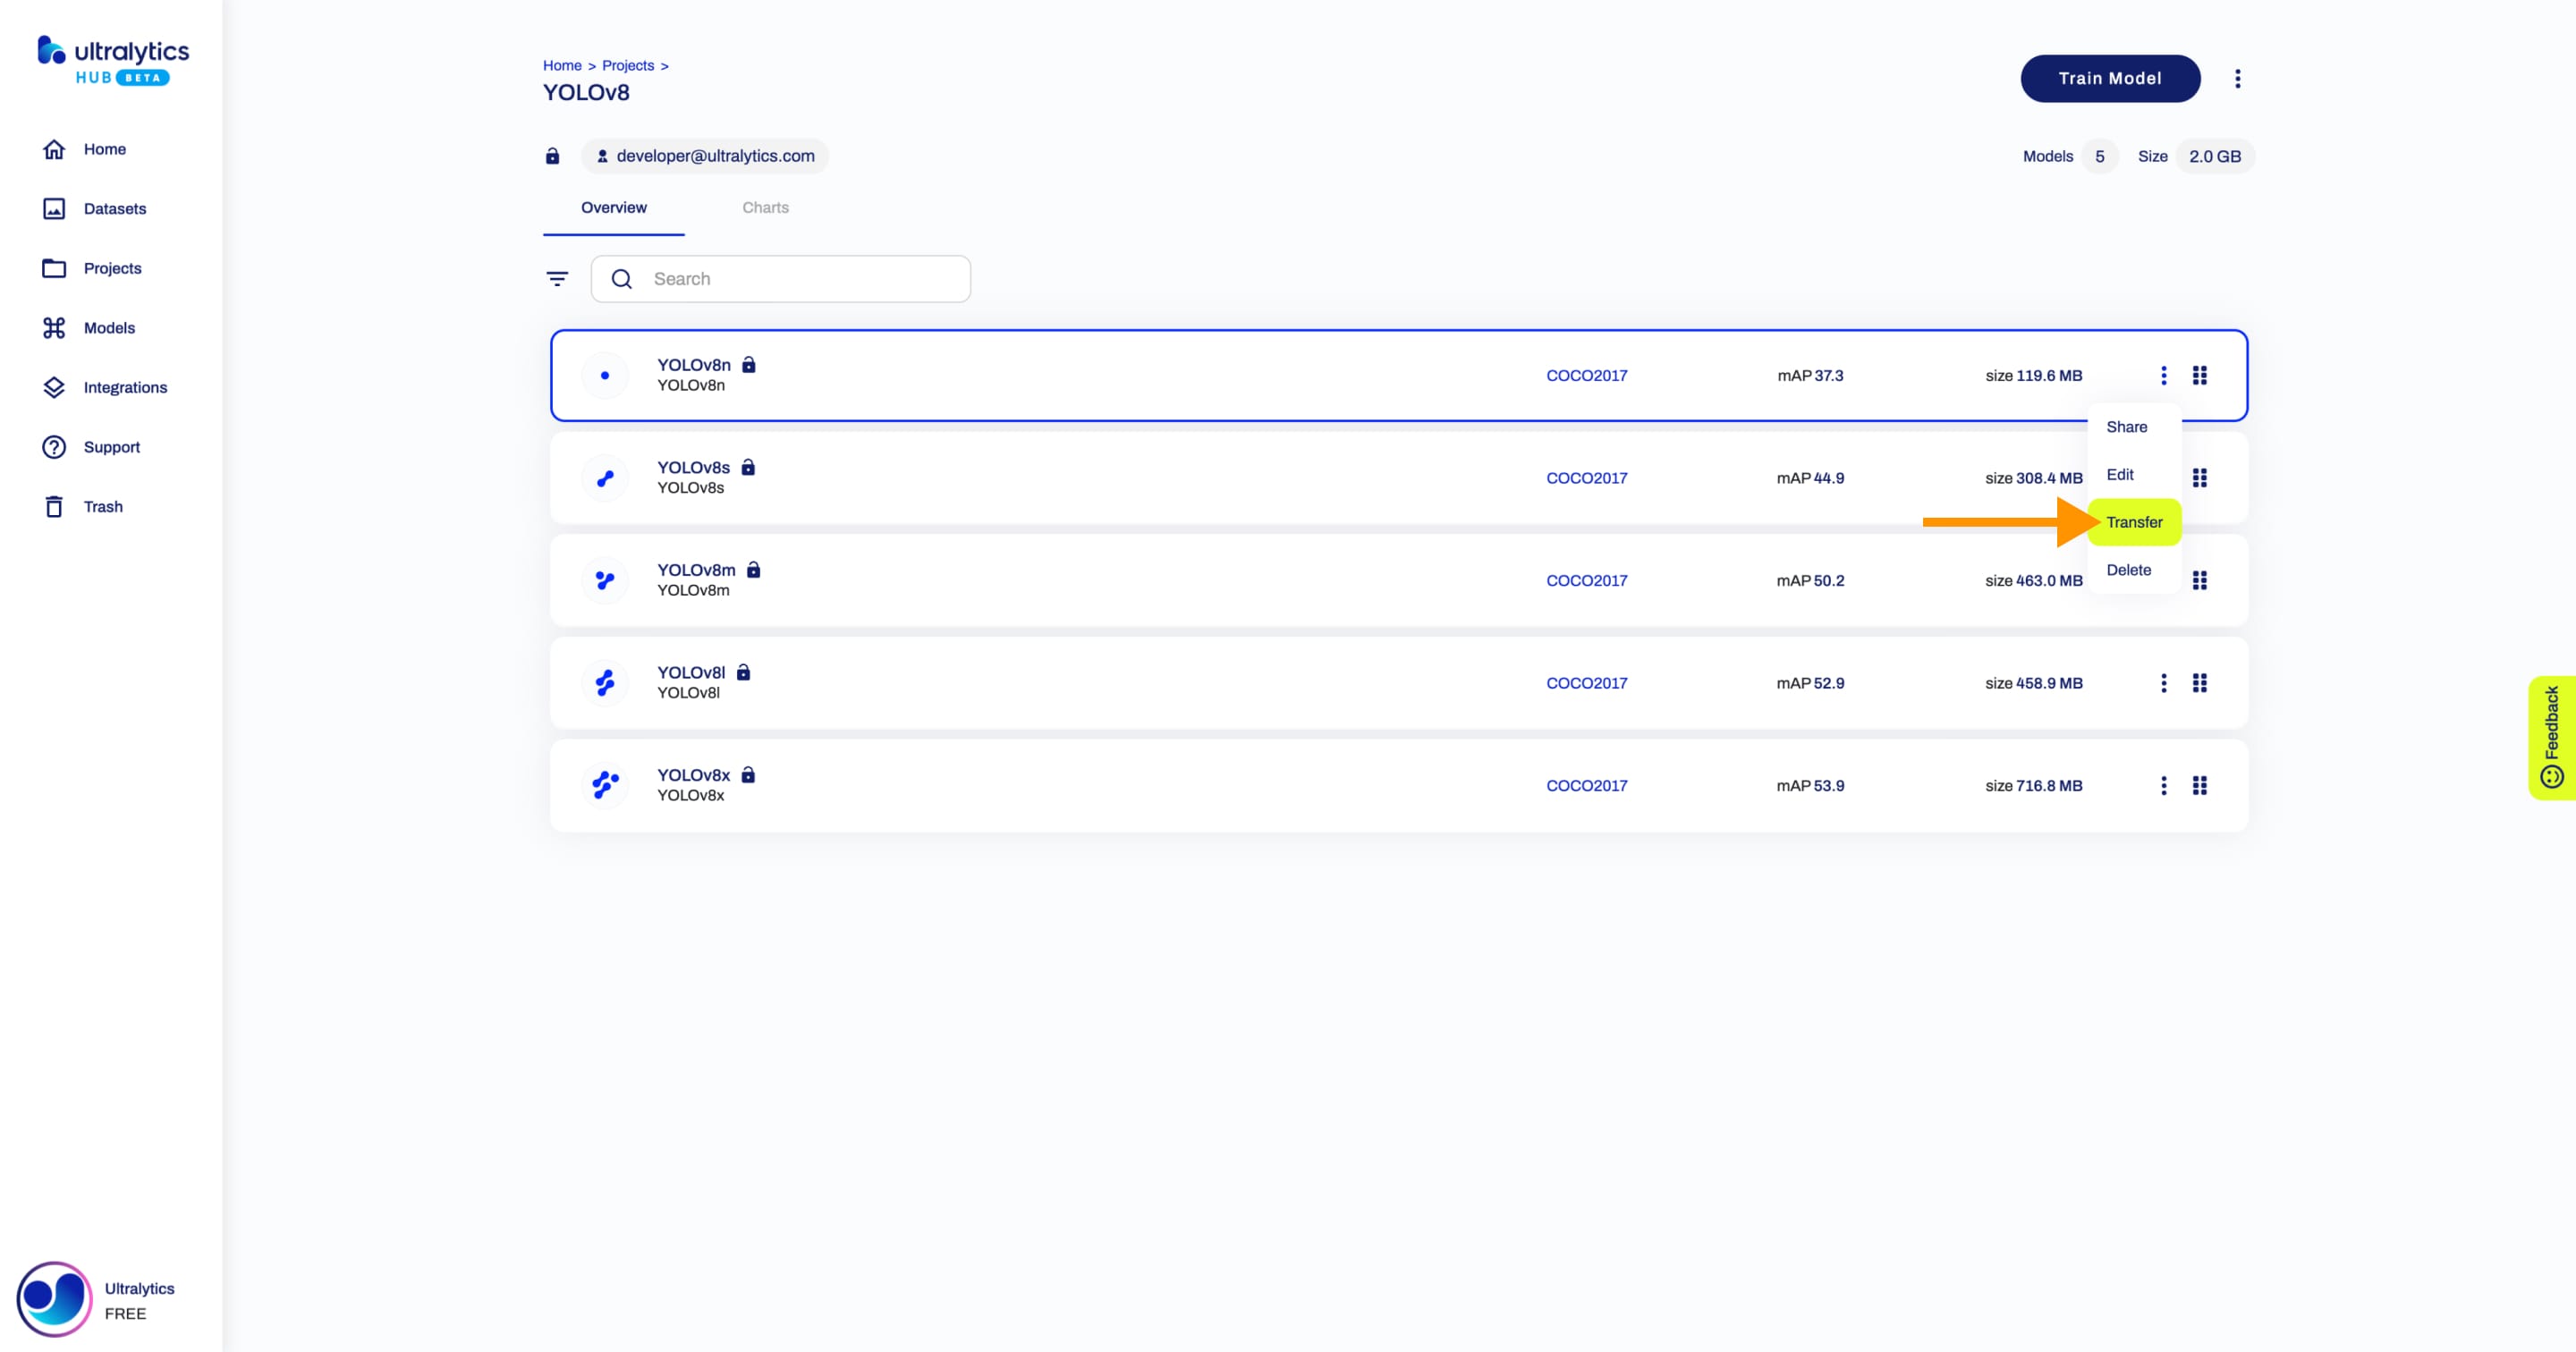
??? tip "Tip"
You can also transfer a model directly from the [Models](https://hub.ultralytics.com/models) page.
Select the project you want to transfer the model to and click **Save**.
|