|
|
|
sidebar_position: 7 |
|
slug: /deploy_local_llm |
|
|
|
|
|
# Deploy a local LLM |
|
import Tabs from '@theme/Tabs'; |
|
import TabItem from '@theme/TabItem'; |
|
|
|
Run models locally using Ollama, Xinference, or other frameworks. |
|
|
|
|
|
|
|
RAGFlow supports deploying models locally using Ollama, Xinference, IPEX-LLM, or jina. If you have locally deployed models to leverage or wish to enable GPU or CUDA for inference acceleration, you can bind Ollama or Xinference into RAGFlow and use either of them as a local "server" for interacting with your local models. |
|
|
|
RAGFlow seamlessly integrates with Ollama and Xinference, without the need for further environment configurations. You can use them to deploy two types of local models in RAGFlow: chat models and embedding models. |
|
|
|
:::tip NOTE |
|
This user guide does not intend to cover much of the installation or configuration details of Ollama or Xinference; its focus is on configurations inside RAGFlow. For the most current information, you may need to check out the official site of Ollama or Xinference. |
|
::: |
|
|
|
## Deploy local models using Ollama |
|
|
|
[Ollama](https://github.com/ollama/ollama) enables you to run open-source large language models that you deployed locally. It bundles model weights, configurations, and data into a single package, defined by a Modelfile, and optimizes setup and configurations, including GPU usage. |
|
|
|
:::note |
|
- For information about downloading Ollama, see [here](https://github.com/ollama/ollama?tab=readme-ov-file#ollama). |
|
- For information about configuring Ollama server, see [here](https://github.com/ollama/ollama/blob/main/docs/faq.md#how-do-i-configure-ollama-server). |
|
- For a complete list of supported models and variants, see the [Ollama model library](https://ollama.com/library). |
|
::: |
|
|
|
### 1. Deploy ollama using docker |
|
|
|
```bash |
|
sudo docker run |
|
time=2024-12-02T02:20:21.360Z level=INFO source=routes.go:1248 msg="Listening on [::]:11434 (version 0.4.6)" |
|
time=2024-12-02T02:20:21.360Z level=INFO source=common.go:49 msg="Dynamic LLM libraries" runners="[cpu cpu_avx cpu_avx2 cuda_v11 cuda_v12]" |
|
``` |
|
|
|
Ensure ollama is listening on all IP address: |
|
```bash |
|
sudo ss -tunlp|grep 11434 |
|
tcp LISTEN 0 4096 0.0.0.0:11434 0.0.0.0:* users:(("docker-proxy",pid=794507,fd=4)) |
|
tcp LISTEN 0 4096 [::]:11434 [::]:* users:(("docker-proxy",pid=794513,fd=4)) |
|
``` |
|
|
|
Pull models as you need. It's recommended to start with `llama3.2` (a 3B chat model) and `bge-m3` (a 567M embedding model): |
|
```bash |
|
sudo docker exec ollama ollama pull llama3.2 |
|
pulling dde5aa3fc5ff... 100% ▕████████████████▏ 2.0 GB |
|
success |
|
``` |
|
|
|
```bash |
|
sudo docker exec ollama ollama pull bge-m3 |
|
pulling daec91ffb5dd... 100% ▕████████████████▏ 1.2 GB |
|
success |
|
``` |
|
|
|
### 2. Ensure Ollama is accessible |
|
|
|
If RAGFlow runs in Docker and Ollama runs on the same host machine, check if ollama is accessiable from inside the RAGFlow container: |
|
```bash |
|
sudo docker exec -it ragflow-server bash |
|
root@8136b8c3e914:/ragflow# curl http://host.docker.internal:11434/ |
|
Ollama is running |
|
``` |
|
|
|
If RAGFlow runs from source code and Ollama runs on the same host machine, check if ollama is accessiable from RAGFlow host machine: |
|
```bash |
|
curl http://localhost:11434/ |
|
Ollama is running |
|
``` |
|
|
|
If RAGFlow and Ollama run on different machines, check if ollama is accessiable from RAGFlow host machine: |
|
```bash |
|
curl http://${IP_OF_OLLAMA_MACHINE}:11434/ |
|
Ollama is running |
|
``` |
|
|
|
### 4. Add Ollama |
|
|
|
In RAGFlow, click on your logo on the top right of the page **>** **Model providers** and add Ollama to RAGFlow: |
|
|
|
 |
|
|
|
|
|
### 5. Complete basic Ollama settings |
|
|
|
In the popup window, complete basic settings for Ollama: |
|
|
|
1. Ensure model name and type match those been pulled at step 1, For example, (`llama3.2`, `chat`), (`bge-m3`, `embedding`). |
|
2. Ensure that the base URL match which been determined at step 2. |
|
3. OPTIONAL: Switch on the toggle under **Does it support Vision?** if your model includes an image-to-text model. |
|
|
|
|
|
:::caution WARNING |
|
Improper base URL settings will trigger the following error: |
|
```bash |
|
Max retries exceeded with url: /api/chat (Caused by NewConnectionError('<urllib3.connection.HTTPConnection object at 0xffff98b81ff0>: Failed to establish a new connection: [Errno 111] Connection refused')) |
|
``` |
|
::: |
|
|
|
### 6. Update System Model Settings |
|
|
|
Click on your logo **>** **Model providers** **>** **System Model Settings** to update your model: |
|
|
|
*You should now be able to find **llama3.2** from the dropdown list under **Chat model**, and **bge-m3** from the dropdown list under **Embedding model**.* |
|
|
|
> If your local model is an embedding model, you should find your local model under **Embedding model**. |
|
|
|
### 7. Update Chat Configuration |
|
|
|
Update your chat model accordingly in **Chat Configuration**: |
|
|
|
> If your local model is an embedding model, update it on the configuration page of your knowledge base. |
|
|
|
## Deploy a local model using Xinference |
|
|
|
Xorbits Inference ([Xinference](https://github.com/xorbitsai/inference)) enables you to unleash the full potential of cutting-edge AI models. |
|
|
|
:::note |
|
- For information about installing Xinference Ollama, see [here](https://inference.readthedocs.io/en/latest/getting_started/). |
|
- For a complete list of supported models, see the [Builtin Models](https://inference.readthedocs.io/en/latest/models/builtin/). |
|
::: |
|
|
|
To deploy a local model, e.g., **Mistral**, using Xinference: |
|
|
|
### 1. Check firewall settings |
|
|
|
Ensure that your host machine's firewall allows inbound connections on port 9997. |
|
|
|
### 2. Start an Xinference instance |
|
|
|
```bash |
|
$ xinference-local |
|
``` |
|
|
|
### 3. Launch your local model |
|
|
|
Launch your local model (**Mistral**), ensuring that you replace `${quantization}` with your chosen quantization method: |
|
|
|
```bash |
|
$ xinference launch -u mistral |
|
``` |
|
### 4. Add Xinference |
|
|
|
In RAGFlow, click on your logo on the top right of the page **>** **Model providers** and add Xinference to RAGFlow: |
|
|
|
 |
|
|
|
### 5. Complete basic Xinference settings |
|
|
|
Enter an accessible base URL, such as `http://<your-xinference-endpoint-domain>:9997/v1`. |
|
> For rerank model, please use the `http://<your-xinference-endpoint-domain>:9997/v1/rerank` as the base URL. |
|
|
|
### 6. Update System Model Settings |
|
|
|
Click on your logo **>** **Model providers** **>** **System Model Settings** to update your model. |
|
|
|
*You should now be able to find **mistral** from the dropdown list under **Chat model**.* |
|
|
|
> If your local model is an embedding model, you should find your local model under **Embedding model**. |
|
|
|
### 7. Update Chat Configuration |
|
|
|
Update your chat model accordingly in **Chat Configuration**: |
|
|
|
> If your local model is an embedding model, update it on the configuration page of your knowledge base. |
|
|
|
## Deploy a local model using IPEX-LLM |
|
|
|
[IPEX-LLM](https://github.com/intel-analytics/ipex-llm) is a PyTorch library for running LLMs on local Intel CPUs or GPUs (including iGPU or discrete GPUs like Arc, Flex, and Max) with low latency. It supports Ollama on Linux and Windows systems. |
|
|
|
To deploy a local model, e.g., **Qwen2**, using IPEX-LLM-accelerated Ollama: |
|
|
|
### 1. Check firewall settings |
|
|
|
Ensure that your host machine's firewall allows inbound connections on port 11434. For example: |
|
|
|
```bash |
|
sudo ufw allow 11434/tcp |
|
``` |
|
|
|
### 2. Launch Ollama service using IPEX-LLM |
|
|
|
#### 2.1 Install IPEX-LLM for Ollama |
|
|
|
:::tip NOTE |
|
IPEX-LLM's supports Ollama on Linux and Windows systems. |
|
::: |
|
|
|
For detailed information about installing IPEX-LLM for Ollama, see [Run llama.cpp with IPEX-LLM on Intel GPU Guide](https://github.com/intel-analytics/ipex-llm/blob/main/docs/mddocs/Quickstart/llama_cpp_quickstart.md): |
|
- [Prerequisites](https://github.com/intel-analytics/ipex-llm/blob/main/docs/mddocs/Quickstart/llama_cpp_quickstart.md#0-prerequisites) |
|
- [Install IPEX-LLM cpp with Ollama binaries](https://github.com/intel-analytics/ipex-llm/blob/main/docs/mddocs/Quickstart/llama_cpp_quickstart.md#1-install-ipex-llm-for-llamacpp) |
|
|
|
*After the installation, you should have created a Conda environment, e.g., `llm-cpp`, for running Ollama commands with IPEX-LLM.* |
|
|
|
#### 2.2 Initialize Ollama |
|
|
|
1. Activate the `llm-cpp` Conda environment and initialize Ollama: |
|
|
|
<Tabs |
|
defaultValue="linux" |
|
values={[ |
|
{label: 'Linux', value: 'linux'}, |
|
{label: 'Windows', value: 'windows'}, |
|
]}> |
|
<TabItem value="linux"> |
|
|
|
```bash |
|
conda activate llm-cpp |
|
init-ollama |
|
``` |
|
</TabItem> |
|
<TabItem value="windows"> |
|
|
|
Run these commands with *administrator privileges in Miniforge Prompt*: |
|
|
|
```cmd |
|
conda activate llm-cpp |
|
init-ollama.bat |
|
``` |
|
</TabItem> |
|
</Tabs> |
|
|
|
2. If the installed `ipex-llm[cpp]` requires an upgrade to the Ollama binary files, remove the old binary files and reinitialize Ollama using `init-ollama` (Linux) or `init-ollama.bat` (Windows). |
|
|
|
*A symbolic link to Ollama appears in your current directory, and you can use this executable file following standard Ollama commands.* |
|
|
|
#### 2.3 Launch Ollama service |
|
|
|
1. Set the environment variable `OLLAMA_NUM_GPU` to `999` to ensure that all layers of your model run on the Intel GPU; otherwise, some layers may default to CPU. |
|
2. For optimal performance on Intel Arc™ A-Series Graphics with Linux OS (Kernel 6.2), set the following environment variable before launching the Ollama service: |
|
|
|
```bash |
|
export SYCL_PI_LEVEL_ZERO_USE_IMMEDIATE_COMMANDLISTS=1 |
|
``` |
|
3. Launch the Ollama service: |
|
|
|
<Tabs |
|
defaultValue="linux" |
|
values={[ |
|
{label: 'Linux', value: 'linux'}, |
|
{label: 'Windows', value: 'windows'}, |
|
]}> |
|
<TabItem value="linux"> |
|
|
|
```bash |
|
export OLLAMA_NUM_GPU=999 |
|
export no_proxy=localhost,127.0.0.1 |
|
export ZES_ENABLE_SYSMAN=1 |
|
source /opt/intel/oneapi/setvars.sh |
|
export SYCL_CACHE_PERSISTENT=1 |
|
|
|
./ollama serve |
|
``` |
|
|
|
</TabItem> |
|
<TabItem value="windows"> |
|
|
|
Run the following command *in Miniforge Prompt*: |
|
|
|
```cmd |
|
set OLLAMA_NUM_GPU=999 |
|
set no_proxy=localhost,127.0.0.1 |
|
set ZES_ENABLE_SYSMAN=1 |
|
set SYCL_CACHE_PERSISTENT=1 |
|
|
|
ollama serve |
|
``` |
|
</TabItem> |
|
</Tabs> |
|
|
|
|
|
:::tip NOTE |
|
To enable the Ollama service to accept connections from all IP addresses, use `OLLAMA_HOST=0.0.0.0 ./ollama serve` rather than simply `./ollama serve`. |
|
::: |
|
|
|
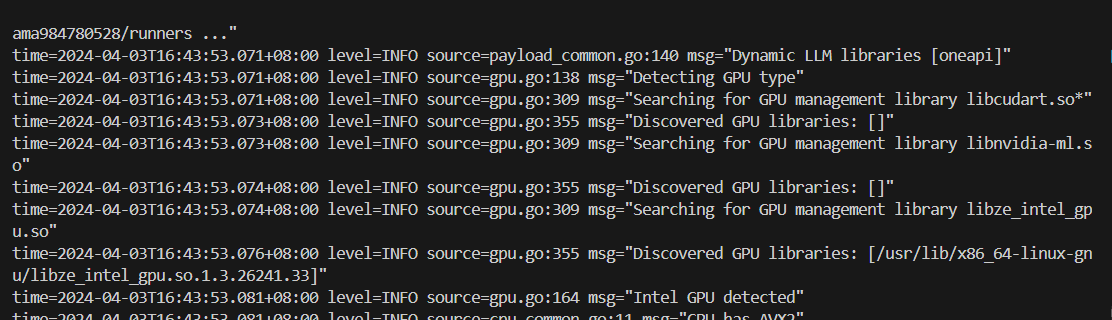
*The console displays messages similar to the following:* |
|
|
|
 |
|
|
|
### 3. Pull and Run Ollama model |
|
|
|
#### 3.1 Pull Ollama model |
|
|
|
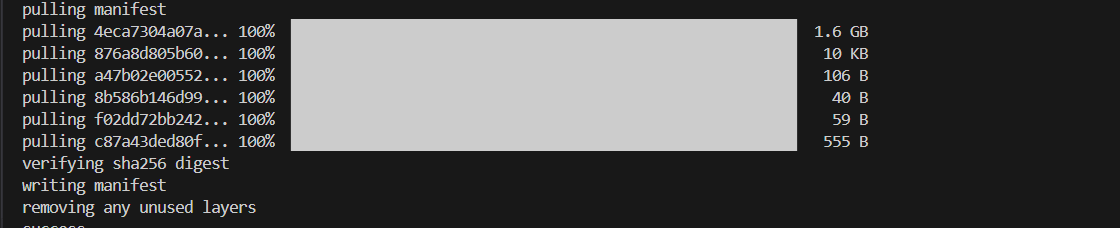
With the Ollama service running, open a new terminal and run `./ollama pull <model_name>` (Linux) or `ollama.exe pull <model_name>` (Windows) to pull the desired model. e.g., `qwen2:latest`: |
|
|
|
 |
|
|
|
#### 3.2 Run Ollama model |
|
|
|
<Tabs |
|
defaultValue="linux" |
|
values={[ |
|
{label: 'Linux', value: 'linux'}, |
|
{label: 'Windows', value: 'windows'}, |
|
]}> |
|
<TabItem value="linux"> |
|
|
|
```bash |
|
./ollama run qwen2:latest |
|
``` |
|
</TabItem> |
|
<TabItem value="windows"> |
|
|
|
```cmd |
|
ollama run qwen2:latest |
|
``` |
|
|
|
</TabItem> |
|
</Tabs> |
|
|
|
### 4. Configure RAGflow |
|
|
|
To enable IPEX-LLM accelerated Ollama in RAGFlow, you must also complete the configurations in RAGFlow. The steps are identical to those outlined in the *Deploy a local model using Ollama* section: |
|
|
|
1. [Add Ollama](#4-add-ollama) |
|
2. [Complete basic Ollama settings](#5-complete-basic-ollama-settings) |
|
3. [Update System Model Settings](#6-update-system-model-settings) |
|
4. [Update Chat Configuration](#7-update-chat-configuration) |
|
|
|
## Deploy a local model using jina |
|
|
|
To deploy a local model, e.g., **gpt2**, using jina: |
|
|
|
### 1. Check firewall settings |
|
|
|
Ensure that your host machine's firewall allows inbound connections on port 12345. |
|
|
|
```bash |
|
sudo ufw allow 12345/tcp |
|
``` |
|
|
|
### 2. Install jina package |
|
|
|
```bash |
|
pip install jina |
|
``` |
|
|
|
### 3. Deploy a local model |
|
|
|
Step 1: Navigate to the **rag/svr** directory. |
|
|
|
```bash |
|
cd rag/svr |
|
``` |
|
|
|
Step 2: Run **jina_server.py**, specifying either the model's name or its local directory: |
|
|
|
```bash |
|
python jina_server.py |
|
``` |
|
> The script only supports models downloaded from Hugging Face. |
