Spaces:
Runtime error

Runtime error
File size: 15,122 Bytes
a63d2a4 |
1 2 3 4 5 6 7 8 9 10 11 12 13 14 15 16 17 18 19 20 21 22 23 24 25 26 27 28 29 30 31 32 33 34 35 36 37 38 39 40 41 42 43 44 45 46 47 48 49 50 51 52 53 54 55 56 57 58 59 60 61 62 63 64 65 66 67 68 69 70 71 72 73 74 75 76 77 78 79 80 81 82 83 84 85 86 87 88 89 90 91 92 93 94 95 96 97 98 99 100 101 102 103 104 105 106 107 108 109 110 111 112 113 114 115 116 117 118 119 120 121 122 123 124 125 126 127 128 129 130 131 132 133 134 135 136 137 138 139 140 141 142 143 144 145 146 147 148 149 150 151 152 153 154 155 156 157 158 159 160 161 162 163 164 165 166 167 168 169 170 171 172 173 174 175 176 177 178 179 180 181 182 183 184 185 186 187 188 189 190 191 192 193 194 195 196 197 198 199 200 201 202 203 204 205 206 207 208 209 210 211 212 213 214 215 216 217 218 219 220 221 222 223 224 225 226 227 228 229 230 231 232 233 234 235 236 237 238 239 240 241 242 243 244 245 246 247 248 249 250 251 252 253 254 255 256 257 258 259 260 261 262 263 264 265 266 267 268 269 270 271 272 273 274 275 276 277 278 279 280 281 282 283 284 285 286 287 288 289 290 291 292 293 294 295 296 297 298 299 300 301 302 303 304 305 306 307 308 309 310 311 312 313 314 315 316 317 318 319 320 321 322 323 324 325 326 327 328 329 330 331 332 333 334 335 336 337 338 339 340 341 342 343 344 345 346 347 348 349 350 351 352 353 354 355 356 357 358 |
<!--Copyright 2023 The HuggingFace Team. All rights reserved.
Licensed under the Apache License, Version 2.0 (the "License"); you may not use this file except in compliance with
the License. You may obtain a copy of the License at
http://www.apache.org/licenses/LICENSE-2.0
Unless required by applicable law or agreed to in writing, software distributed under the License is distributed on
an "AS IS" BASIS, WITHOUT WARRANTIES OR CONDITIONS OF ANY KIND, either express or implied. See the License for the
specific language governing permissions and limitations under the License.
-->
# Kandinsky 2.2
The Kandinsky 2.2 release includes robust new text-to-image models that support text-to-image generation, image-to-image generation, image interpolation, and text-guided image inpainting. The general workflow to perform these tasks using Kandinsky 2.2 is the same as in Kandinsky 2.1. First, you will need to use a prior pipeline to generate image embeddings based on your text prompt, and then use one of the image decoding pipelines to generate the output image. The only difference is that in Kandinsky 2.2, all of the decoding pipelines no longer accept the `prompt` input, and the image generation process is conditioned with only `image_embeds` and `negative_image_embeds`.
Same as with Kandinsky 2.1, the easiest way to perform text-to-image generation is to use the combined Kandinsky pipeline. This process is exactly the same as Kandinsky 2.1. All you need to do is to replace the Kandinsky 2.1 checkpoint with 2.2.
```python
from diffusers import AutoPipelineForText2Image
import torch
pipe = AutoPipelineForText2Image.from_pretrained("kandinsky-community/kandinsky-2-2-decoder", torch_dtype=torch.float16)
pipe.enable_model_cpu_offload()
prompt = "A alien cheeseburger creature eating itself, claymation, cinematic, moody lighting"
negative_prompt = "low quality, bad quality"
image = pipe(prompt=prompt, negative_prompt=negative_prompt, prior_guidance_scale =1.0, height=768, width=768).images[0]
```
Now, let's look at an example where we take separate steps to run the prior pipeline and text-to-image pipeline. This way, we can understand what's happening under the hood and how Kandinsky 2.2 differs from Kandinsky 2.1.
First, let's create the prior pipeline and text-to-image pipeline with Kandinsky 2.2 checkpoints.
```python
from diffusers import DiffusionPipeline
import torch
pipe_prior = DiffusionPipeline.from_pretrained("kandinsky-community/kandinsky-2-2-prior", torch_dtype=torch.float16)
pipe_prior.to("cuda")
t2i_pipe = DiffusionPipeline.from_pretrained("kandinsky-community/kandinsky-2-2-decoder", torch_dtype=torch.float16)
t2i_pipe.to("cuda")
```
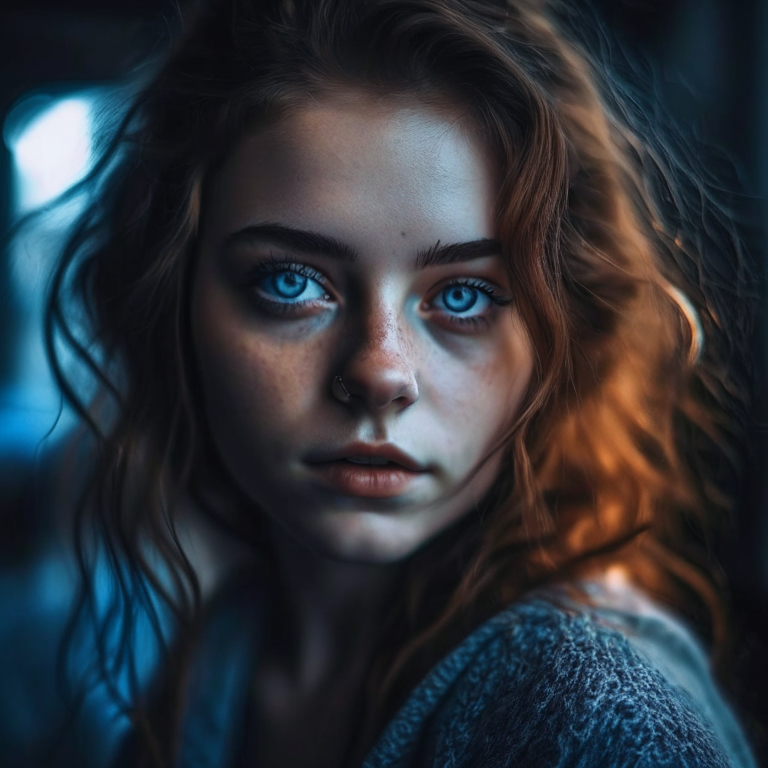
You can then use `pipe_prior` to generate image embeddings.
```python
prompt = "portrait of a women, blue eyes, cinematic"
negative_prompt = "low quality, bad quality"
image_embeds, negative_image_embeds = pipe_prior(prompt, guidance_scale=1.0).to_tuple()
```
Now you can pass these embeddings to the text-to-image pipeline. When using Kandinsky 2.2 you don't need to pass the `prompt` (but you do with the previous version, Kandinsky 2.1).
```
image = t2i_pipe(image_embeds=image_embeds, negative_image_embeds=negative_image_embeds, height=768, width=768).images[
0
]
image.save("portrait.png")
```
We used the text-to-image pipeline as an example, but the same process applies to all decoding pipelines in Kandinsky 2.2. For more information, please refer to our API section for each pipeline.
### Text-to-Image Generation with ControlNet Conditioning
In the following, we give a simple example of how to use [`KandinskyV22ControlnetPipeline`] to add control to the text-to-image generation with a depth image.
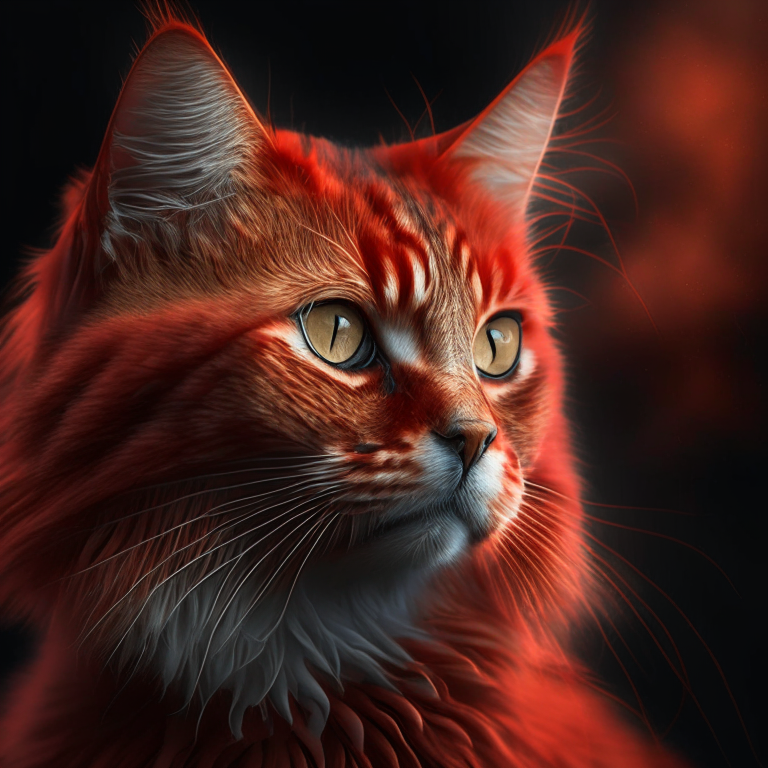
First, let's take an image and extract its depth map.
```python
from diffusers.utils import load_image
img = load_image(
"https://huggingface.co/datasets/hf-internal-testing/diffusers-images/resolve/main/kandinskyv22/cat.png"
).resize((768, 768))
```
We can use the `depth-estimation` pipeline from transformers to process the image and retrieve its depth map.
```python
import torch
import numpy as np
from transformers import pipeline
from diffusers.utils import load_image
def make_hint(image, depth_estimator):
image = depth_estimator(image)["depth"]
image = np.array(image)
image = image[:, :, None]
image = np.concatenate([image, image, image], axis=2)
detected_map = torch.from_numpy(image).float() / 255.0
hint = detected_map.permute(2, 0, 1)
return hint
depth_estimator = pipeline("depth-estimation")
hint = make_hint(img, depth_estimator).unsqueeze(0).half().to("cuda")
```
Now, we load the prior pipeline and the text-to-image controlnet pipeline
```python
from diffusers import KandinskyV22PriorPipeline, KandinskyV22ControlnetPipeline
pipe_prior = KandinskyV22PriorPipeline.from_pretrained(
"kandinsky-community/kandinsky-2-2-prior", torch_dtype=torch.float16
)
pipe_prior = pipe_prior.to("cuda")
pipe = KandinskyV22ControlnetPipeline.from_pretrained(
"kandinsky-community/kandinsky-2-2-controlnet-depth", torch_dtype=torch.float16
)
pipe = pipe.to("cuda")
```
We pass the prompt and negative prompt through the prior to generate image embeddings
```python
prompt = "A robot, 4k photo"
negative_prior_prompt = "lowres, text, error, cropped, worst quality, low quality, jpeg artifacts, ugly, duplicate, morbid, mutilated, out of frame, extra fingers, mutated hands, poorly drawn hands, poorly drawn face, mutation, deformed, blurry, dehydrated, bad anatomy, bad proportions, extra limbs, cloned face, disfigured, gross proportions, malformed limbs, missing arms, missing legs, extra arms, extra legs, fused fingers, too many fingers, long neck, username, watermark, signature"
generator = torch.Generator(device="cuda").manual_seed(43)
image_emb, zero_image_emb = pipe_prior(
prompt=prompt, negative_prompt=negative_prior_prompt, generator=generator
).to_tuple()
```
Now we can pass the image embeddings and the depth image we extracted to the controlnet pipeline. With Kandinsky 2.2, only prior pipelines accept `prompt` input. You do not need to pass the prompt to the controlnet pipeline.
```python
images = pipe(
image_embeds=image_emb,
negative_image_embeds=zero_image_emb,
hint=hint,
num_inference_steps=50,
generator=generator,
height=768,
width=768,
).images
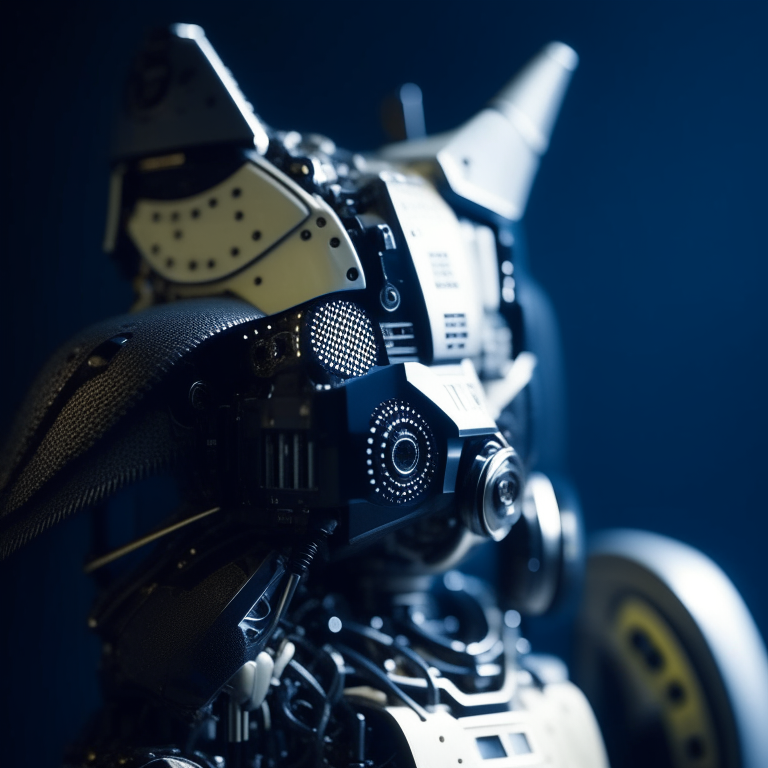
images[0].save("robot_cat.png")
```
The output image looks as follow:
### Image-to-Image Generation with ControlNet Conditioning
Kandinsky 2.2 also includes a [`KandinskyV22ControlnetImg2ImgPipeline`] that will allow you to add control to the image generation process with both the image and its depth map. This pipeline works really well with [`KandinskyV22PriorEmb2EmbPipeline`], which generates image embeddings based on both a text prompt and an image.
For our robot cat example, we will pass the prompt and cat image together to the prior pipeline to generate an image embedding. We will then use that image embedding and the depth map of the cat to further control the image generation process.
We can use the same cat image and its depth map from the last example.
```python
import torch
import numpy as np
from diffusers import KandinskyV22PriorEmb2EmbPipeline, KandinskyV22ControlnetImg2ImgPipeline
from diffusers.utils import load_image
from transformers import pipeline
img = load_image(
"https://huggingface.co/datasets/hf-internal-testing/diffusers-images/resolve/main" "/kandinskyv22/cat.png"
).resize((768, 768))
def make_hint(image, depth_estimator):
image = depth_estimator(image)["depth"]
image = np.array(image)
image = image[:, :, None]
image = np.concatenate([image, image, image], axis=2)
detected_map = torch.from_numpy(image).float() / 255.0
hint = detected_map.permute(2, 0, 1)
return hint
depth_estimator = pipeline("depth-estimation")
hint = make_hint(img, depth_estimator).unsqueeze(0).half().to("cuda")
pipe_prior = KandinskyV22PriorEmb2EmbPipeline.from_pretrained(
"kandinsky-community/kandinsky-2-2-prior", torch_dtype=torch.float16
)
pipe_prior = pipe_prior.to("cuda")
pipe = KandinskyV22ControlnetImg2ImgPipeline.from_pretrained(
"kandinsky-community/kandinsky-2-2-controlnet-depth", torch_dtype=torch.float16
)
pipe = pipe.to("cuda")
prompt = "A robot, 4k photo"
negative_prior_prompt = "lowres, text, error, cropped, worst quality, low quality, jpeg artifacts, ugly, duplicate, morbid, mutilated, out of frame, extra fingers, mutated hands, poorly drawn hands, poorly drawn face, mutation, deformed, blurry, dehydrated, bad anatomy, bad proportions, extra limbs, cloned face, disfigured, gross proportions, malformed limbs, missing arms, missing legs, extra arms, extra legs, fused fingers, too many fingers, long neck, username, watermark, signature"
generator = torch.Generator(device="cuda").manual_seed(43)
# run prior pipeline
img_emb = pipe_prior(prompt=prompt, image=img, strength=0.85, generator=generator)
negative_emb = pipe_prior(prompt=negative_prior_prompt, image=img, strength=1, generator=generator)
# run controlnet img2img pipeline
images = pipe(
image=img,
strength=0.5,
image_embeds=img_emb.image_embeds,
negative_image_embeds=negative_emb.image_embeds,
hint=hint,
num_inference_steps=50,
generator=generator,
height=768,
width=768,
).images
images[0].save("robot_cat.png")
```
Here is the output. Compared with the output from our text-to-image controlnet example, it kept a lot more cat facial details from the original image and worked into the robot style we asked for.

## Optimization
Running Kandinsky in inference requires running both a first prior pipeline: [`KandinskyPriorPipeline`]
and a second image decoding pipeline which is one of [`KandinskyPipeline`], [`KandinskyImg2ImgPipeline`], or [`KandinskyInpaintPipeline`].
The bulk of the computation time will always be the second image decoding pipeline, so when looking
into optimizing the model, one should look into the second image decoding pipeline.
When running with PyTorch < 2.0, we strongly recommend making use of [`xformers`](https://github.com/facebookresearch/xformers)
to speed-up the optimization. This can be done by simply running:
```py
from diffusers import DiffusionPipeline
import torch
t2i_pipe = DiffusionPipeline.from_pretrained("kandinsky-community/kandinsky-2-1", torch_dtype=torch.float16)
t2i_pipe.enable_xformers_memory_efficient_attention()
```
When running on PyTorch >= 2.0, PyTorch's SDPA attention will automatically be used. For more information on
PyTorch's SDPA, feel free to have a look at [this blog post](https://pytorch.org/blog/accelerated-diffusers-pt-20/).
To have explicit control , you can also manually set the pipeline to use PyTorch's 2.0 efficient attention:
```py
from diffusers.models.attention_processor import AttnAddedKVProcessor2_0
t2i_pipe.unet.set_attn_processor(AttnAddedKVProcessor2_0())
```
The slowest and most memory intense attention processor is the default `AttnAddedKVProcessor` processor.
We do **not** recommend using it except for testing purposes or cases where very high determistic behaviour is desired.
You can set it with:
```py
from diffusers.models.attention_processor import AttnAddedKVProcessor
t2i_pipe.unet.set_attn_processor(AttnAddedKVProcessor())
```
With PyTorch >= 2.0, you can also use Kandinsky with `torch.compile` which depending
on your hardware can signficantly speed-up your inference time once the model is compiled.
To use Kandinsksy with `torch.compile`, you can do:
```py
t2i_pipe.unet.to(memory_format=torch.channels_last)
t2i_pipe.unet = torch.compile(t2i_pipe.unet, mode="reduce-overhead", fullgraph=True)
```
After compilation you should see a very fast inference time. For more information,
feel free to have a look at [Our PyTorch 2.0 benchmark](https://huggingface.co/docs/diffusers/main/en/optimization/torch2.0).
<Tip>
To generate images directly from a single pipeline, you can use [`KandinskyV22CombinedPipeline`], [`KandinskyV22Img2ImgCombinedPipeline`], [`KandinskyV22InpaintCombinedPipeline`].
These combined pipelines wrap the [`KandinskyV22PriorPipeline`] and [`KandinskyV22Pipeline`], [`KandinskyV22Img2ImgPipeline`], [`KandinskyV22InpaintPipeline`] respectively into a single
pipeline for a simpler user experience
</Tip>
## Available Pipelines:
| Pipeline | Tasks |
|---|---|
| [pipeline_kandinsky2_2.py](https://github.com/huggingface/diffusers/blob/main/src/diffusers/pipelines/kandinsky2_2/pipeline_kandinsky2_2.py) | *Text-to-Image Generation* |
| [pipeline_kandinsky2_2_combined.py](https://github.com/huggingface/diffusers/blob/main/src/diffusers/pipelines/kandinsky2_2/pipeline_kandinsky2_2_combined.py) | *End-to-end Text-to-Image, image-to-image, Inpainting Generation* |
| [pipeline_kandinsky2_2_inpaint.py](https://github.com/huggingface/diffusers/blob/main/src/diffusers/pipelines/kandinsky2_2/pipeline_kandinsky2_2_inpaint.py) | *Image-Guided Image Generation* |
| [pipeline_kandinsky2_2_img2img.py](https://github.com/huggingface/diffusers/blob/main/src/diffusers/pipelines/kandinsky2_2/pipeline_kandinsky2_2_img2img.py) | *Image-Guided Image Generation* |
| [pipeline_kandinsky2_2_controlnet.py](https://github.com/huggingface/diffusers/blob/main/src/diffusers/pipelines/kandinsky2_2/pipeline_kandinsky2_2_controlnet.py) | *Image-Guided Image Generation* |
| [pipeline_kandinsky2_2_controlnet_img2img.py](https://github.com/huggingface/diffusers/blob/main/src/diffusers/pipelines/kandinsky2_2/pipeline_kandinsky2_2_controlnet_img2img.py) | *Image-Guided Image Generation* |
### KandinskyV22Pipeline
[[autodoc]] KandinskyV22Pipeline
- all
- __call__
### KandinskyV22ControlnetPipeline
[[autodoc]] KandinskyV22ControlnetPipeline
- all
- __call__
### KandinskyV22ControlnetImg2ImgPipeline
[[autodoc]] KandinskyV22ControlnetImg2ImgPipeline
- all
- __call__
### KandinskyV22Img2ImgPipeline
[[autodoc]] KandinskyV22Img2ImgPipeline
- all
- __call__
### KandinskyV22InpaintPipeline
[[autodoc]] KandinskyV22InpaintPipeline
- all
- __call__
### KandinskyV22PriorPipeline
[[autodoc]] KandinskyV22PriorPipeline
- all
- __call__
- interpolate
### KandinskyV22PriorEmb2EmbPipeline
[[autodoc]] KandinskyV22PriorEmb2EmbPipeline
- all
- __call__
- interpolate
### KandinskyV22CombinedPipeline
[[autodoc]] KandinskyV22CombinedPipeline
- all
- __call__
### KandinskyV22Img2ImgCombinedPipeline
[[autodoc]] KandinskyV22Img2ImgCombinedPipeline
- all
- __call__
### KandinskyV22InpaintCombinedPipeline
[[autodoc]] KandinskyV22InpaintCombinedPipeline
- all
- __call__
|