New Text-to-Image Model King is Qwen Image — FLUX DEV vs FLUX Krea vs Qwen Image Realism vs Qwen Image Max Quality

by Furkan Gözükara - PhD Computer Engineer, SECourses
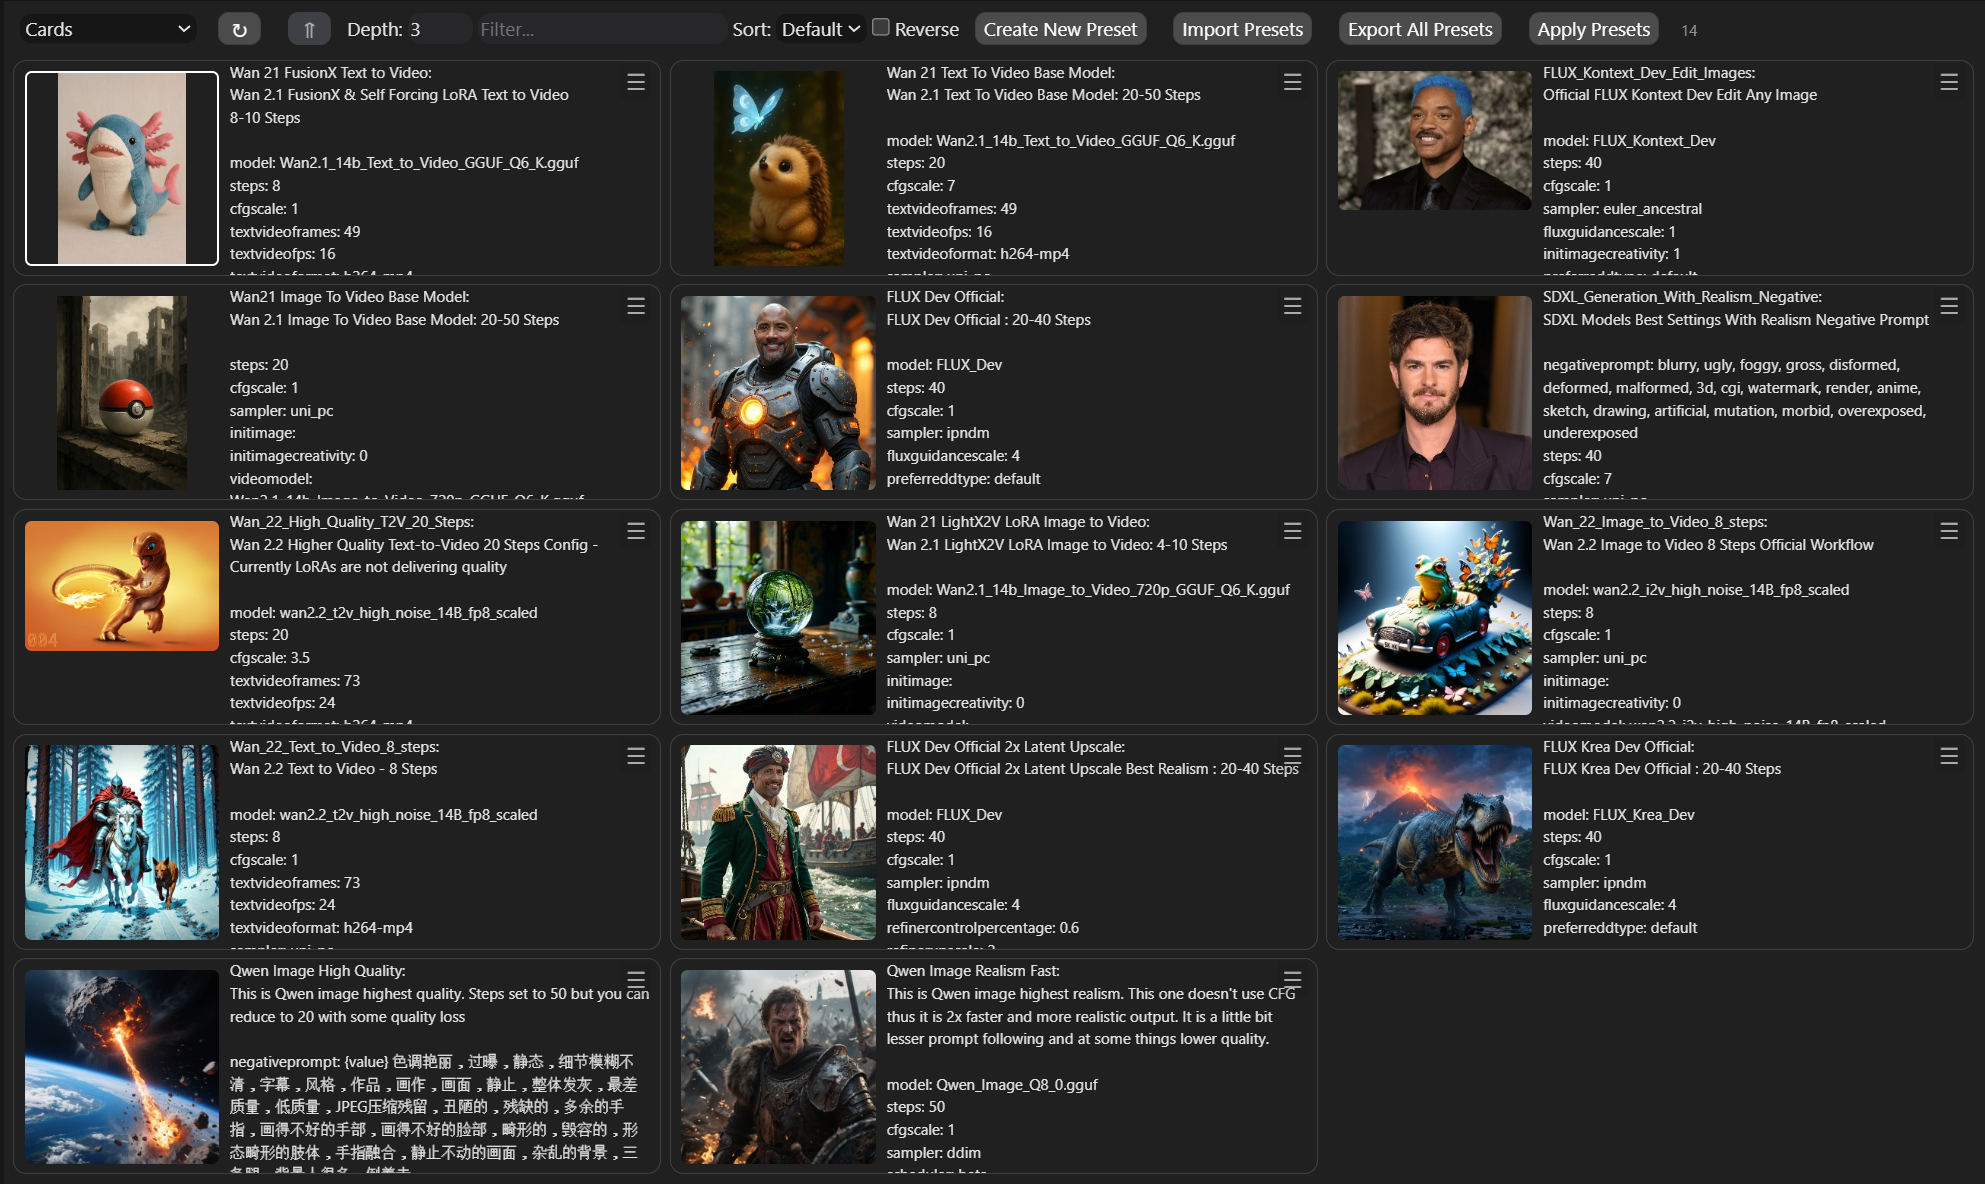
I have done over 700 generations to find out the very best configuration for generating the very best images in Qwen Image model. I have shared the presets and the grid images in below post:
Our presets are made after extremely carefuly analysis of all experiments. This above link zip file also has downloader to auto download all Qwen Image models and more.
Full quality images of gallery shared here :
A little below of this post I also uploaded images to here but it is compressed here.
Used 8x A6000 GPU having machine to conduct the experiments but Qwen Image model works as low as 6 GB VRAM GPUs if you have RAM.
When you analyze the grids you would also see that even Q4_1 of Qwen Image yields amazing results. If you have RAM even 6 GB GPUs can use this model to generate amazing images.
How to install ComfyUI with Flash Attention, Sage Attention, xFormers, Triton, DeepSpeed, Insightface, onnxruntime-gpu, GGUF tutorial shared in below video:

The installer zip file is shared here literally 1-click to install and supports RTX 5000 series and Python 3.10, 3.11 and 3.12 (recommended is 3.10.11).
ComfyUI installer zip file : https://www.patreon.com/posts/105023709
How to install SwarmUI and use existing ComfyUI as a backend and use our presets tutorial share in below video:
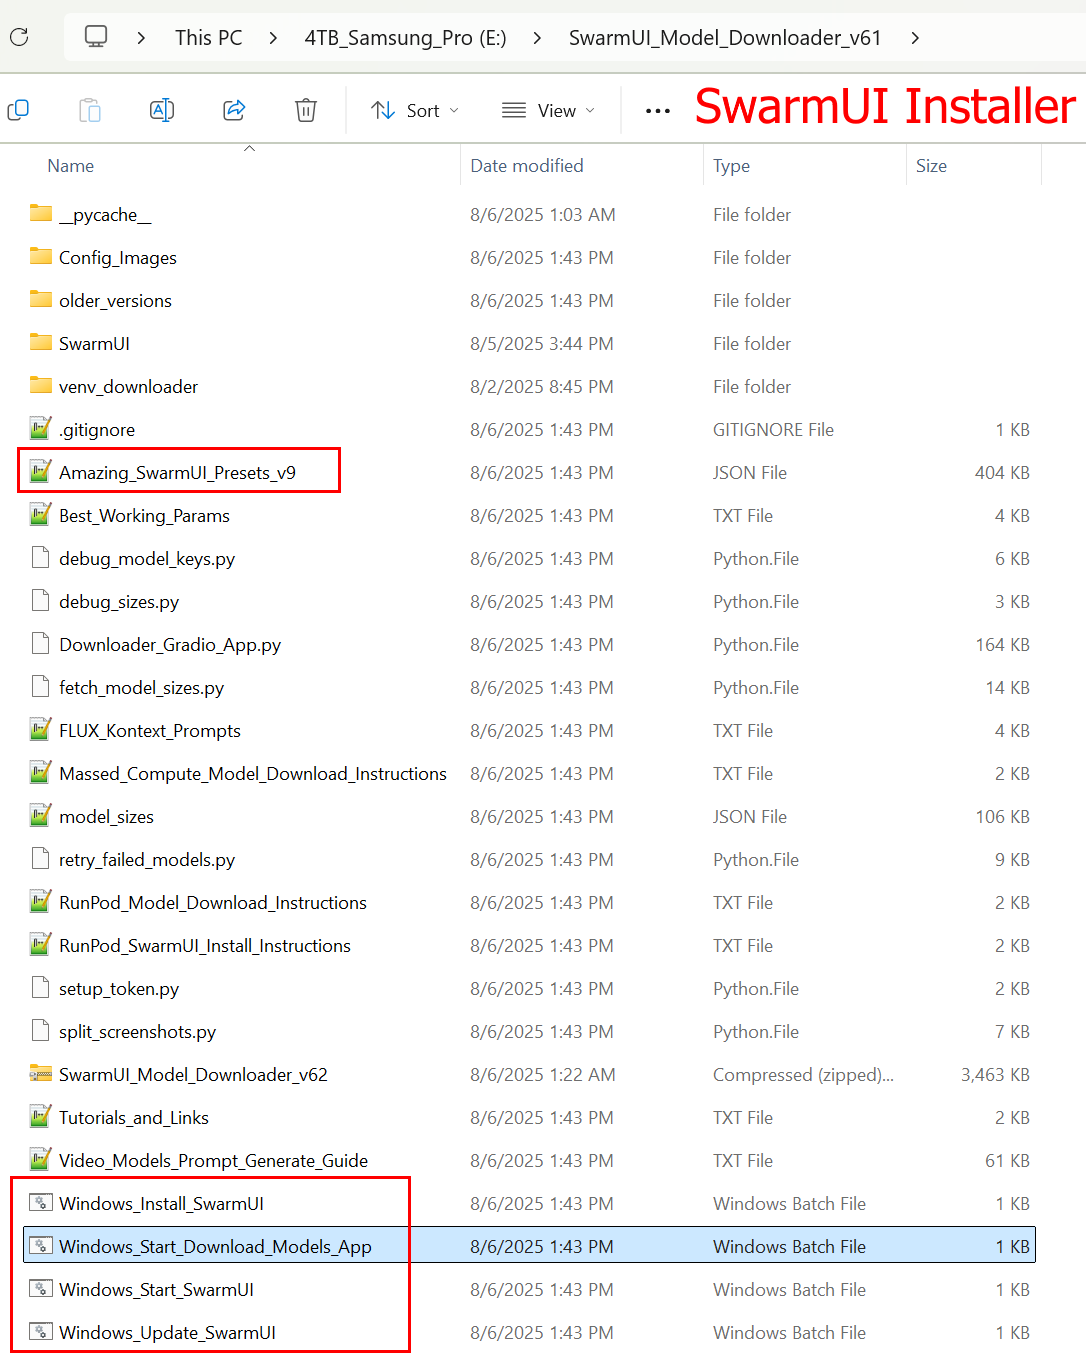
- Massive model downloader and SwarmUI installer and amazing presets shared in below post:
- Using our ComfyUI installation is extremely recommended since it has perfect library set auto installed and so easy to update properly.
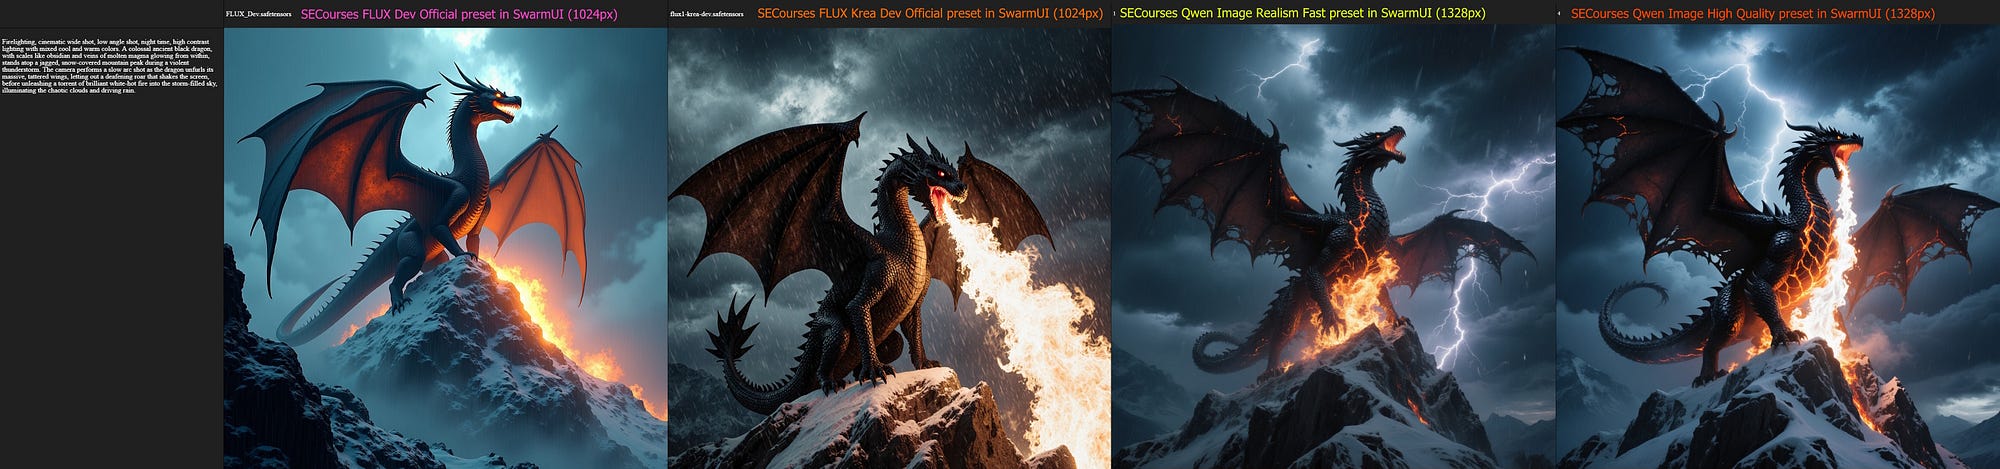
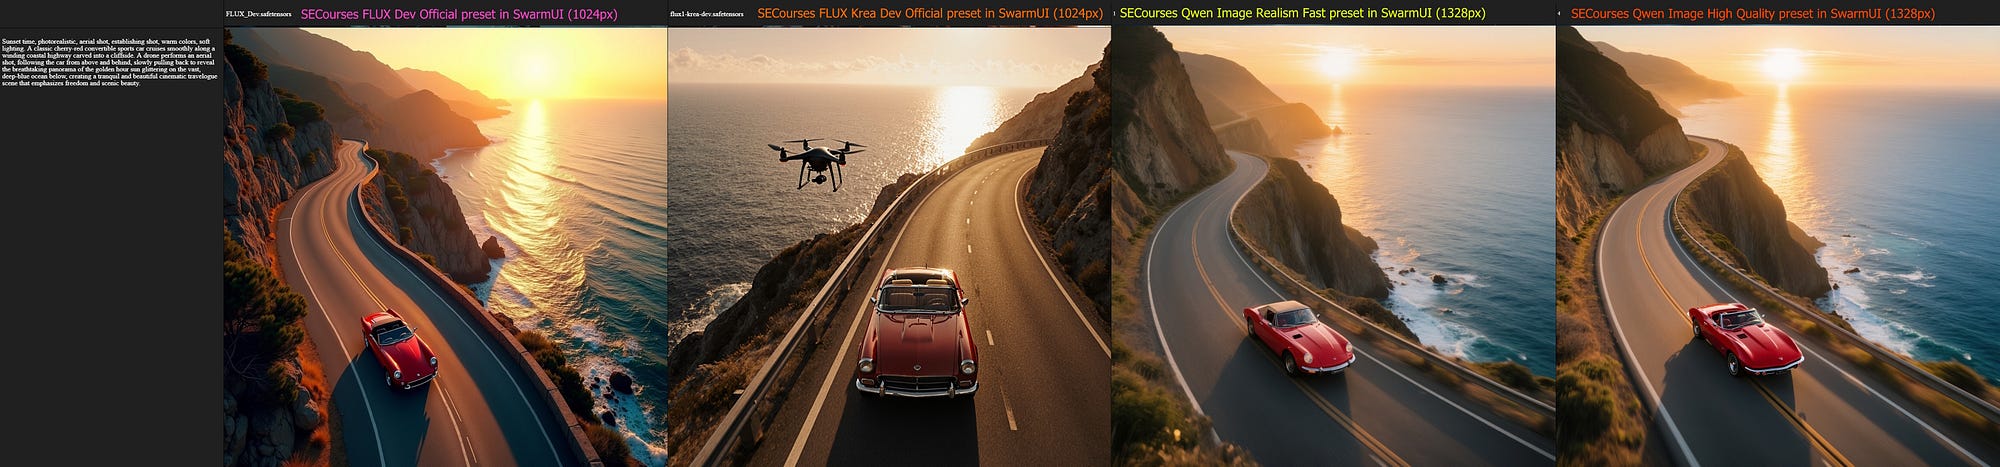
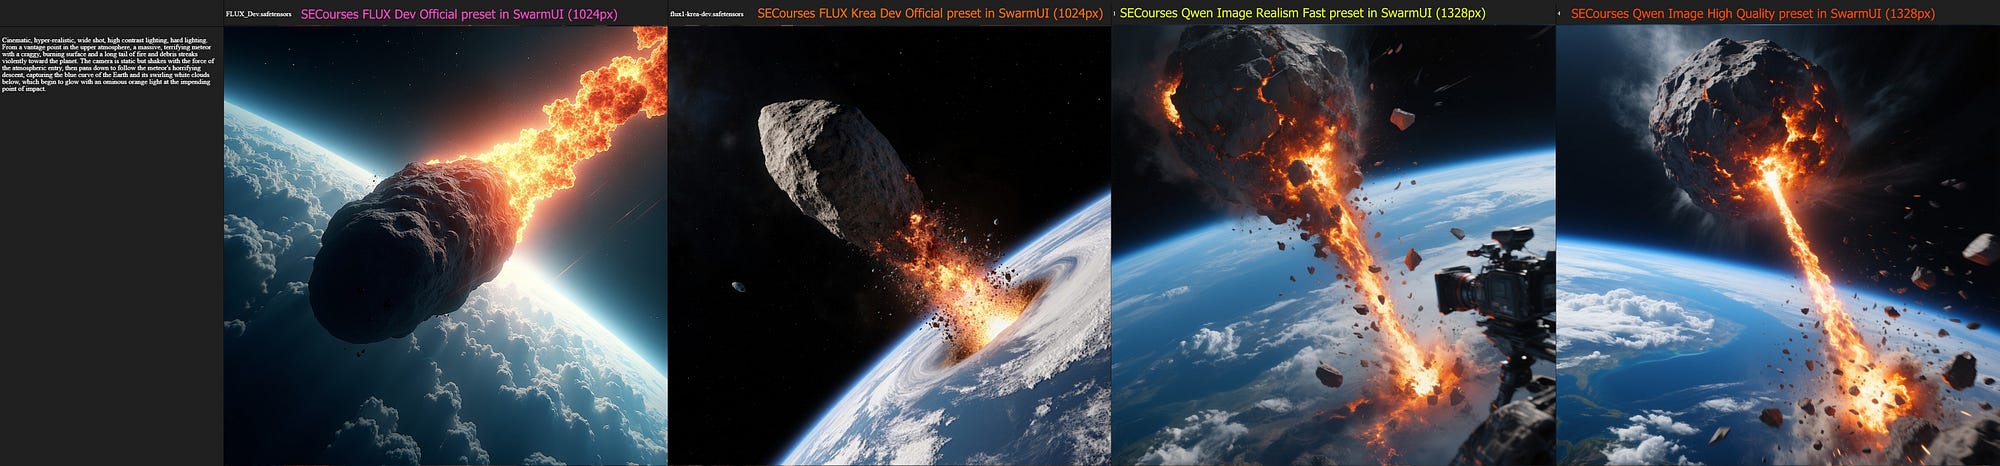
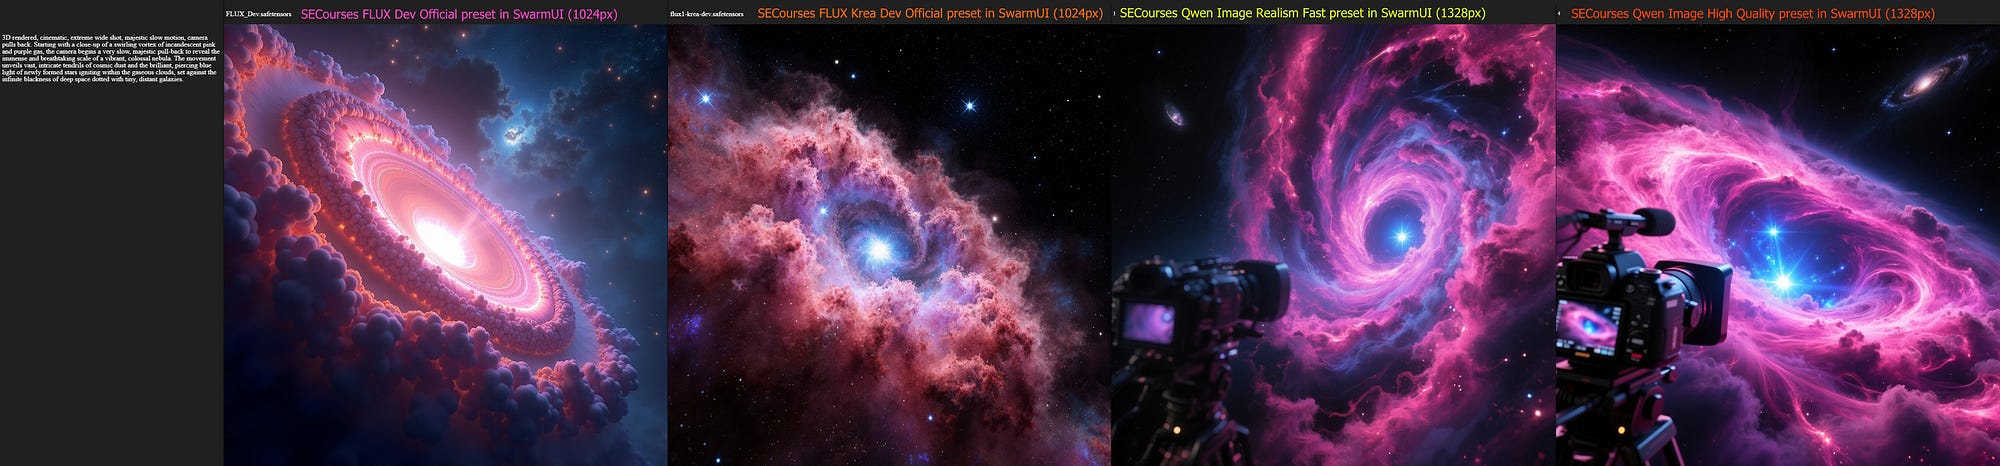
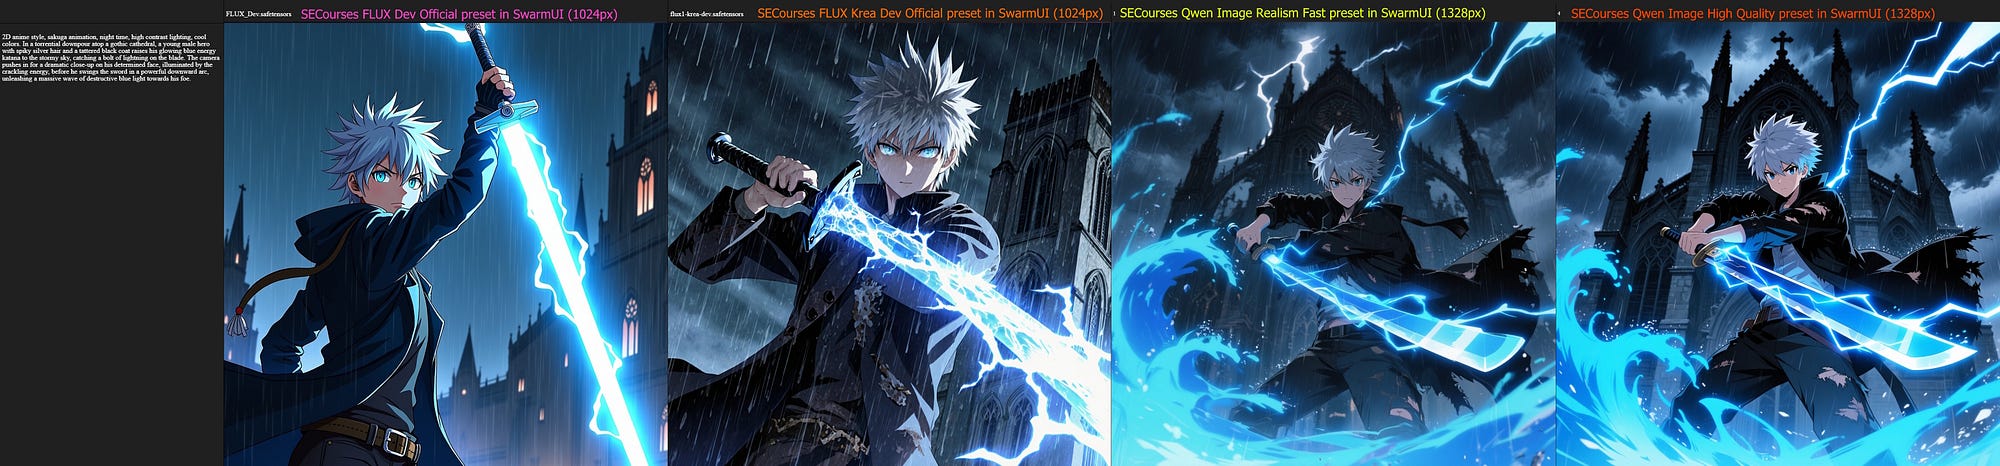
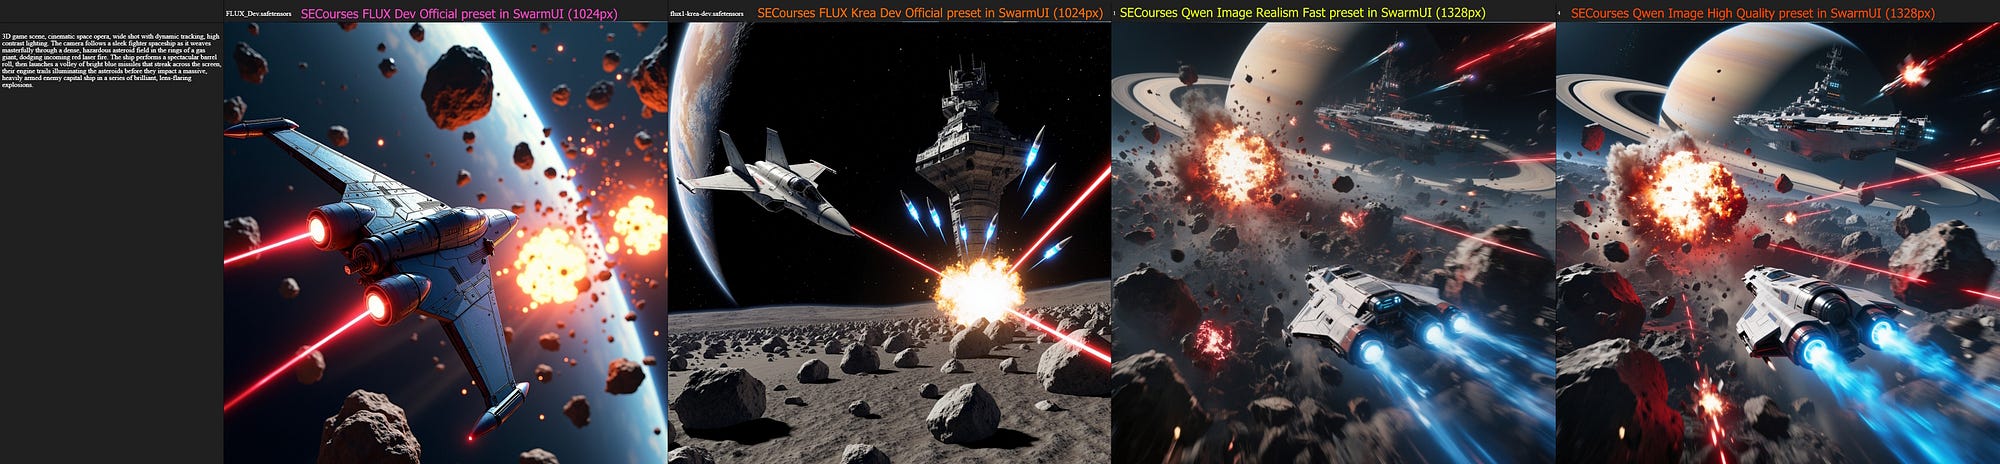
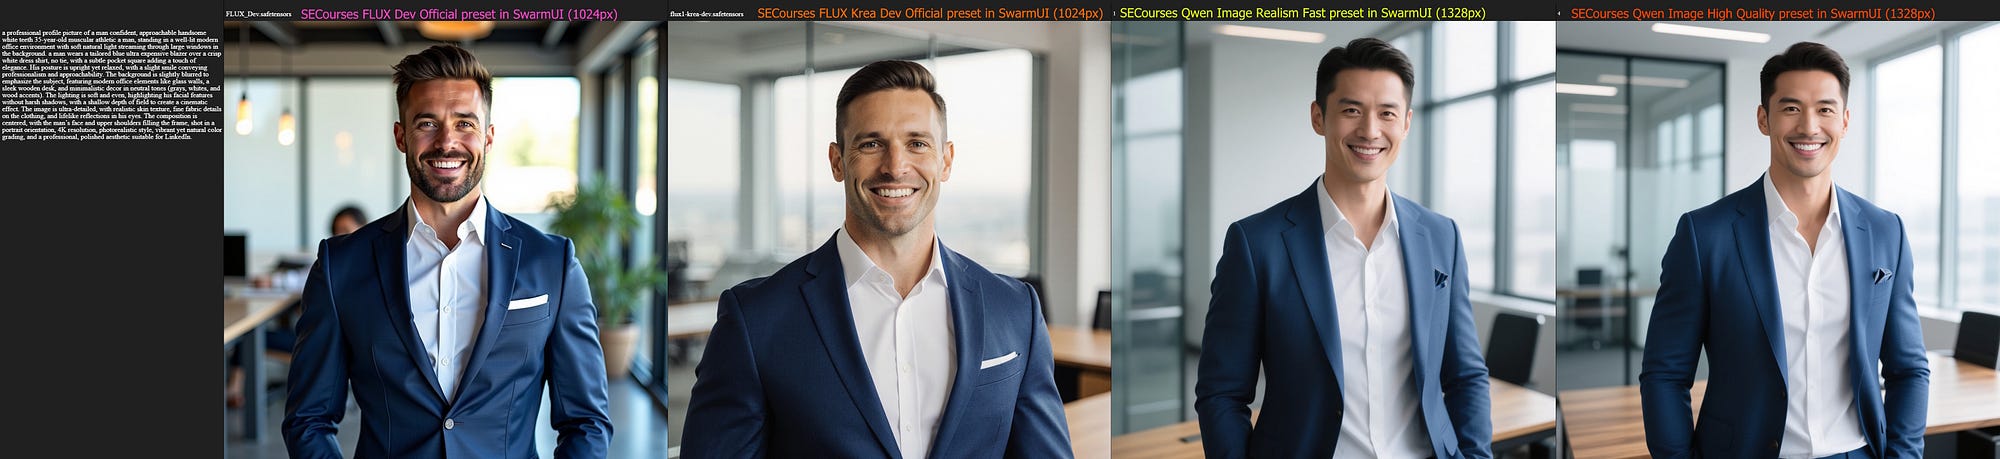
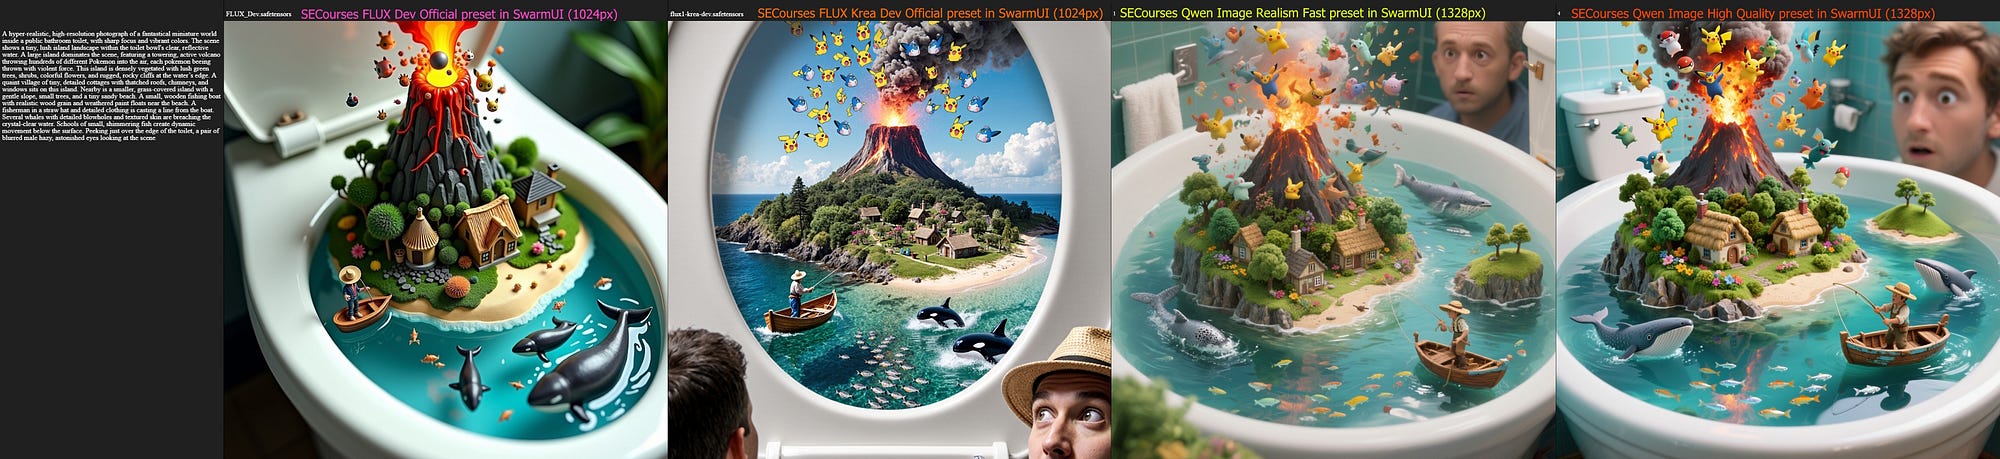
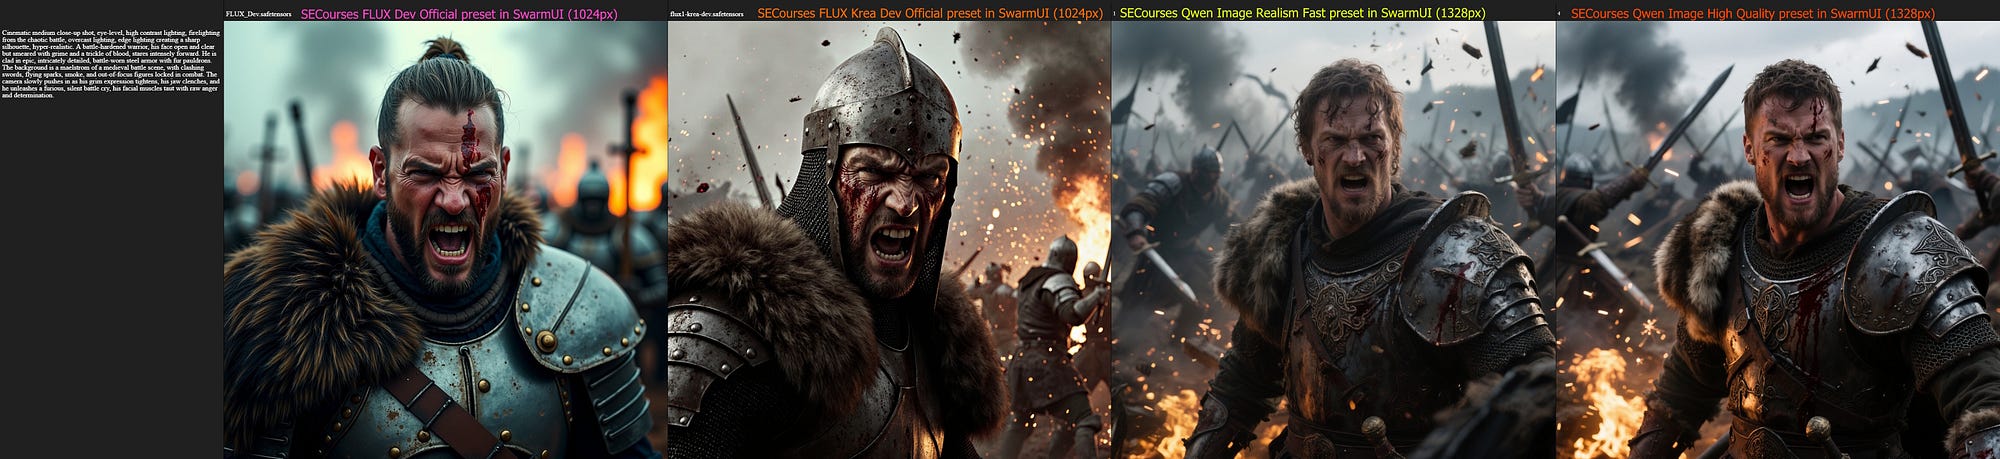
Comparison Images

How to Use ComfyUI, SwarmUI and Qwen Image and More
It is mandatory to update your ComfyUI and SwarmUI before using Qwen Image model.
To update use latest zip files and run
Windows_Update_SwarmUIandWindows_Update_ComfyUIbat files.If you want to use ComfyUI or SwarmUI on RunPod below is a fully up to date tutorial:

If you want to use ComfyUI or SwarmUI on Massed Compute, which I recommend, below is a fully up to date tutorial:

Check video chapters to find relevant sections if you want like :
36:08 Massed Compute — Advanced: Integrating with the Pre-installed SwarmUI
Qwen Image Model Analysis
- Qwen Image prompt understanding and following is extremely superior compared to FLUX Dev.
- It realism is also better than FLUX Dev but not at the level of FLUX Krea Dev level.
- However, with LoRAs or Fine Tuning there is 0 doubt that it will surpass the FLUX model.
- Moreover, default resolution of the Qwen Image is 1328x1328 (1,763,584) pixel compared to 1024x1024 (1,048,576) pixel of FLUX Dev.
- So Qwen Image has 68% bigger resolution than FLUX Dev which is a very serious improvement in native resolution and quality.
- We have 2 presets for for Qwen Image:
- Qwen Image High Quality: Follows prompt better and generates complex scenes better (takes exactly 2x time of Fast preset).
- Qwen Image Realism Fast: Generates more realistic output.
- Moreover our presets are robust and therefore they work between 20–50 steps fairly well.
- As you do more steps better but 20 steps can be also acceptable level.
- Hopefully Qwen Image training coming to Kohya Musubi Tuner and I will make a 1-click to install and run Musubi Tuner GUI for Qwen Image training and research and find out the very best traning parameters and prepare configs for every GPU.
- I expect that you will be able to train Qwen Image as low as 6 GB VRAM if you have RAM.
- Check out the above post images clearly to see the difference between Qwen vs FLUX — they are highest quality.
- Moroever you can download full grids from this post (over 1.6 GB) : https://www.patreon.com/posts/114517862
Tutorials Arsenal
We also have more tutorials and mostly so easy to follow when you understand the workflow.
First of all exactly follow the below requirements tutorial strictly — this is only 1 time necessary to install and use all AI applications and models:

Wan 2.2 & FLUX Krea Full Tutorial — Automated Install — Ready Perfect Presets — SwarmUI with ComfyUI:

SECourses Video and Image Upscaler Pro STAR vs TOPAZ StarLight vs Image Based Best Upscalers:

MultiTalk Full Tutorial With 1-Click Installer — Make Talking and Singing Videos From Static Images:
FLUX Kontext Dev Detailed Local Windows How To Tutorial — Better Than ChatGPT & Gemini Image Editing:

WAN 2.1 FusionX is the New Best of Local Video Generation with Only 8 Steps + FLUX Upscaling Guide:

Ultimate ComfyUI & SwarmUI on RunPod Tutorial with Addition RTX 5000 Series GPUs & 1-Click to Setup:
Hi3DGen Full Tutorial With Ultra Advanced App to Generate the Very Best 3D Meshes from Static Images:
Step by Step TRELLIS Tutorial to Generate Amazing High-Quality 3D Assets from Static Images Locally:

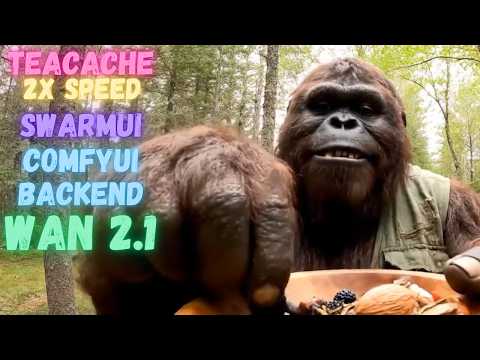
SwarmUI Teacache Full Tutorial With Very Best Wan 2.1 I2V & T2V Presets — ComfyUI Used as Backend:
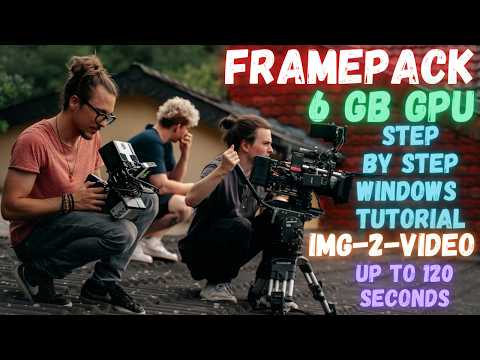
FramePack Full Tutorial: 1-Click to Install on Windows — Up to 120 Second Image-to-Videos with 6GB:
Our Installers
- Our installers always automatically generates an isolated Python VENV and install libraries into that.
- Thus, they will never break your computer or existing running applications.